
Just like you can customize notifications on your iPhone or iPad, you can do the same on your Mac. And with macOS, you have a fair amount of flexibility in the notifications you want to receive.
You can see a banner or alert, hear a sound, display a badge icon, see notifications on your lock screen, and much more. In addition, you can adapt these notifications to the different applications and services on your Mac.
If you haven’t bothered to customize notifications on macOS, we’ll walk you through the options. In this way, you can receive alerts only for what you want and how you want.
Open notification settings on Mac
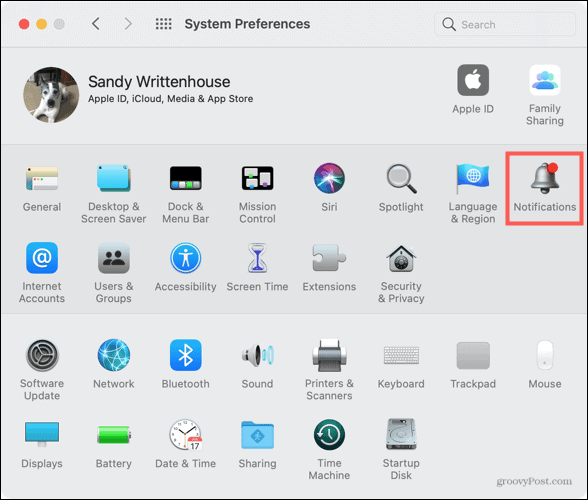
To start setting up your Mac notifications, go to System preferences. You can use the Dock icon or click on the Apple icon> System Preferences from the menu bar.
From there, select Notifications.
Turn on and customize notifications on Mac
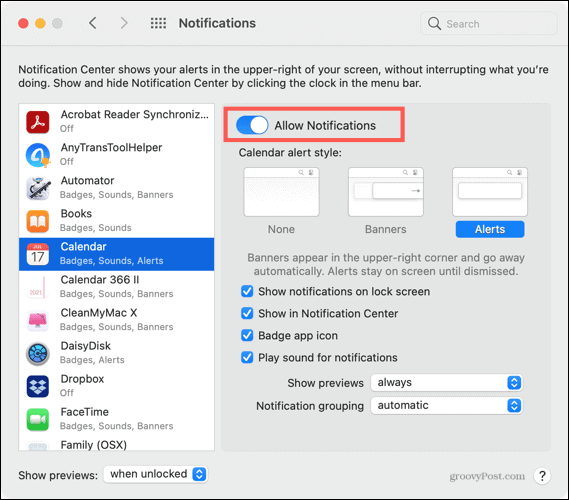
On the left side of the notification window, you will see the applications and services with available notifications.
Select one of the options that appear on the menu. On the right, activate the button Enable notifications. This button also offers you a quick and easy way to disable notifications for any application or service.
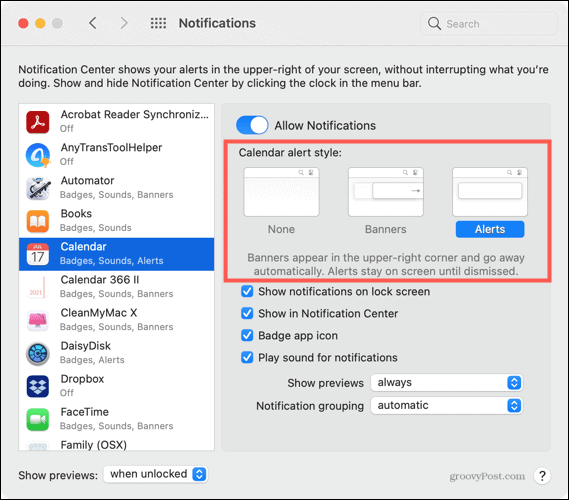
Notification style
For those you want to receive notifications for, start by selecting the desktop alert style in the section Calendar alert style.

A Banner will appear briefly, while a Alert it will remain on your screen until you dismiss it. You can of course select None If you prefer.
Additional notification options
Then check the boxes for additional notification options below them. You can display notifications on the lock screen and on the Notification center.
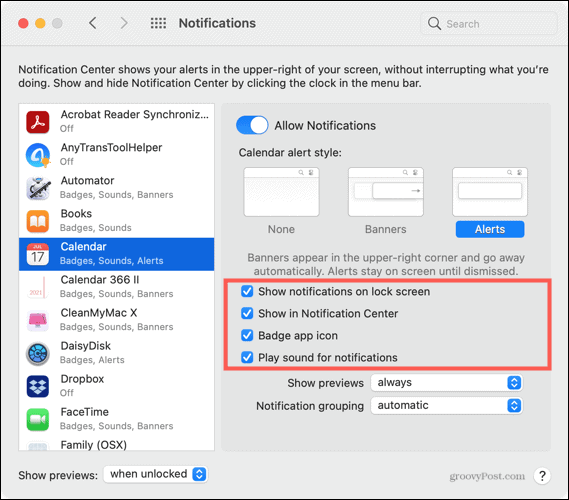
It can also display a badge app icon which is useful for the icons on your Dock. You can also hear a notification sound.
Previews
With notifications active, you can decide if you want to see a preview of the notification and how often you want to see them. Choose Always never or Only when unlocked in the drop-down menu.
You can choose an option that is applied by application or service or use the drop-down in the lower left to apply the settings more widely.
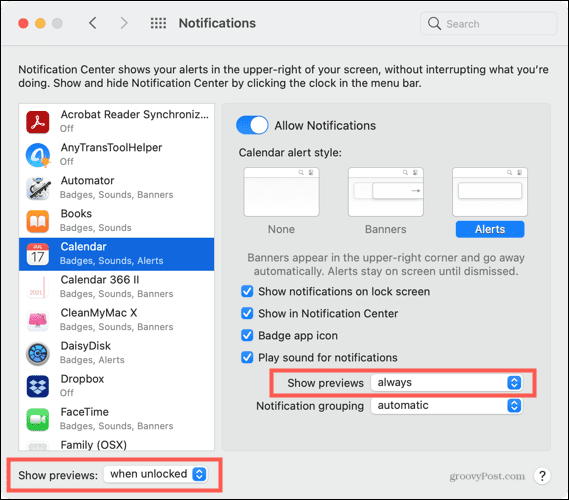
This is convenient for things like the Mail app, so you can see a preview of the email, rather than just a notification that you’ve received an email.

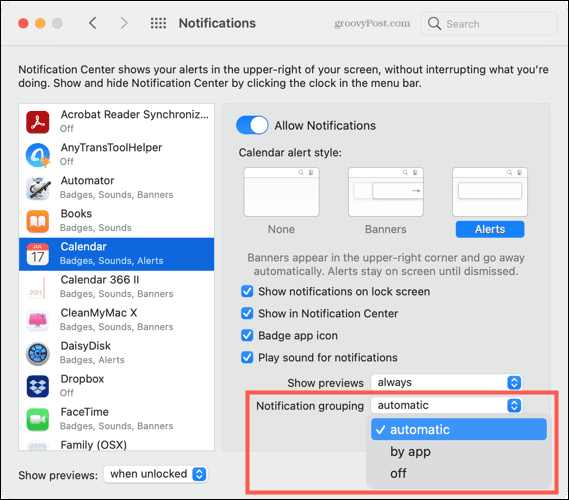
Group
Lastly, you can group the notifications in the Notification Center by app or automatically.

Choose to group By application means that an application groups the notifications with the most recent first. Automatic means that when you receive more than one notification, macOS will group them automatically. You can also select disabled to disable grouping of notifications.
Take the time to customize
The great thing about these Mac notification options is that you can mix and match them however you want. So you can display a banner and play a sound for your Calendar, see an alert and badge icon for Mail, or view an alert in the Notification Center for Photos.
By taking a few minutes to customize your notifications on your Mac, you can make sure you get only the alerts you want. So for important applications and services, you can be sure that you never miss a thing. And for those elements that you prefer not to receive notifications, it is just as easy.


 a Screenshot on Mac")
