
Through Windows Update, Windows 11 is capable of installing and configuring new drivers without us having to do anything. The problem is that sometimes this can cause problems on our computer. It would be best disable automatic driver installation in windows 11 and have control of the drivers that are installed.
Obviously, it means that we will have to keep an eye on the new versions of the drivers of our devices and hardware. But if this is not a problem, it is the best option to avoid some conflicts that can be generated.
It can also happen that we believe that a driver is better for our device than the one that is currently installed. Precisely for this reason, it is important to disable automatic installation and a little further down we will show you how to achieve it. In this way we can install the drivers manually.
Disable automatic driver installation in Windows 11
Being able to manually install our own drivers helps us avoid potential bugs and compatibility issues.

To start we will have to press the Windows key on our keyboard or click on the Start button, we will go to Settings> System.

We’re going to have to scroll down and click on the About option.

Once the About page opens, we will have to click on Advanced system settings in the Device specifications section.
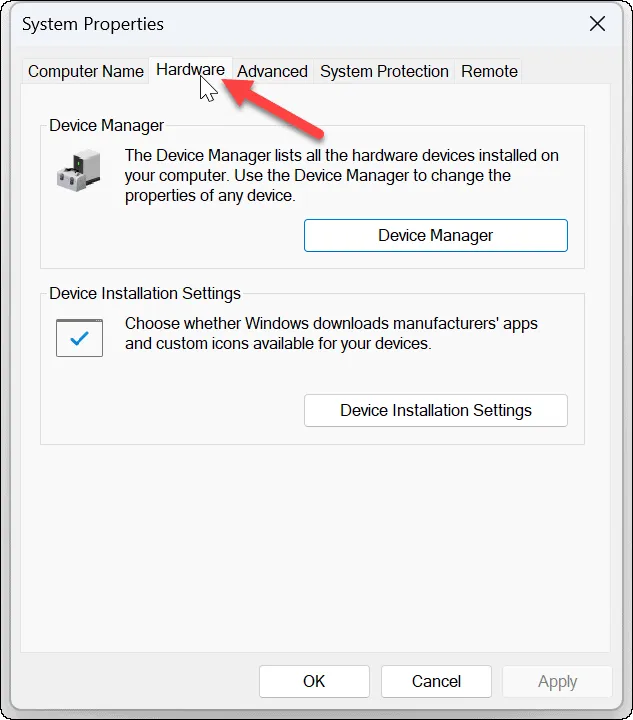
A new window called System Properties opens, let’s go to the Hardware tab.

Next, we are going to click the Installation Settings button in the Device Installation Settings section.

Now we are going to have to click on the No option (it is possible that the device does not work as expected).
To finish, we are simply going to have to click Save changes and OK to be able to close the System Properties window and prevent drivers from automatically updating in Windows 11.
Remember that if you have any kind of doubt about this topic, you can leave it in the comment box that you will find a little further down and we will be happy to help you in any way we can.

