
This post shows students and new users the steps to enable or disable the touchpad on Windows 11 laptops. Some laptops have a touchpad that adds the same functionality as a mouse without the need for an external mouse. If you have an external mouse and you don’t need the touchpad enabled, you can simply disable it with a few clicks in Windows 11.
One reason a user may want to disable the touchpad is accidental palm motion while typing. You may want to disable the touchpad when using your laptop’s internal keyboard.
Have you been in a situation where using the laptop keyboard and the palm of your hand accidentally touches the touchpad and the mouse flies across the screen? Well, you can disable that in Windows 11.
Some notebook computers have a button near the top of the touchpad that allows you to quickly turn the touchpad on and off. You can turn the touch panel on and off with that button. On Dell laptops, there is an ambulation light in the upper left corner that can be made with a double tab to quickly enable or disable the touchpad.
Also make sure your laptop does not have FN key to disable or enable.
If your laptop doesn’t have the button or a way to quickly enable or disable the touchpad, follow the steps below to do so.
To start disabling or enabling the touchpad on laptops, please follow the steps below.
How to turn off the laptop touchpad when using Windows 11
For those who want to disable the touchpad on Windows 11 laptops, the steps below should help.
Windows 11 has a centralized location for most of its setup applications. From system settings to creating new users and updating Windows, everything can be done from the System settings crystal.
To access the System Settings, you can use the Windows key + i shortcut or click Start ==> Settings as shown in the following picture:
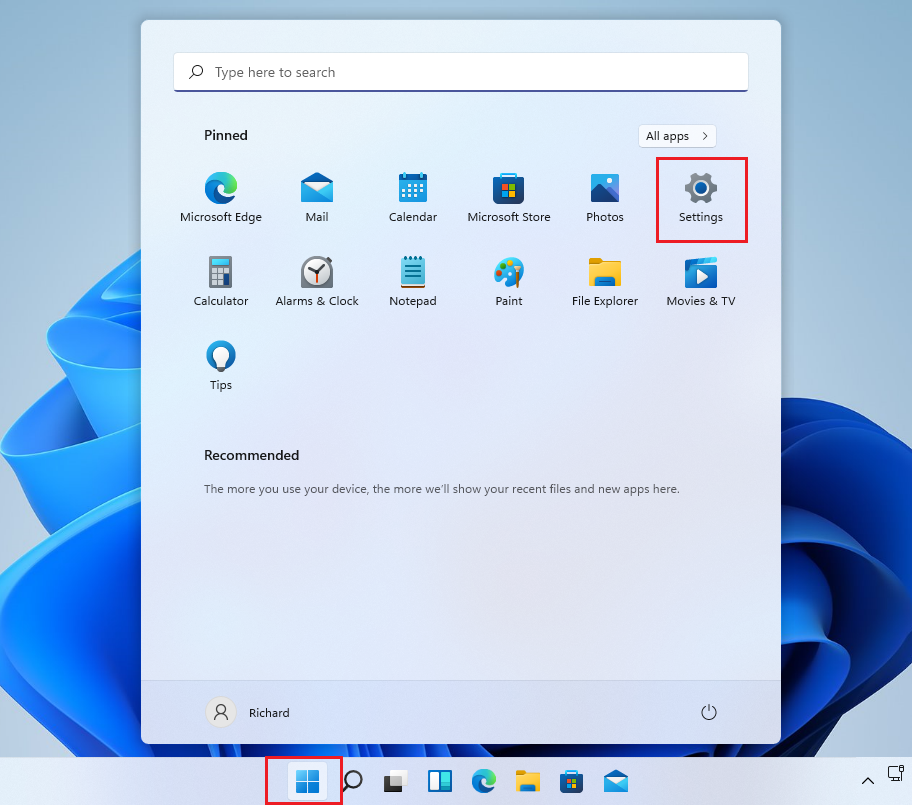
Alternatively, you can use the search box on the taskbar and find Settings. Then select to open it.
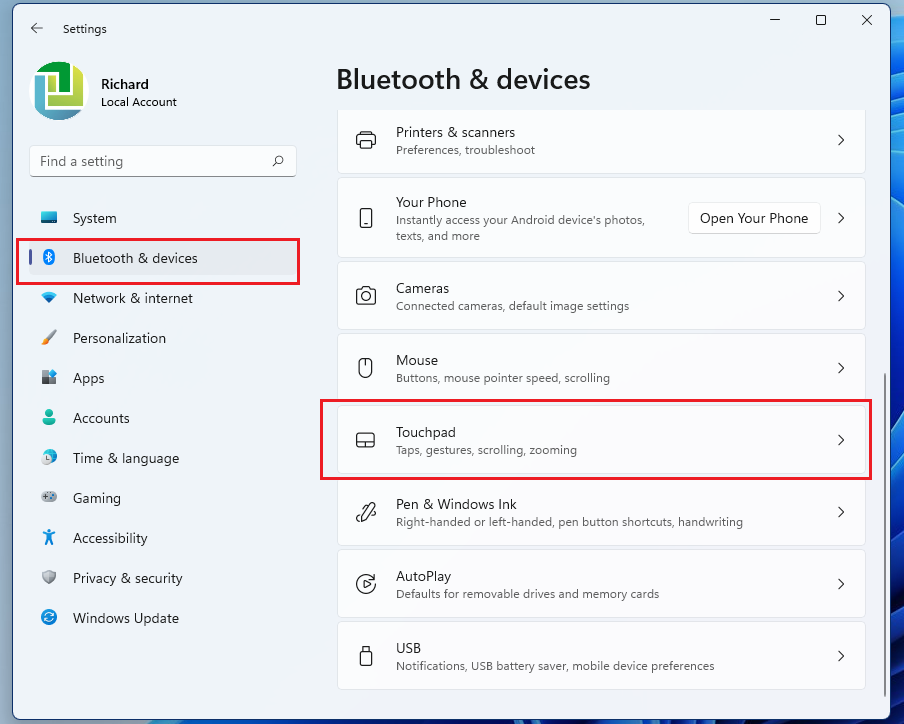
The Windows settings panel should look similar to the image below. In Windows settings, click Bluetooth and devices, Select Touch panel on the right panel of the screen shown in the image below.
In the touch panel settings panel, move the button to the off position to disable the touch panel. Once the touchpad is disabled, you need an external mouse or even your keyboard to navigate Windows 11.
How to enable the touchpad when using Windows 11
If you change your mind about disabling the old touchpad, simply re-enable it by reversing the steps above.
Click on the Start Menu And go to Settings ==> Bluetooth and device ==> click Touch panel and toggle the button to disable or enable the touch panel when Upon position to enable.
You should do that!
Conclusion:
In this tutorial we have seen how to disable or enable the touchpad when using Windows 11. If you find any errors above or have something to add, use our comment form below.


1 Comment
Pingback: How to Activate Windows 11 for Free: 3 Methods - TechRechard