


If you use a Windows 11 laptop in multiple places throughout the day, the list of Wi-Fi networks can start to pile up. There could be multiple networks on the list that you no longer need. You might also be troubleshooting a network connectivity issue and need to forget a Wi-Fi network in Windows 11.
In any case, Microsoft makes the process of forgetting a Wi-Fi network easy and straightforward in Windows 11. Here’s what you have to do.
Forget a Wi-Fi network in Windows 11
The easiest way to forget a Wi-Fi network in Windows 11 is through the Quick Settings menu. Before you forget a wireless network, make sure you still have the password for the network so you can reconnect later if needed.
To forget a wireless network using the Quick Settings menu in Windows 11, follow these steps:
- Press the quick settings button located in the lower right corner of the taskbar, next to the system clock. You can also use the keyboard shortcut Windows + A to start quick setup.


- When the menu appears, click on the icon of the arrow of the button Wifi. If you don’t see the Wi-Fi button, you can add it (and other buttons) by customizing the menu.
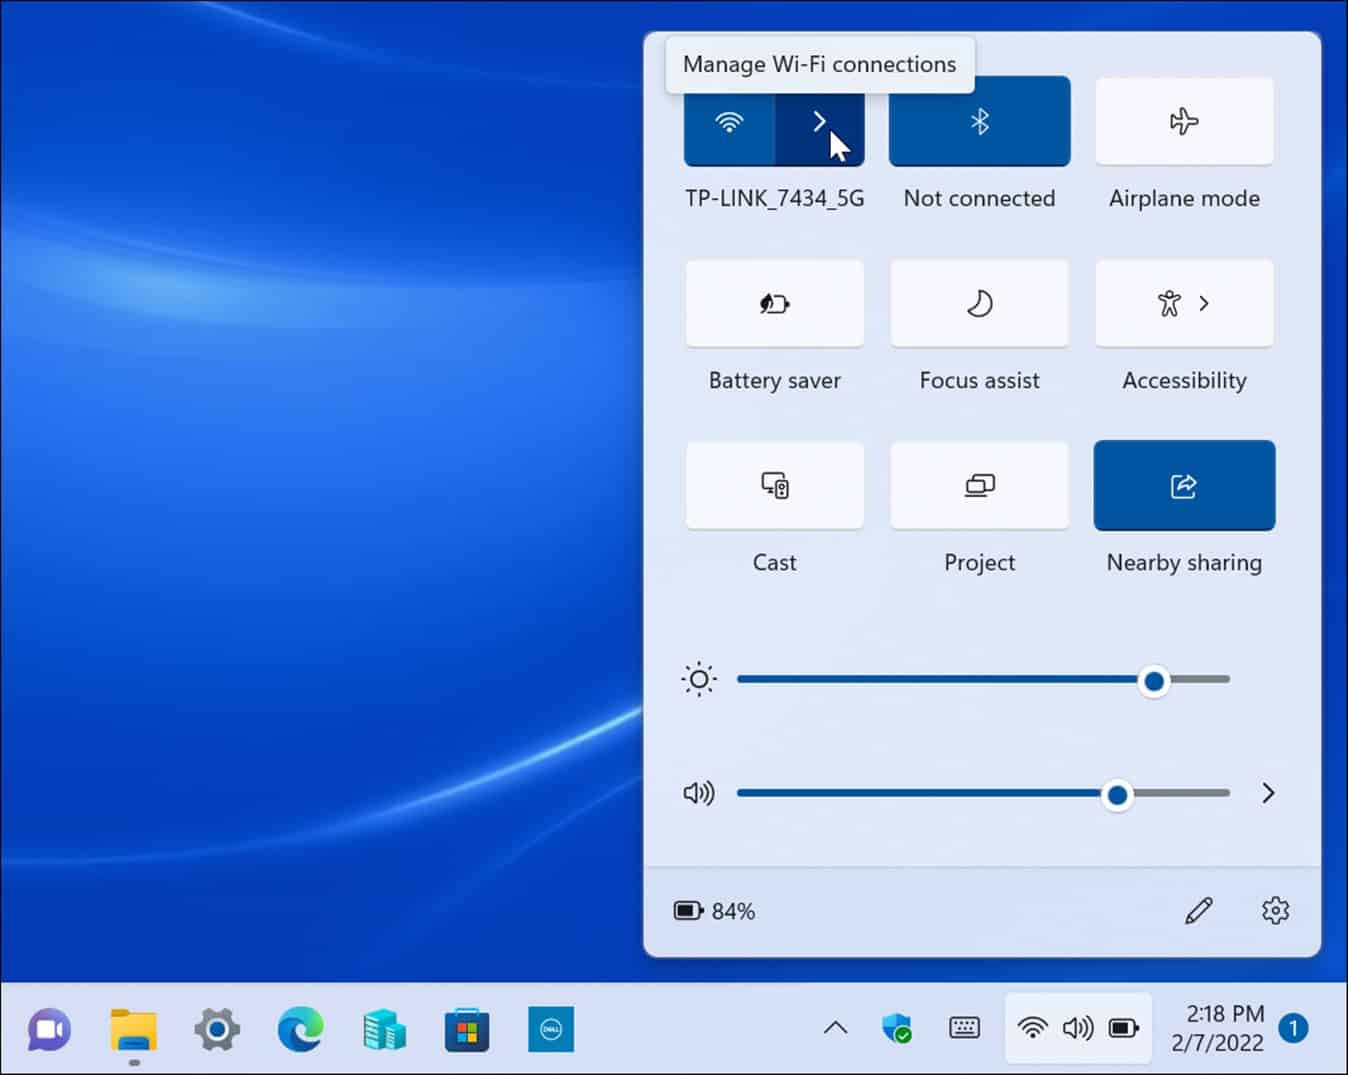

- A list of the networks you have connected to will appear here. Find the Wi-Fi network you want to remove, right-click right button mouse over their name and click the option To forget from the menu that appears.


- Windows 11 will erase the Wi-Fi network settings you have selected. If it’s a default Wi-Fi network, Windows will stop trying to connect to it. If you need to connect again, open Quick Settings > Wi-Fi and click the button Connect. Of course, you will have to re-enter the network password to complete the connection.


How to forget a Wi-Fi password in Windows 11 through settings
It is also possible to forget a Wi-Fi network from Windows 11 through the Settings app. It’s also possible to forget Wi-Fi networks even when you’re out of range via Settings.
To use Settings to forget a Wi-Fi network in Windows 11, follow these steps:
- Click the button Start or press the windows key to open the Start menu, and then touch Setting.


- When Settings opens, click Network and Internet in the list on the left and select Wifi in the options on the right.


- On the next screen, click Manage known networks from the options on the right.
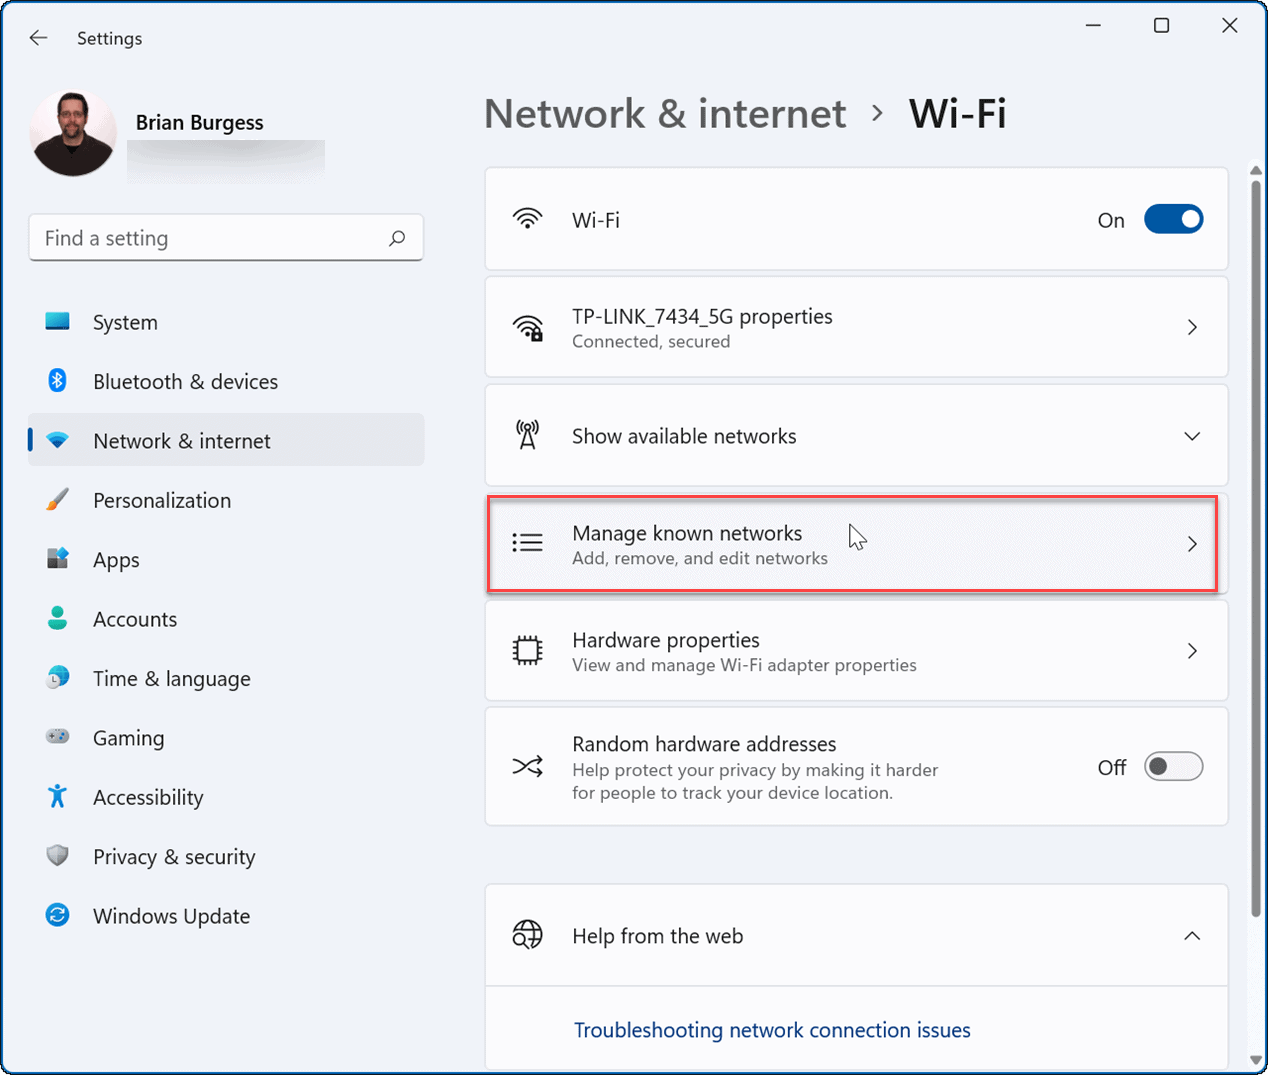
- Now in the section Manage known networksclick the button To forget next to the one you want to remove.
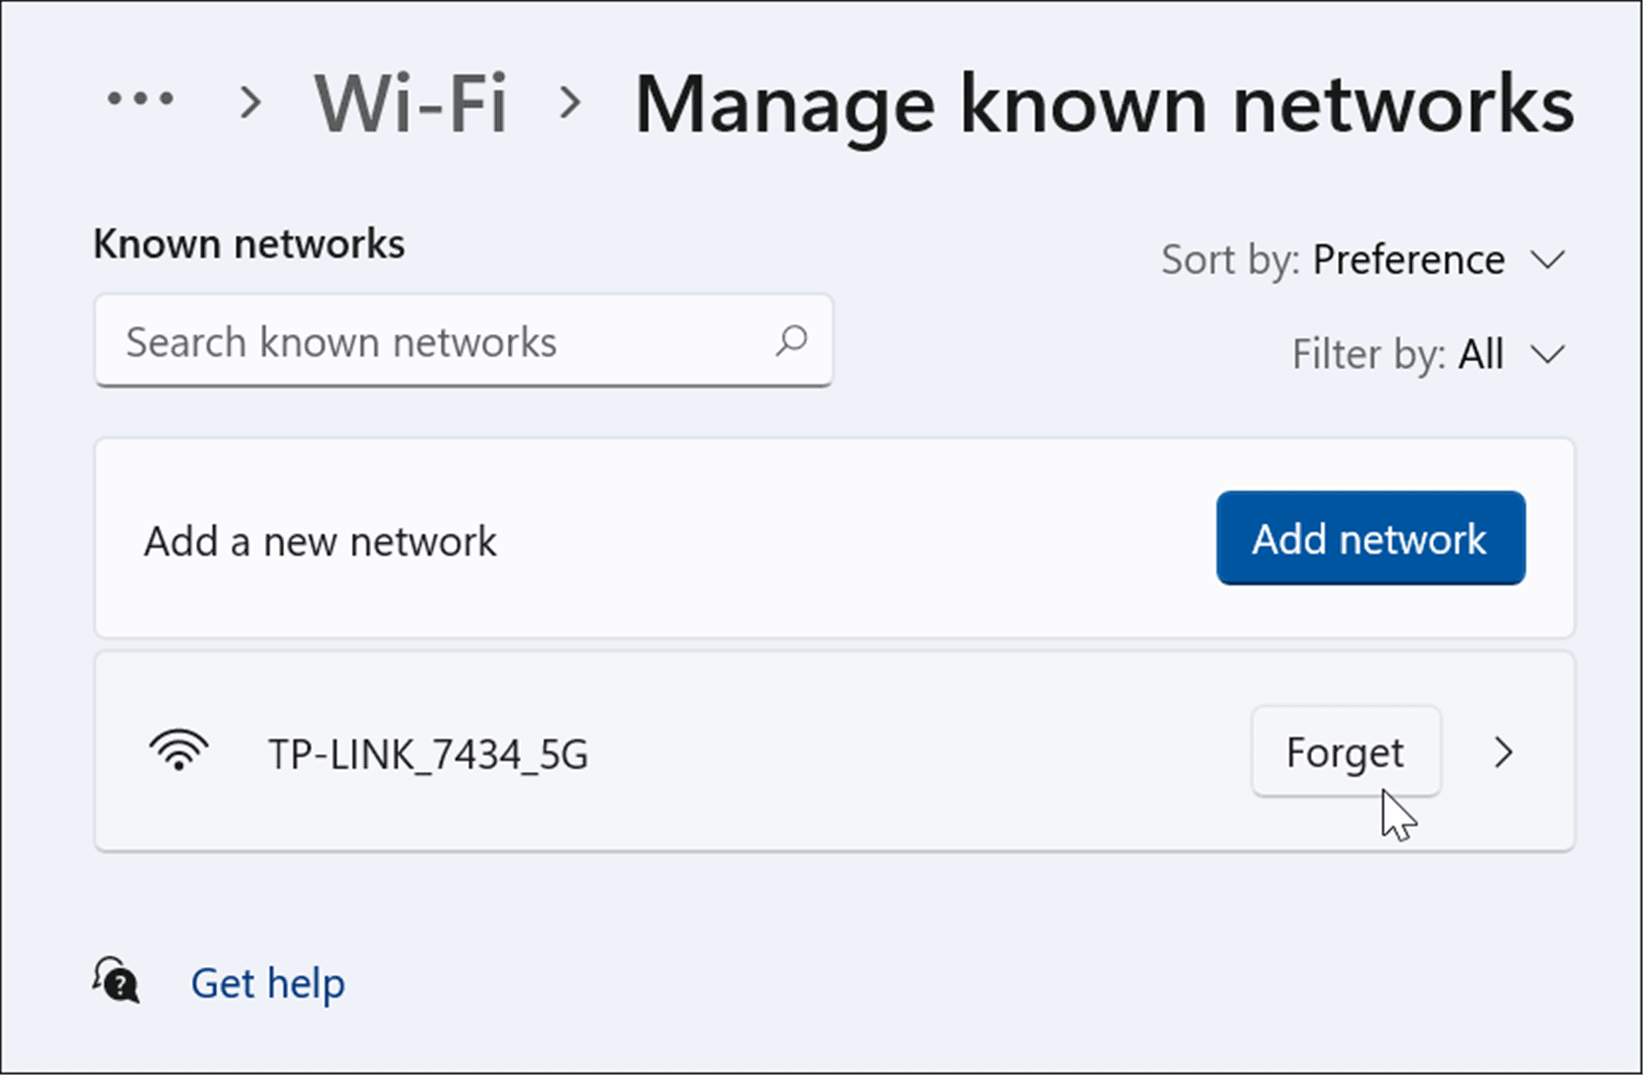
- Wi-Fi and your data will no longer be accessible from Windows 11. However, if you need to reconnect, open the quick setup (Windows key + A), click Wi-Fi and enter the Wi-Fi password.


How to delete all saved wireless networks using PowerShell
If you want to remove all Wi-Fi networks from the list and start over, you can use the PowerShell terminal.
To forget all Wi-Fi networks with PowerShell, follow the steps below:
- Right-click on the button Start and select Windows Powersell (Admin) on the menu.


- When the prompt opens PowerShell, enter the following command and press Enter:
Netsh wlan delete profile name=* i=*


When the command runs, it removes all Wi-Fi networks from your history, and you can start over or reconnect to just one if needed.
Using wireless networks in Windows 11
Another cool feature of Windows 11 that uses both Bluetooth and wireless technology is Nearby Sharing. It allows you to share files between other Windows PCs. It is similar to using AirDrop on iPhone. If you have any issues with it, you can fix Nearby Sharing when it doesn’t work.