Formatting a drive in Windows 11 erases any existing data on the drive and prepares you for other tasks. When connecting a drive, whether internal or external, it is important to format it. This allows you to clean the hard drive of any unnecessary files and possible malicious programs. Formatting a drive is also a great way to quickly check if the drive is working properly or not.
The formatting process also helps you ensure that the drive uses the correct settings for your PC to avoid any compatibility issues. Whenever you format a drive, be it a solid state drive or a classic hard drive, you can choose a supported file system like NTFS, FAT32 or exFAT.
Below is explained how to format a drive using File Explorer in Windows 11.
How to format a drive in Windows 11
Note: Formatting a drive erases all the data on it. Make sure to back up important files and folders before starting the formatting process.
To get started, make sure the disk you want to format is connected and recognized by Windows 11. Then right-click Beginning and click File Browser in the menu that appears.
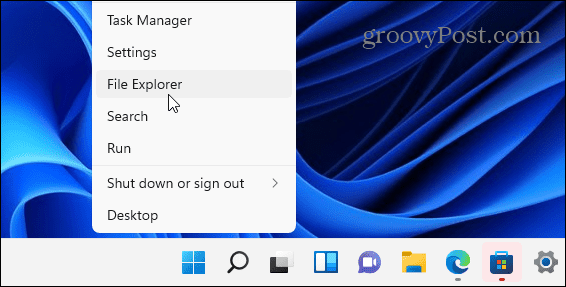
It’s also worth noting that you can open File Explorer by clicking the folder icon on the taskbar.
![]()
![]()
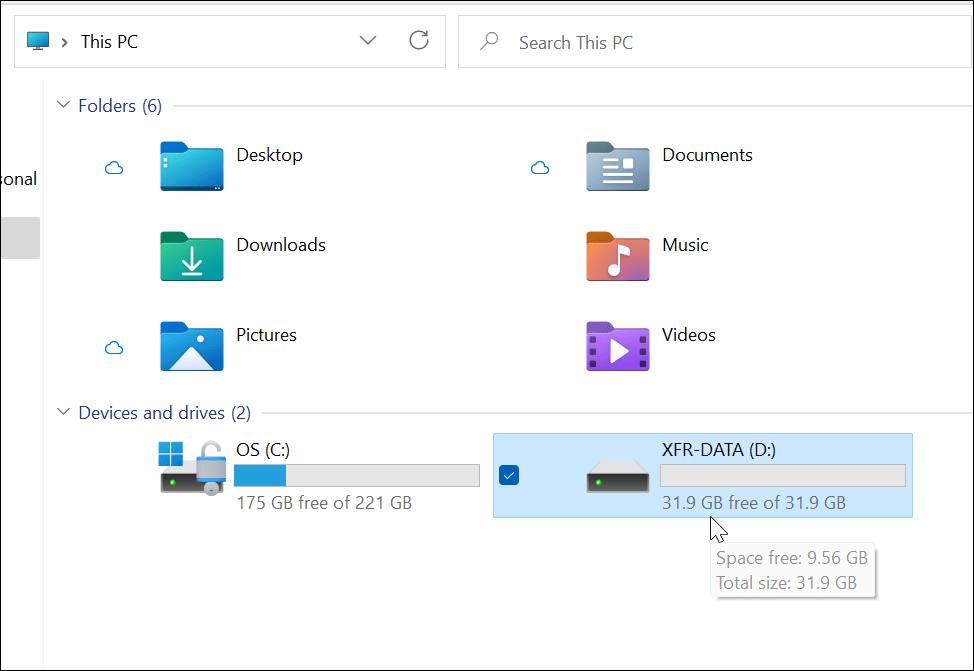
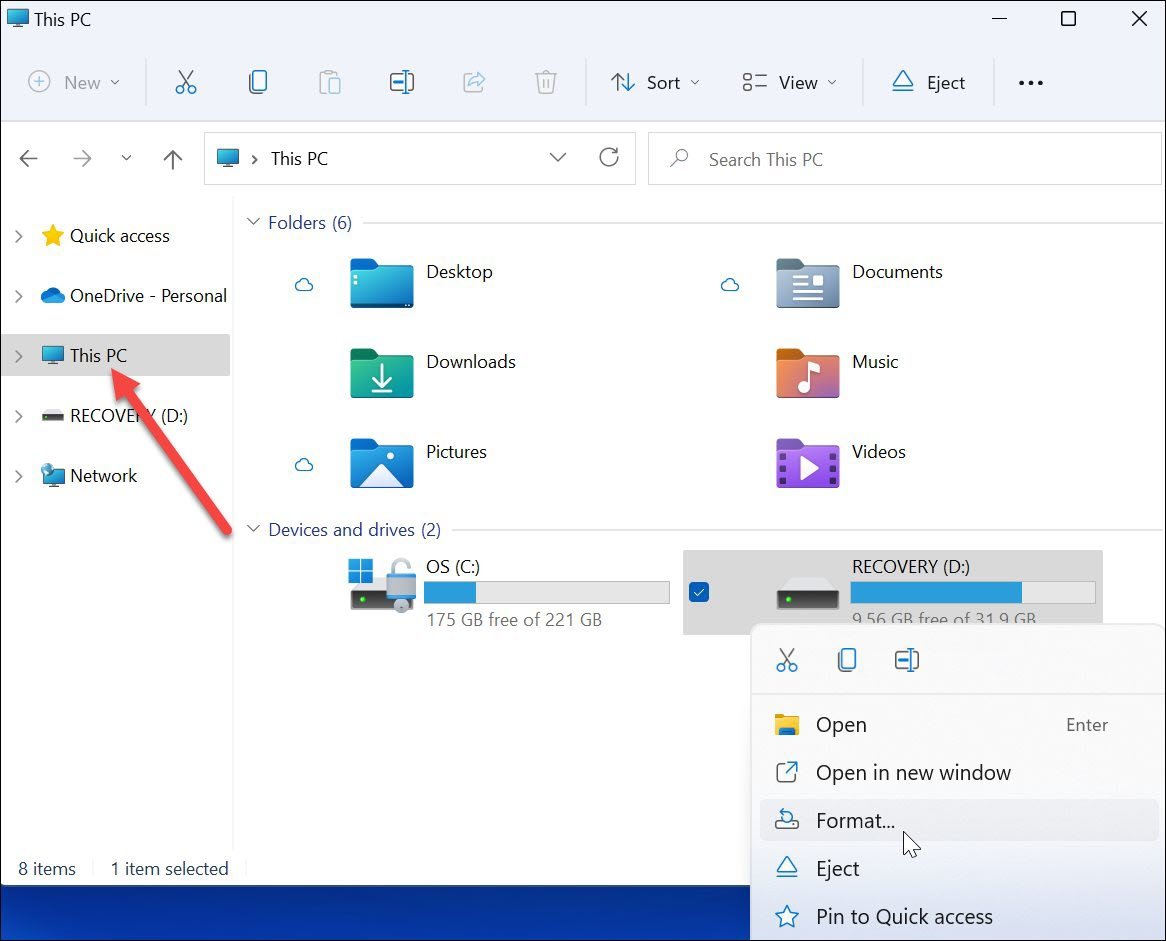
When File Explorer opens, click This team in the left column. Right-click on the drive you want to format in the section Devices and drives, and then click Format in the context menu that appears.
Format options
Then choose from the following menu options Format to format your drive:
- Capacity: The maximum data capacity of the hard disk after formatting. Please note that the formatting process takes up some space on the drive.
- File System: Represents the data structure that defines how the data is stored in a unit. There are three file systems to choose from: FAT32, NTFS, and exFAT. Use the latter if you plan to use the drive on macOS and Windows. For Windows 10/11, use the NTFS system. FAT32 is limited to 4GB and is not optimal in modern computing environments. Mac users should choose exFAT instead.
- Allocation unit size: The drive size, also known as “cluster size”, is set by default to 4 Kilobytes for NTFS, which is a small block. Adjusting this was something that users did in the days when all we had were clunky, slow hard drives. Nowadays, you can keep it in the default value without problems.
- Volume label: The volume label is simply the name you want to assign to the drive. After formatting, you will see the name of the drive in File Explorer.
- Format options: A quick format performs a high-level format, but only deletes the file system table and the root folder. This means that the data is still on the drive and can be recovered. However, as the drive is used, the excess data is overwritten. If you do a full format (which takes longer), Windows will look for bad sectors and write zeros to each of them, removing all data and making it unrecoverable. The choice is yours, but you will probably want to do a full format on a drive that contains a lot of sensitive and personal data.
Continue formatting the drive
Once you have made your format selections, press the button. Beginning in the window Format.

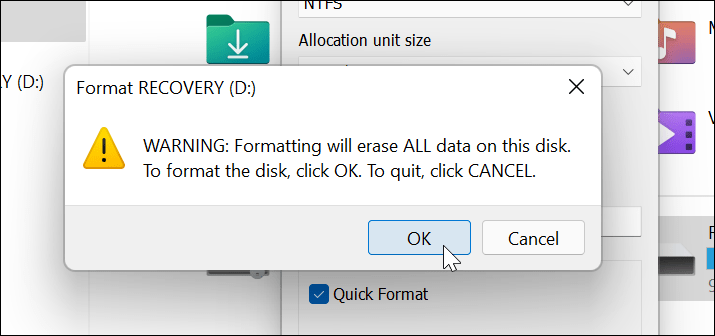
A warning message will then appear informing you that all data will be deleted. Again, make sure the data on the drive you need is backed up.
When you’re ready, click To accept to start the process.
You will see a progress bar during the formatting process. The amount of time it takes varies depending on the size of the drive, the amount of data it contains, and whether or not you choose to quickly format the drive.
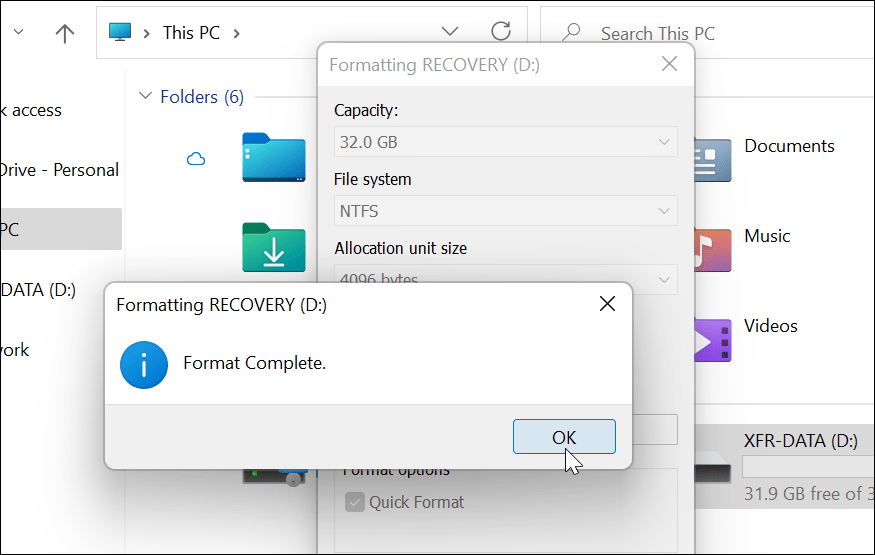
When the formatting process is complete, a message will appear: click To accept to confirm.
Using the formatted drive in Windows 11
The steps above should have helped you successfully format a drive in Windows 11.
At this point, the drive is ready for use – the existing data has been erased and you can start reusing it. You can open the File Explorer> This Computer and view the new drive in the Devices and drives section.