


Project to this PC is a function that Windows uses to project the content of other devices to the screen of our PC and gives us the possibility to control the device using the keyboard and mouse. it’s possible turn projection on or off on a Windows 11 PC when we want; If enabled, we can send that content to iPhone, Android or another PC through the same home wireless network.
So Project to this PC makes use of the Connect app to mirror the screen. The app is no longer available on Windows, although this functionality can still be accessed through Wireless Display, which can be installed as an optional feature in Windows 11.
Additionally, this requires hardware support for the Miracast app. Next, we are going to see how to enable the function in case it is not enabled and also how to deactivate it if we do not want to continue using it.
Turn projection on or off on a Windows 11 PC
From Windows Settings

- We start by clicking on Start that is in the lower left corner of our screen.
- Now we are going to have to click on Settings.
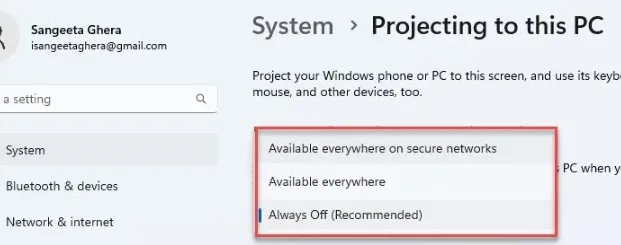
- Next, we scroll down until we reach the Project to this PC option, in System Settings.
- We go to the drop-down menu and we will have to choose Available everywhere in secure networks or Available everywhere to enable the configuration.
- In case you want to deactivate it, we will have to choose Always off from the same drop-down menu.
Turn projection on or off on a PC from the Registry Editor

We can also do this from the Windows Registry Editor. However, before proceeding we recommend creating a backup or restore point in case something goes wrong along the way.
- We start by pressing the Windows + R keys on our keyboard.
- We will write “regedit” in the Run window and press Enter.
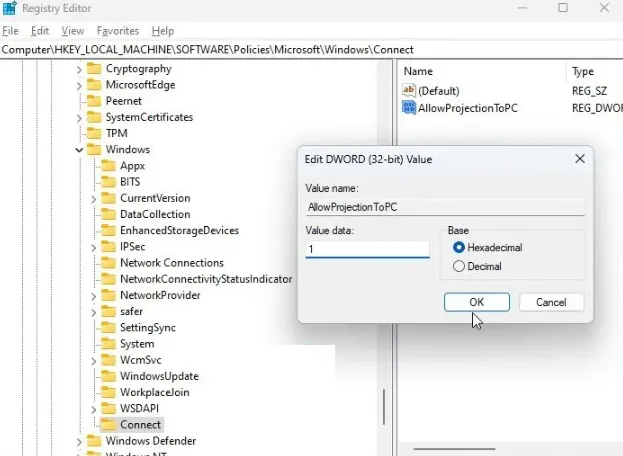
- Now we are going to have to navigate to the following path from the left sidebar: HKEY_LOCAL_MACHINESoftwarePoliciesMicrosoftWindowsConnect
- In case we cannot find Connect, we are going to right click on the Windows folder in the left panel, select New > Key and name Connect.
- Now we are going to right click on any empty part of the right pane and choose New > DWORD (32-bit) Value. The name that we will assign will be “AllowPrjectionToPC”.
- We are going to right click on the key we just created and choose Modify.
- In value data, which should be 0, let’s choose 1.
For the changes to take effect, we will have to restart the computer.
Modify the frequency with which we request the projection on this PC
It is also possible to change how often to request Project to this Windows 11 PC from the same Settings menu. We are going to click on Start> Settings> Project to this PC. We are going to visualize three drop-down menus. The second allows us to modify this option. We are going to choose between Only the first time or Every time a connection is requested. We choose one of the two options and we will exit the configuration. The changes are applied at the moment.