
In case you have any kind of problem with the display size of our videos on CapCutwhat we should do is change the relationship of aspect. This application, which allows us to edit videos professionally, also gives us the possibility of changing the aspect ratio very easily.
Change aspect ratio in CapCut
Let’s remember that CapCut is a free video editing application. Which we have available for Android phones, which we will find in the Google store from this link; although it is also in the App Store for iPhone since here.
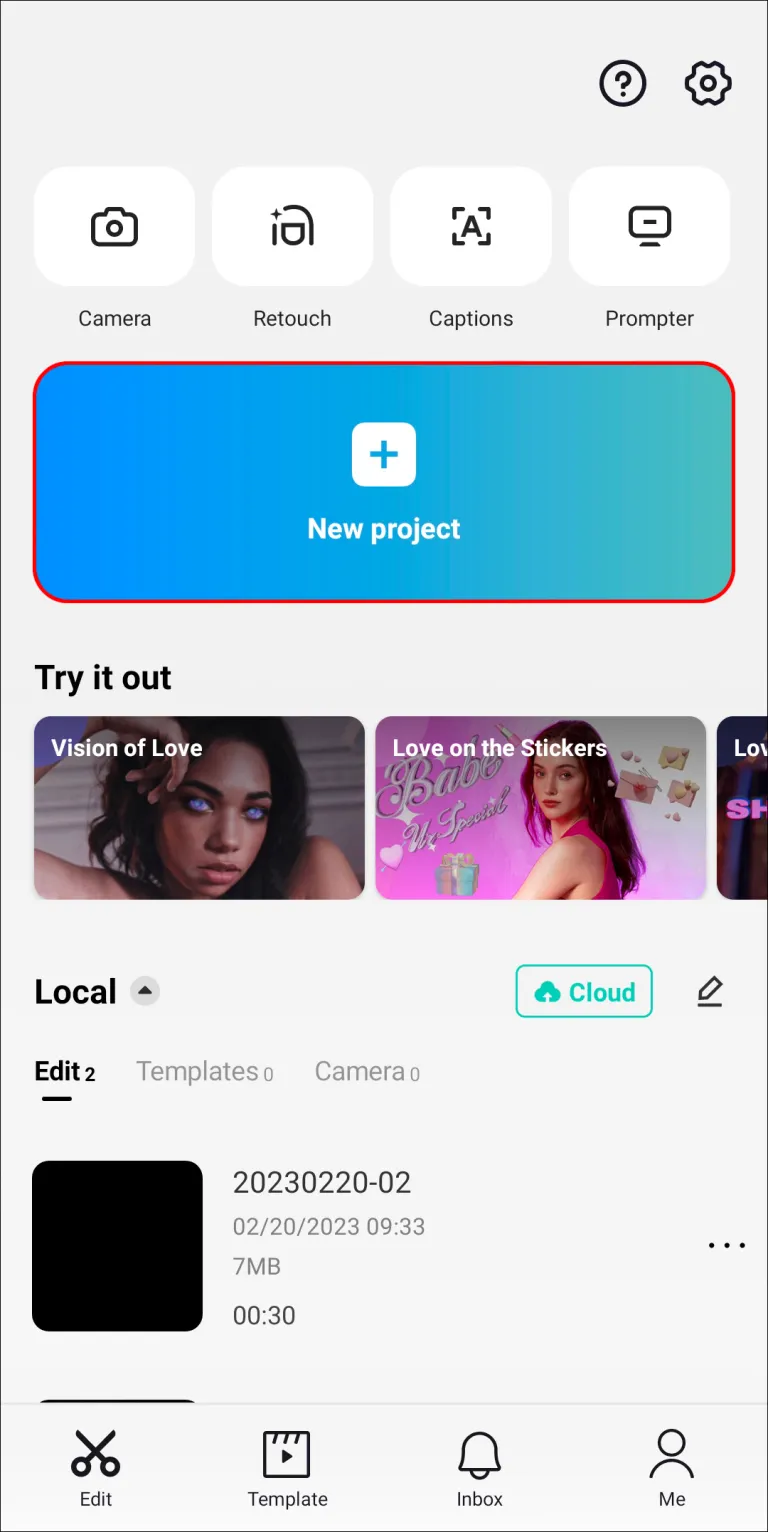
Once we have CapCut on our device, we proceed to run it as we normally would. On the first screen we will have to press the “New project” button to import a video. We will have to select a video that we have recorded to edit it.

The video will appear in the Media section of the application. We will press the video that we want to adjust. Which will open the video in the Editor section of the app.
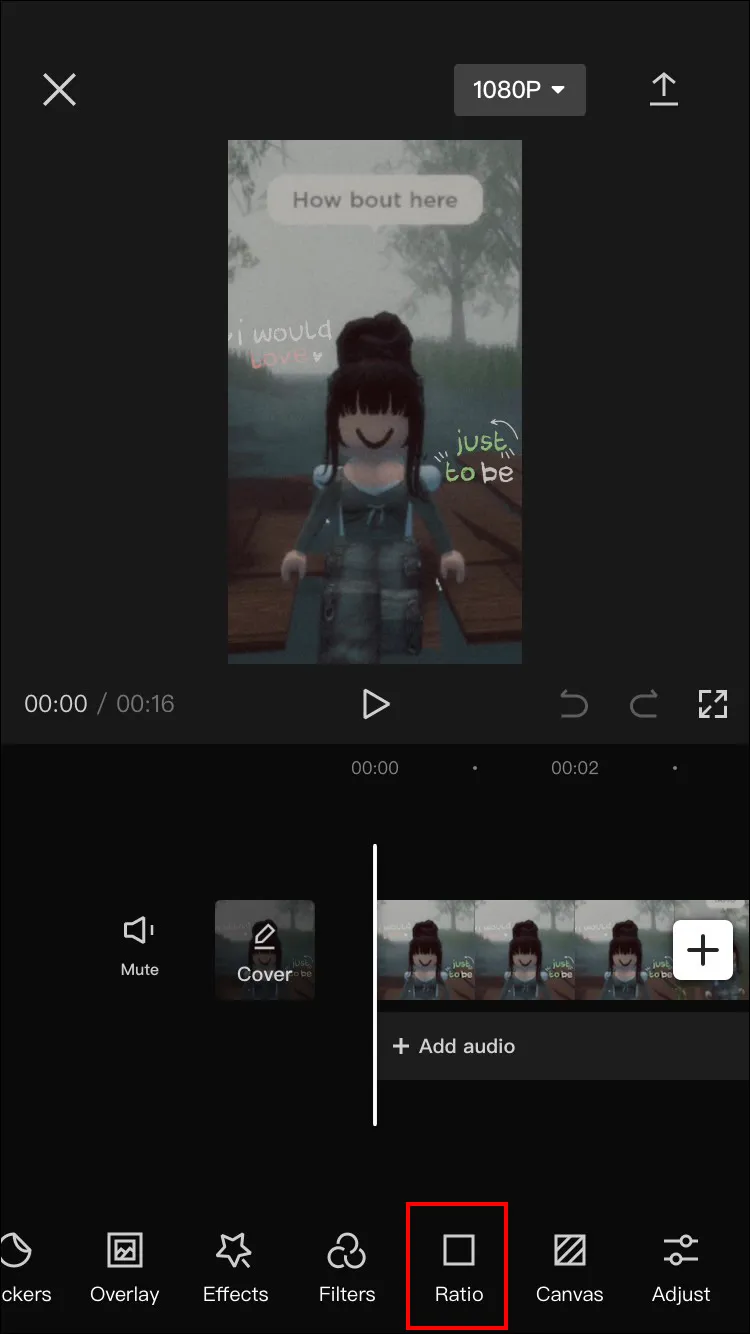
From here, we press Proportion from the toolbar that is at the bottom. We will see a menu with different aspect related options that we can select.

Here we can choose aspect options like 9:16, 4:3, 16:9, 1:1, etc.
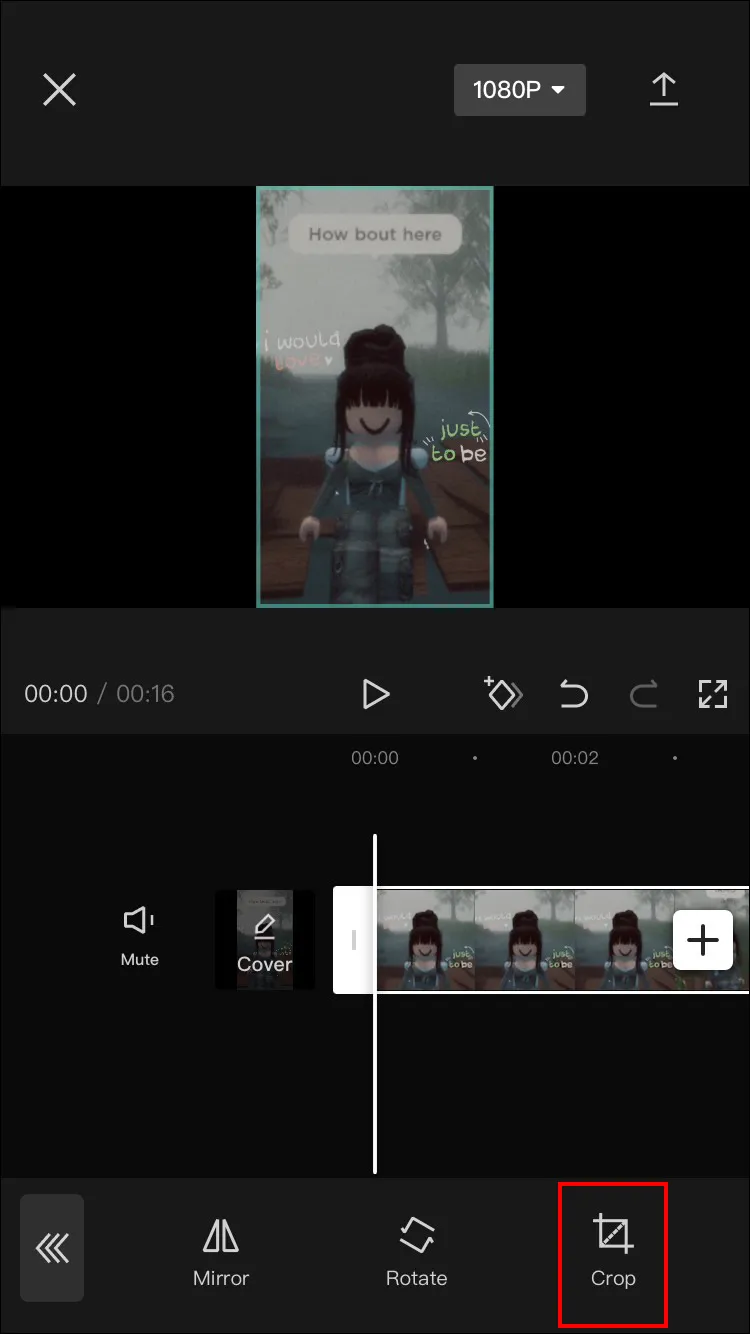
In case we need to adjust the video, some sections may be cut off as a result of the aspect ratio adjustment. For this we can make use of the Crop option.

Once we’re done, the only thing left to do is press Save to keep the edits made to the video. After this, we can proceed to export or share the video.
How do I choose the right aspect ratio
The aspect ratio in CapCut varies depending on the purpose. So it would not be strange to be a little confused regarding the indicated aspect ratio for the format we want.
So how can we know which one is correct? If we go back to the fourth step of the previous section, we can see a menu of proportion options. Each aspect ratio option is ideal for different types of displays/platforms. We will see some examples below:
1:1 (square): in this case it is ideal for social networks, especially for what would be TikTok stories or videos.
9:16 (Vertical): Designed for vertical videos, it is optimized for viewing on mobile devices. Again, there are many who use it to edit videos that will be uploaded to social networks like Instagram, TikTok, etc. We also find a small variation of this ratio that would be 4:5 (Portrait).
16:9 (widescreen): would be the standard ratio for the videos we see on a computer or widescreen.
3:4 (Landscape): Ideal for any kind of landscape-style video. It is also compatible with social networks such as Instagram or Facebook.
How to remove black borders after video editing

First we press the Edit button that is in the lower corner of the screen.

Next, we are going to have to choose Crop Tool to resize the video. We can manually trim the black edges.

Once we have finished, we will have to export the video in question to save the changes.
In case we want to avoid the letterbox effect (black borders) and we don’t want to crop the video. We will have to choose the indicated aspect ratio to match the original aspect ratio of the video. For this we would need to check the properties of the video file.
Something else we should consider before finishing. It is that in some occasions we may not be able to completely remove the black borders. This usually happens when the original aspect ratio is completely different than the aspect ratio we are trying to achieve. In this case, the ideal solution would be to create a custom aspect ratio to fit the video and take care of editing the black lines where necessary.

