By default, Windows 11 shows the Watch in Format 12 hours in the lock screen, although it is possible to change this. If we are someone who likes to use the 24-hour clock, then we can quickly and easily modify it; A little further down we will see how to achieve it step by step.
Change lock screen clock format from settings

The first thing we will do is open the Windows 11 Settings application, for this we are going to press the “Windows + I” key combination, go to “System” and select “Time and language” in the left sidebar.

Now we are going to have to click on “Language and region” to access the settings related to time formats.
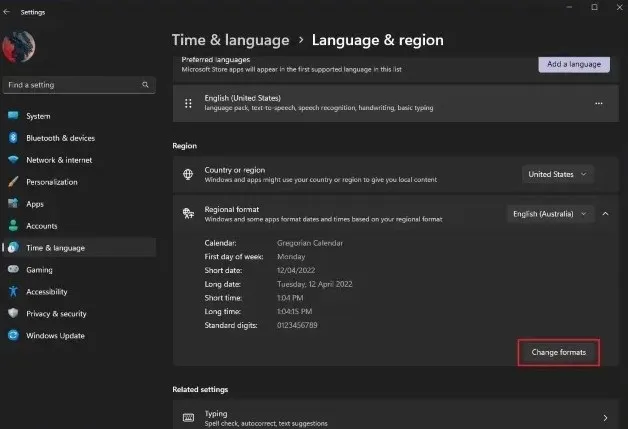
In the “Region” section, we will have to go to “Regional format” and click on the button in the lower right “Change formats”.
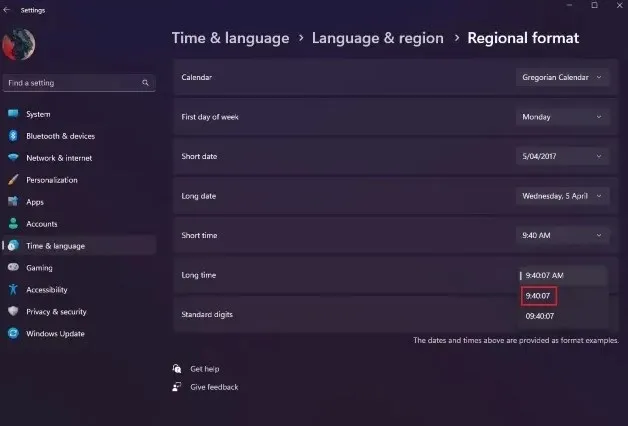
Next, we are going to click on the dropdown next to “Long time” and select the option with AM to use the 24-hour format. It is also possible to use the one without AM.
The next thing will be to restart the computer to see the new 24-hour clock format on the lock screen.
From the control panel
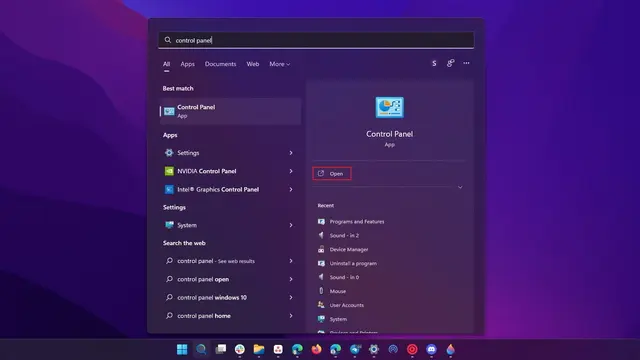
Press the “Windows” key and type Control Panel. Among the results, we are going to click Open Control Panel, it should be the first.
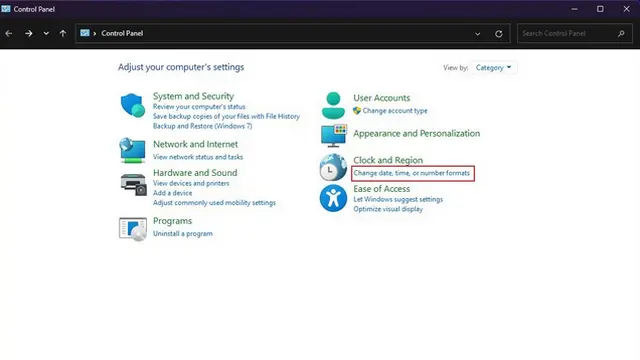
We go to the “Clock and region” section, we will click on “Change date, time or number format” to be able to modify the date format of the lock screen on our PC.
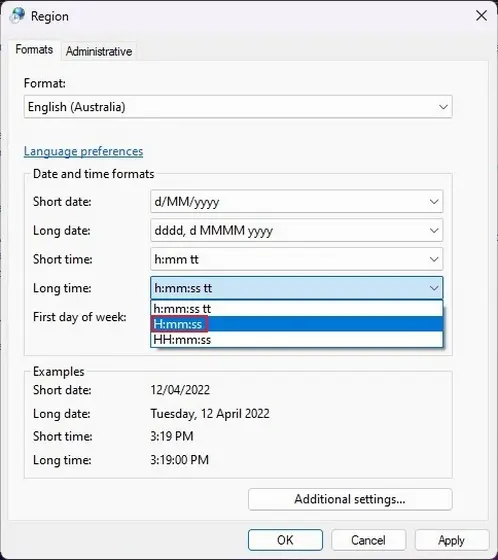
Next, we’ll click the dropdown next to “Long time” and choose “H:mm:ss” or “HH:mm:ss” if we want a 24-hour clock. On the other hand, we will have to use H:mm:ss tt or hh:mm:ss tt to be able to use the 12 hour clock.
After configuring the one we like, we are going to click on “Apply” so that the changes are applied. Although to be able to visualize them, we will have to restart the computer.

