
If we are to send emails to a specific group of people quite often, it is convenient for us create a distribution list in outlook or contact group. In this way, we will save a lot of time and we will be able to send all the emails that we deem necessary to that specific group of people, without complicating our day-to-day life too much.
Create email group in Outlook on Windows
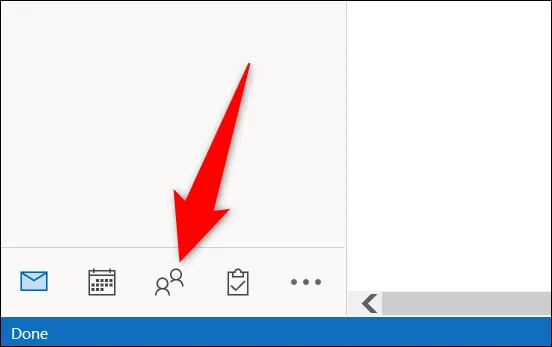
In order to create an email group in Outlook from Windows, we will have to open the application on our computer and click on the People icon located in the lower left corner of the screen.
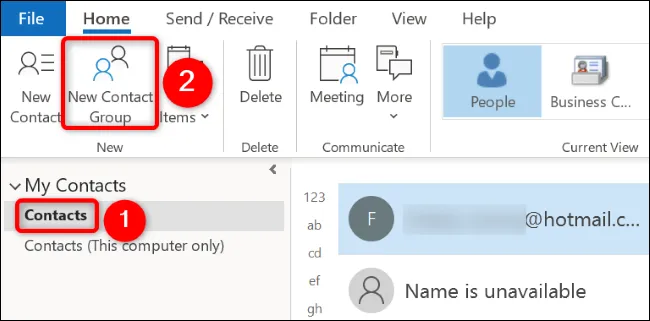
Next, in the left sidebar, we will proceed to choose the location where we want to save our group. If we are not sure, we recommend choosing “Contacts”. Now, we’re going to have to go to the Home tab at the top and choose New Contact Group.

We will see that a new window opens. We will have to click on the Name field and enter the name we want the contact group to have.
After naming the group, we will go to the Home tab at the top and click on Add members. We will choose where we want to get our contacts from. We can choose people who are in the Outlook contact list or the address book. We can even add a new contact using your email. To follow the example, we are going to choose From Outlook Contacts.

A new window opens, we will have to choose the contacts we want to add to our group. It is possible to select several contacts at the same time if we hold down the Ctrl key on the keyboard and click. Once we finish the selection, at the bottom of the window, we will have to choose Members and then Accept.
Once we are back in the group creation window, we are going to proceed to click on the upper left corner and click on Save and close.
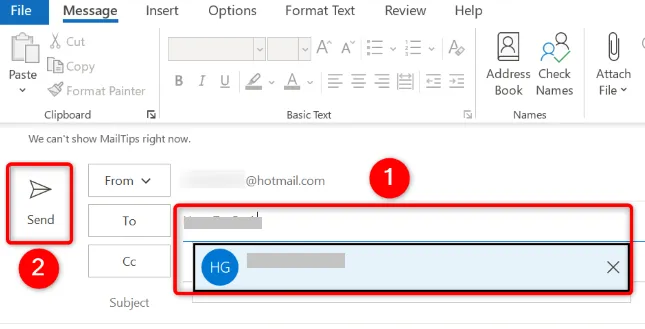
In this way we have managed to create a distribution list in Outlook. To be able to use it in our emails, we will have to compose an email as usual; we can add graphics, attach a folder or file, etc. Basically, everything we would do when writing it normally.
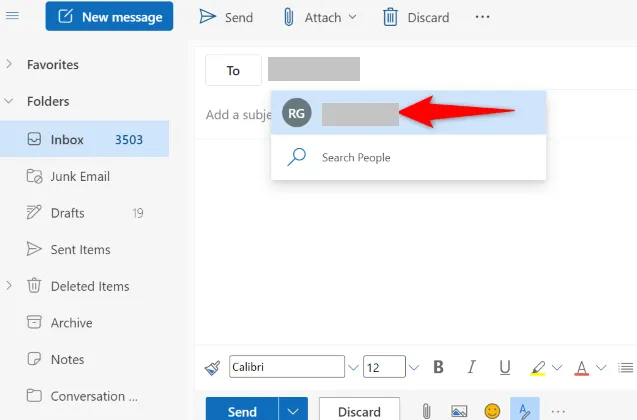
However, in the To field, we will have to type the name of the group and select it from the list.
Create distribution list in Outlook for Mac
Unfortunately, the contact list is not available for the new version of Outlook for Mac (although it has been confirmed that it will be soon). But if we have the legacy version we can do it anyway.

We start the Outlook application on Mac and we are going to click on the People icon that is in the lower left part of the app. In this new screen, we will have to go to Start and choose New contact list.
Here we are going to click on Untitled List and enter a descriptive name for the list. Later, we will add the members of this list by clicking on Add in the ribbon that we can see above.

In order to add someone, we will have to start writing their name and we will be able to see it in the list, we will click on it when we see it to add it quickly. In case we want to add someone who is not among our contacts, we will simply write the exact email.
When we finish, we go to the upper left corner and click Save and close.
Now it’s time to use the contact group as a distribution list in Outlook. We are going to write a new email and in the To section we are going to write the name of the group. Then, we proceed to write the email as we normally would.
Create distribution list in Outlook on the web

We start from any web browser and go to the Official site Outlook. After logging in, we go to the left sidebar and click on the People icon.

Next to the New contact icon, we can see an arrow pointing down, we will click on it and choose New contact list.
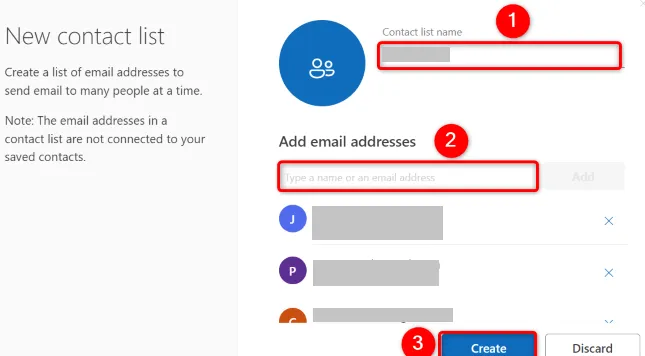
In this new window we are going to have to write the name of the new contact list, of the group. Then we will click on Add email addresses and we will write the addresses of those people that we want to add to the distribution list. To finish, we will click on create.
As we mentioned before, in order to use the distribution list or group, we will have to compose an email as we would normally do. Although in the To Field we are going to have to enter the name of the group that we recently created.

