
- In InDesign we have three basic forms of work: the ellipse, the polygon and the rectangle
- All of them can be modified to create custom shapes within the application.
- How to change the shapes in InDesign, altering the original ones and making them different?
As in many of the programs dedicated to visual and graphic design that we can access today, If the default ones don’t work for you, you should know how to create custom shapes in InDesign quickly and easily.. Fortunately, this is a fairly simple process even without knowledge.
Advertising

For those of you who don’t know, InDesign is desktop publishing and desktop publishing software for creating flyers, magazines, books, and digital publications. Shapes in InDesign can be used as is for illustrations, combined and used together or they can be changed in terms of their appearancealtering their shapes according to your needs.
Basic shapes in InDesign
Before we get into the details of custom shapes, it’s important to remember that we have three basic shapes within the application that are the ellipse, the polygon and the rectangle, the most obvious of all.
If you are looking for ways that go beyond those mentioned here, you will not be able to find them in the first instance. You can only find them by modifying them, and InDesign has been developed to allow us to tweak them..
Alter shapes in InDesign
rectangle shape
The rectangle tool can be used to draw squares and rectangles.holding down the Shift key while dragging or clicking and entering similar values in the height and width fields.
You can also change the edges by adding fancy curves, making them rounded and smooth by giving them bevels, etc. When you create the rectangle or square, you can make changes in the top menu bar.
The corner options dialog will open, and there you can choose the various options you want for your shape. Keep in mind that not all options will work for everyone, so experiment a bit.
ellipse shape
The ellipse tool looks like an elongated circle and is used to draw ovals or oval circles. To draw circles, you have to click on the Ellipse tool, and drag on the canvas while pressing the Shift key. You should also know that the corner options do not work on ellipses, as is obvious and of course.
Advertising

polygon shape
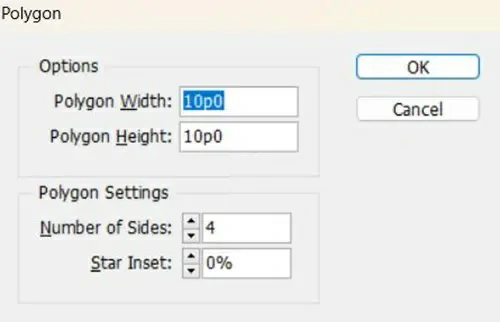
The polygon tool may seem like a boring tool, but it has some cool features to learn. It is the most versatile of all tools, and ranges from three-sided to hundred-sided shapes.
When creating the shape, You’ll see the height and width options just like the other shapes, but also two options that are unique to this tool. These two options are the Number of Sides and the Start Box.
Our recommendation is to explore the different corner alternatives and see what you achieve in each case. In these situations, it is always advisable to take some time to familiarize yourself with the available solutions.
How to introduce rounded corners?
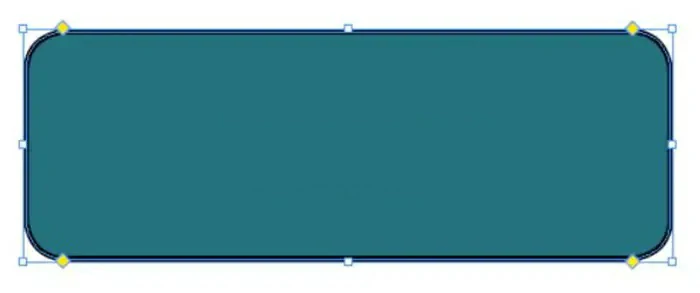
InDesign offers a simple way to round the corners of some shapes. You can click on certain shapes and then drag to make them round. To do this, click on the shape and if you see a yellow handle appear on the shape, it can be rounded by dragging itso don’t stop trying with it until you finish.
If the shape has a yellow handle, the next step is to click on the handle. You’ll see that the shape has four yellow handles around it. Click on any and drag to the center of the shape.
InDesign makes it even cooler, and you can make each corner a different style if you’re interested in achieving that. While you’re still in the option, with the corners unbound, Click the dropdown arrow next to the value box for each corner where it has the corner style. Next, you need to choose the unique corner style and the size it should be changed to.. And those results will be immediately visible on the screen.
conclusions
Shapes are important in InDesign because they can be used for so many things. Shapes can be used as placeholders for images and text, to frame images and text, and many other tasks.. Customizing them is important if you don’t feel entirely comfortable with the ones that come built into the program.
Have you been able to create custom InDesign shapes with these step-by-steps that we teach you?

