
We cannot deny that on a huge number of occasions it can be very useful for us that Alexa remembers all the things we have talked about. However, other times it is better remove all the record of voice of Amazon Alexa The motives? We believe that it is not necessary to go into much detail about this, each one will have their own.
Amazon is in charge of manufacturing several of the best smart speakers on the market and it surprises us model by model, with what they are capable of doing only with the sound of our voice. However, these speakers save a voice history of our interactions and four other data points to test and improve our experience. It’s a really useful thing that works really well.
However, perhaps we come across some things that we do not want anyone to know or we simply want to delete all the Amazon Alexa voice history because today we woke up on the wrong foot and no justification is necessary. After all, it’s our speaker, we can do whatever we want, right?
So without going too far, we are going to see a short and detailed guide on how we can achieve this simple objective.
Delete all Amazon Alexa voice history
The Alexa application on our phone was developed to be able to manage our speakers, it will be precisely from here where we will be able to delete the history by following these steps:

- We open the Alexa application on our phone.
- Click on More (icon of three horizontal lines in the lower right corner of the screen).
- Let’s go to Settings.
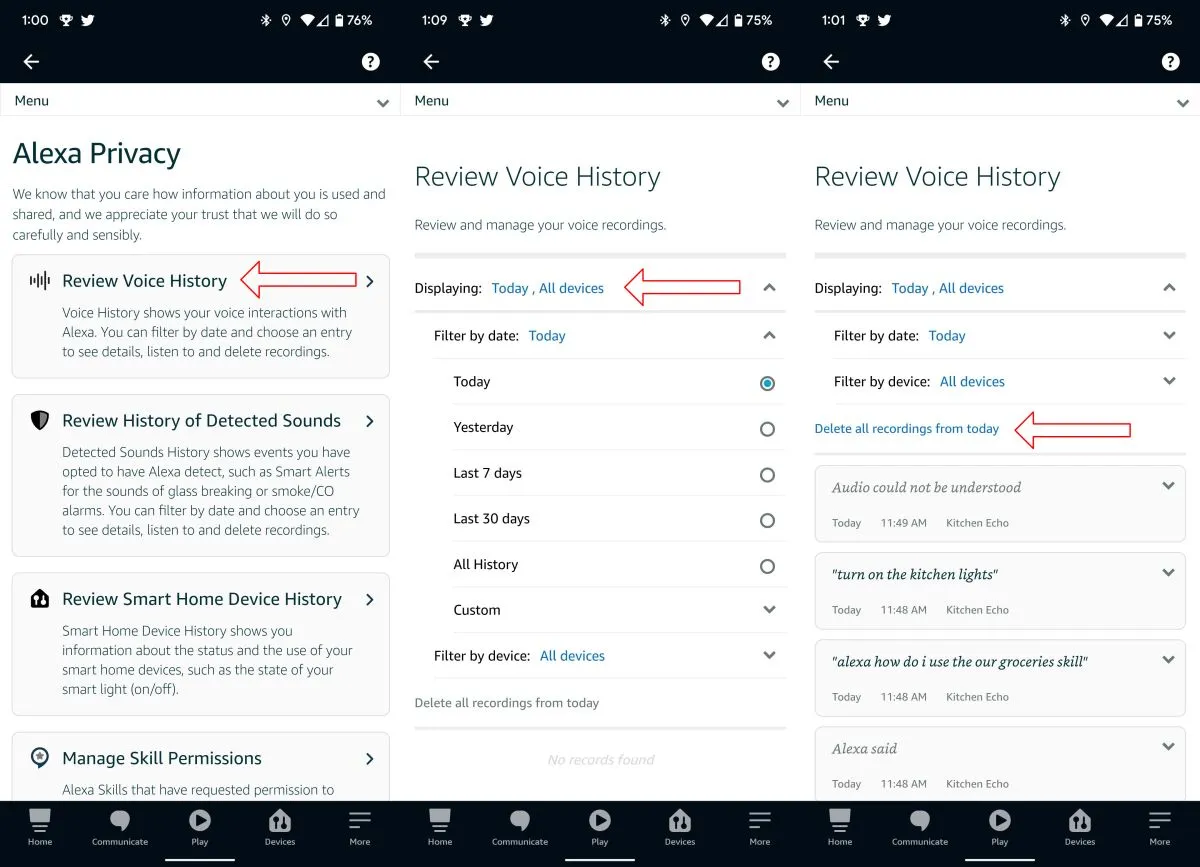
- We look for Alexa Privacy.
- Now we are going to press Review voice history.
- Click on the dropdown menu next to Show to filter the date range and Echo devices that we want to review.
- In order to delete all the recordings and devices that we chose, we will have to click on the Delete all recordings link that is located below the display filter.
Finally, we are going to have to review the pop-up notification and if we are completely sure, we will click on the Delete button.
In case we want to verify or delete a recording from the assistant, we will have to press the arrow next to an individual recording to verify it once we found the recording that we want to delete. By pressing the playback button, we will be able to listen to it. So, if we are really going to delete it, we click on the icon that looks like a trash can. We will not see a configuration that asks us if we really want to delete this unique recording, so we have to be absolutely sure that we want to delete it.

