
This short post shows students and new users how to install WordPress content management system (CMS) on Ubuntu Linux with the Nginx HTTP web server. It also has a link to set up free Let’s Encrypt SSL certificates to protect your WordPress website.
WordPress is a free and open source CMS based on PHP and MySQL that also has many features and thousands of plugins and templates or themes. If you want to create a website or online store, WordPress might be the easiest way to do it, especially if you will need user support to manage and maintain the site.
The tutorial is based on Ubuntu Linux. We will install the Nginx web server, the MariaDB database server and the PHP modules. We will also link to another post that will show you how to protect your WordPress website using Let’s Encrypt’s free SSL certificates.
For more information on WordPress, see your Homepage
To start installing WordPress on Ubuntu Linux, follow the steps below:
How to install Nginx on Ubuntu Linux
As mentioned above, we will use the Nginx web server to run WordPress. WordPress requires a web server to function, and Nginx is one of the most popular open source web servers available today.
To install Nginx on Ubuntu, run the following commands:
sudo apt update
sudo apt install nginx
After installing Nginx, the following commands can be used to stop, start and enable Nginx services always start every time your server starts.
sudo systemctl stop nginx.service
sudo systemctl start nginx.service
sudo systemctl enable nginx.service
To test if Nginx is installed and working, open your web browser and look for the IP address or hostname of the server.
http: // localhost

If you see the above page in the browser, then Nginx is working as expected.
How to install MariaDB on Ubuntu Linux
A database server is required for WordPress to work. WordPress stores its content in a database and MariaDB is probably the best database server available to run WordPress.
MariaDB is fast, secure, and the default server for almost all Linux servers. To install MariaDB, run the following commands:
sudo apt install mariadb-server
sudo apt install mariadb-client
After installing MariaDB, the following commands can be used to stop, start and enable MariaDB services always start when the server starts.
sudo systemctl stop mariadb.service
sudo systemctl start mariadb.service
sudo systemctl enable mariadb.service
Then run the following commands to protect the database server with a root password if you were not prompted to do so during installation.
sudo mysql_secure_installation
When prompted, use the guide below to respond:
If you've just installed MariaDB, and haven't set the root password yet, you should just press enter here.

Enter current password for root (enter for none): PRESS ENTER

Switch to unix_socket authentication [Y/n] n

Change the root password? [Y/n] n

Remove anonymous users? [Y/n] y

Disallow root login remotely? [Y/n] y

Remove test database and access to it? [Y/n] y

Reload privilege tables now? [Y/n] y

All done!
To verify and validate that MariaDB is installed and working, log into the database console using the following commands:
sudo mysql -u root -p
It should automatically log into the database server as we started the login request as root. Only root can login without password and only from server console.

If you see a screen similar to the one shown above, then the server installed successfully.
How to install PHP-FPM on Ubuntu Linux
As we also mentioned earlier, we are installing PHP on Ubuntu as WordPress requires it. The PHP packages are added to the Ubuntu repositories. Repository versions may not be the latest. If you need to install the latest versions, you will need to add a third-party PPA repository.
In a third-party repository with the latest versions of PHP, run the following commands.
sudo apt-get install software-properties-common
sudo add-apt-repository ppa:ondrej/php
At the time of writing, the latest version of PHP 8.0.
sudo apt update
Then run the following commands to install PHP 8.0 and related modules.
sudo apt install php8.0-fpm php8.0-common php8.0-mysql php8.0-gmp php8.0-curl php8.0-intl php8.0-mbstring php8.0-xmlrpc php8.0-gd php8.0-xml php8.0-cli php8.0-zip
Once PHP is installed, the following commands can be used to start, stop, and allow the PHP-FPM services to start automatically when the server starts.
sudo systemctl stop php8.0-fpm
sudo systemctl start php8.0-fpm
sudo systemctl enable php8.0-fpm
Next, you’ll want to change some PHP configuration settings that work great with WordPress. Run the following commands to open the default PHP configuration file.
sudo nano /etc/php/8.0/fpm/php.ini
Then change the line settings to be something that lines up with the lines below. Save your changes and exit.
file_uploads = On
allow_url_fopen = On
short_open_tag = On
memory_limit = 256M
cgi.fix_pathinfo = 0
upload_max_filesize = 100M
max_execution_time = 360
date.timezone = America/Chicago
How to create a WordPress database in Ubuntu
At this point, we are ready to create a WordPress database. As mentioned above, WordPress uses databases to store its content.
To create a database for WordPress, run the following commands:
sudo mysql -u root -p
Then create a database called wpdb
CREATE DATABASE wpdb;
Next, create a database user named wpdbuser and set password
CREATE USER 'wpdbuser'@'localhost' IDENTIFIED BY 'new_password_here';
Then grant the user full access to the database.
GRANT ALL ON wpdb.* TO 'wpdbuser'@'localhost' WITH GRANT OPTION;
Finally, save your changes and exit.
FLUSH PRIVILEGES;
EXIT;
How to download WordPress
We are ready to download WordPress and start configuring it. First, run the following commands to download the latest version of WordPress from your repository.
Then extract the downloaded content into a new folder called wordpress.
cd /tmp
wget https://wordpress.org/latest.tar.gz
tar -xvzf latest.tar.gz
sudo mv wordpress /var/www/wordpress
Then run the command below to allow www-data user to own the new WordPress directory.
sudo chown -R www-data:www-data /var/www/wordpress/
sudo chmod -R 755 /var/www/wordpress/
How to configure Nginx for WordPress
We have downloaded the WordPress content into a new folder that we call WordPress. Now, let’s configure Nginx to create a new server block to use with our WordPress website. You can create so many server blocks with Nginx.
To do that, run the following commands to create a new configuration file called wordpress at / etc / nginx / sites-available / directory to host our WordPress server block.
sudo nano /etc/nginx/sites-available/wordpress
In the archive, copy and paste the content below in the archive and save it.
server {
    listen 80;
    listen [::]:80;
    root /var/www/wordpress;
    index  index.php index.html index.htm;
    server_name  example.com www.example.com;

    client_max_body_size 100M;
    autoindex off;
    location / {
        try_files $uri $uri/ /index.php?$args;
    }

    location ~ .php$ {
         include snippets/fastcgi-php.conf;
         fastcgi_pass unix:/var/run/php/php7.4-fpm.sock;
         fastcgi_param SCRIPT_FILENAME $document_root$fastcgi_script_name;
         include fastcgi_params;
    }
}
Save the file and close.
After saving the above file, run the following commands to enable the new file that contains our WordPress server block. Restart Nginx after that.
sudo ln -s /etc/nginx/sites-available/wordpress /etc/nginx/sites-enabled/
sudo systemctl restart nginx.service
At this stage, WordPress is ready and can be started by going to the server’s IP or hostname.
http://localhost
However, we want to make sure our server is protected with free Let’s Encrypt SSL certificates. So, continue below to learn how to generate Let’s Encrypt SSL certificate for websites.
How to set up Let’s Encrypt for WordPress
We have written a great post on how to generate and manage Let’s Encrypt SSL certificates for Nginx web server. You can use that post to apply here for your WordPress website.
To read the post on how to generate Let’s Encrypt SSL certificates for the website, click the link below:
How to set up Let’s Encrypt on Ubuntu Linux with Nginx
If you managed to generate a Let’s Encrypt SSL certificate, you need to reopen the server block for our WordPress website by running the following commands.
sudo nano /etc/nginx/sites-available/wordpress
The new WordPress server block settings should look similar to the following line. Take notes on the highlighted lines.
server {
    listen 80;
    listen [::]:80;
    root /var/www/example.com;
    index  index.php index.html index.htm;
    server_name  example.com www.example.com;

    include snippets/well-known.conf;

    return 301 https://$host$request_uri;
}

server {
    listen 443 ssl http2;
    listen [::]:443 ssl http2;
    root /var/www/example.com;
    index  index.php index.html index.htm;
    server_name www.example.com;

    ssl_certificate /etc/letsencrypt/live/example.com/fullchain.pem;
    ssl_certificate_key /etc/letsencrypt/live/example.com/privkey.pem;
    ssl_trusted_certificate /etc/letsencrypt/live/example.com/chain.pem;

    ssl_protocols TLSv1 TLSv1.1 TLSv1.2 TLSv1.3;
    ssl_ciphers ECDHE-ECDSA-AES128-GCM-SHA256:ECDHE-RSA-AES128-GCM-SHA256:ECDHE-ECDSA-AES256-GCM-SHA384:ECDHE-RSA-AES256-GCM-SHA384:ECDHE-ECDSA-CHACHA20-POLY1305:ECDHE-RSA-CHACHA20-POLY1305:DHE-RSA-AES128-GCM-SHA256:DHE-RSA-AES256-GCM-SHA384;

    add_header Strict-Transport-Security "max-age=31536000;  includeSubDomains";

    include snippets/well-known.conf;

    return 301 https://example.com$request_uri;
}

server {
    listen 443 ssl http2;
    listen [::]:443 ssl http2;
    root /var/www/example.com;
    index  index.php index.html index.htm;
    server_name example.com;

    ssl_certificate /etc/letsencrypt/live/example.com/fullchain.pem;
    ssl_certificate_key /etc/letsencrypt/live/example.com/privkey.pem;
    ssl_trusted_certificate /etc/letsencrypt/live/example.com/chain.pem;

    ssl_protocols TLSv1 TLSv1.1 TLSv1.2 TLSv1.3;
    ssl_ciphers ECDHE-ECDSA-AES128-GCM-SHA256:ECDHE-RSA-AES128-GCM-SHA256:ECDHE-ECDSA-AES256-GCM-SHA384:ECDHE-RSA-AES256-GCM-SHA384:ECDHE-ECDSA-CHACHA20-POLY1305:ECDHE-RSA-CHACHA20-POLY1305:DHE-RSA-AES128-GCM-SHA256:DHE-RSA-AES256-GCM-SHA384;

    ssl_prefer_server_ciphers on;
    ssl_session_cache shared:SSL:50m;
    ssl_session_timeout 1d;
    ssl_session_tickets off;

    ssl_stapling on;
    ssl_stapling_verify on;
    resolver 8.8.8.8 8.8.4.4 valid=300s;
    resolver_timeout 30s;

    ssl_dhparam /etc/ssl/certs/dhparam.pem;

    add_header Strict-Transport-Security "max-age=31536000;  includeSubDomains";
    add_header X-Frame-Options SAMEORIGIN;
    add_header X-Content-Type-Options nosniff;

    include snippets/well-known.conf;

    client_max_body_size 100M;

    autoindex off;
    location / {
        try_files $uri $uri/ /index.php?$args;
    }

    location ~ .php$ {
         include snippets/fastcgi-php.conf;
         fastcgi_pass unix:/var/run/php/php8.0-fpm.sock;
         fastcgi_param SCRIPT_FILENAME $document_root$fastcgi_script_name;
         include fastcgi_params;
    }
}
Save the file above, then restart Nginx and PHP using the commands below.
sudo systemctl reload nginx
sudo systemctl reload php8.0-fpm
Finally, if everything went according to plan, you should be able to start the WordPress setup wizard by navigating to the server’s hostname or IP address via HTTPS.
https://example.com/
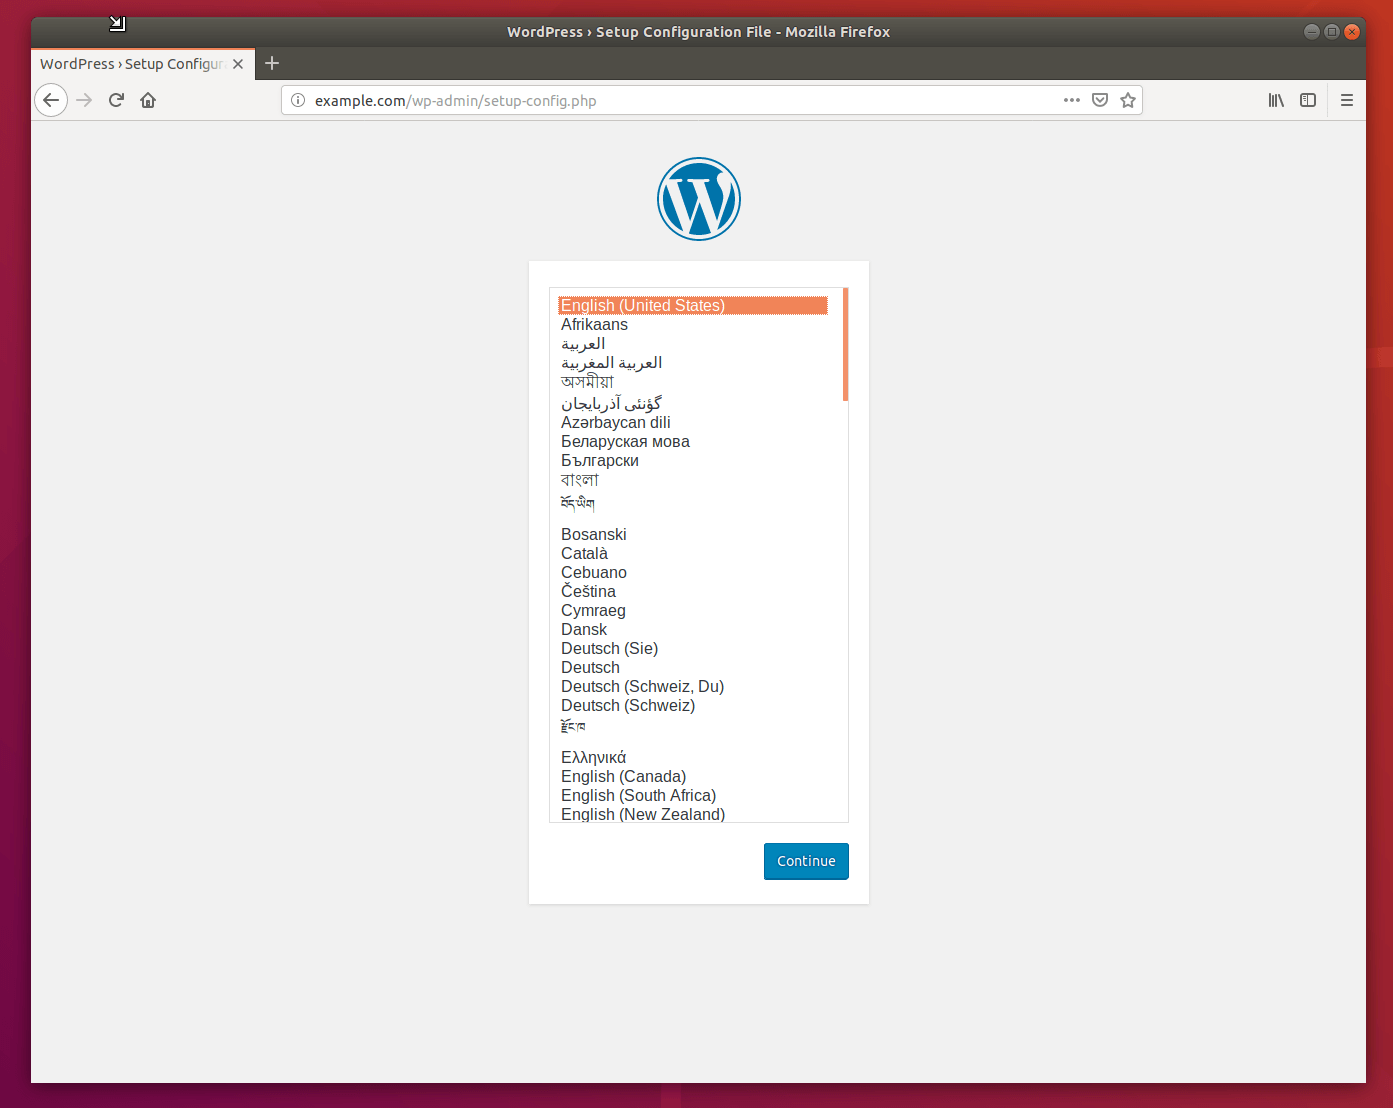
A WordPress setup wizard should appear. Follow the wizard to complete the setup.
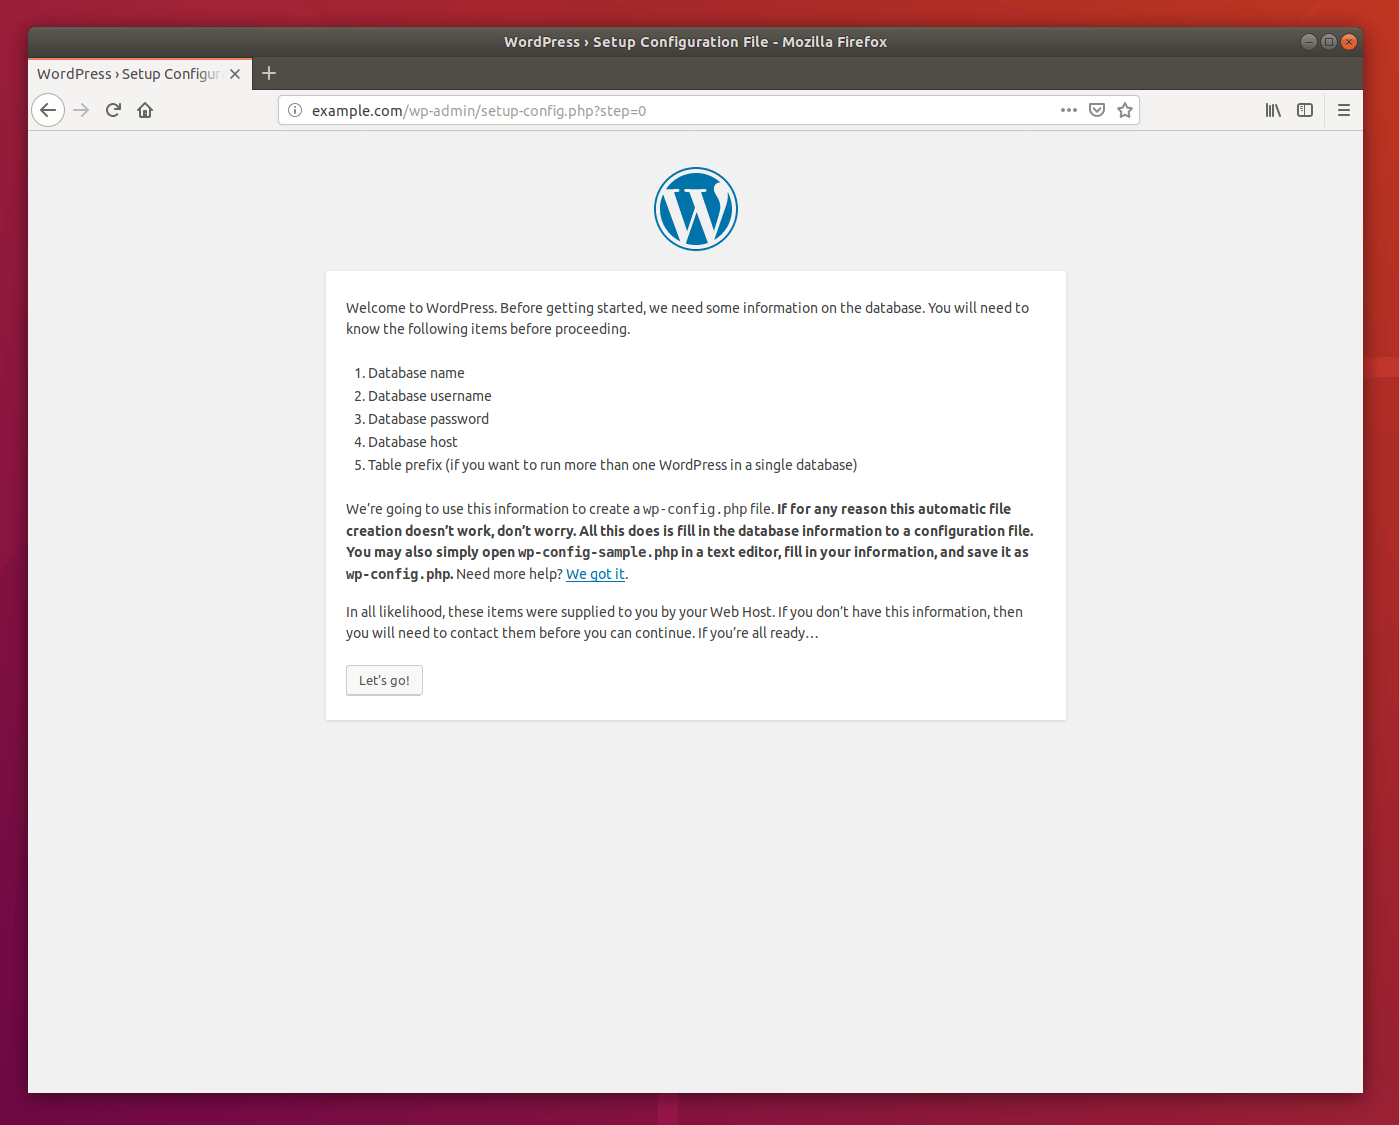
You will need to know the following items before proceeding. Use the database connection information that you created earlier.
- Database name
- Database username
- Database password
- Database host
- Table prefix (if you want to run more than one WordPress in a single database)
The wizard will use the information in the database to create a wp-config.php file in WordPress root folder.
If for some reason this automatic file creation doesn’t work, don’t worry… All it does is fill in the database information in a configuration file. You can also just open wp-config-sample.php in a text editor, fill in your information and save it as wp-config.php.
Then enter your database connection information and click Submit

After that, click Run the installation for WordPress to complete the configuration …

Next, create WordPress site name and backend admin account, then click Install WordPress

When you’re done, WordPress should be installed and ready to go.

You should do that!
Conclusion:
In this tutorial we have seen how to install WordPress on Ubuntu Linux with a link to configure Let’s Encrypt. If you find any errors above or have something to add, please use the comment form below.


