
Nowadays we are forced to spend more time at home and we have to look for platforms that allow us to work remotely. Keeping in touch with our co-workers and friends is something very simple these days thanks to the enormous number of communication and productivity applications that exist on the market. One of these applications is slack and set up an account to start using it is something too simple.
Slack comes with a free version and offers several paid plans as well. We’ll start by setting up a workspace; which will be the main area of operations and which contains our contacts. In this workspace, we can create channels, which would be chat rooms or group chats.
In these channels, we can communicate with our friends or colleagues through text messages, send files, integrate with other apps such as Office 365 or Google Docs, send audio and video. Even make video calls or voice calls.
How to create and set up a Slack account
We’ll start setting up a Slack account, but we need to do it from scratch. We’ll start with a main workspace and then create a variety of sub-workspaces which are known as channels. We can be part of more than one workspace, but for each space we will have to create a new account.
We’ll see how to join an existing workspace later. Now we will focus on how to create a new workspace.
We start by entering the official Web and clicking on “Try for free”. Next, we will enter our email. Slack will send us a code to our email to verify it. So we go to our email account and copy this code to enter it in Slack.
Now, you will be invited to create a workspace. Slack can suggest several existing workspaces that we can join; assuming we’ve already been invited to one.
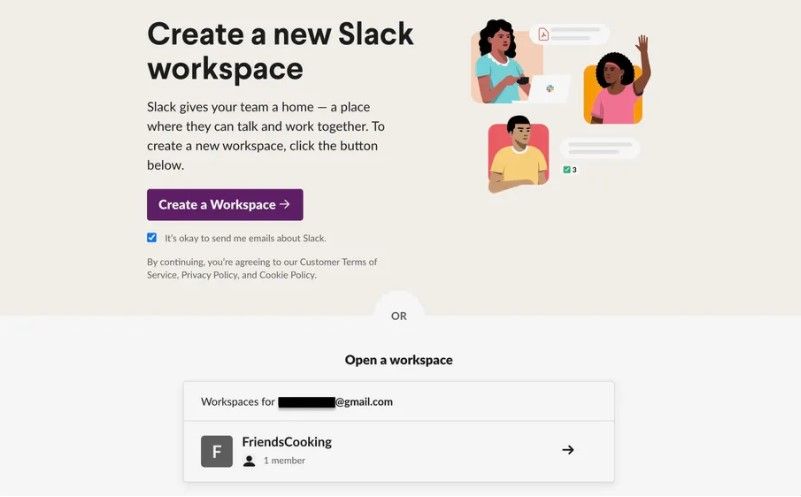
We are going to click on “Create a workspace”. We will be asked for the name of our company or team; actually what it really asks for is the name of the workspace. So we are going to write a descriptive one, but short and we will click on “Next”.

Here it will ask us to write a name for the project we are working on. We add it and click “Next”.
In this new screen, we will have to enter the names and email addresses of those people we want to add and Slack will send them invitations. It is also possible to use an invite link to share. However, if we don’t want to invite anyone yet, we just click “Skip Now”; we can add people later.
Workspaces will be generated in the left sidebar. All channels will be listed here, while “Direct Messages” will list anyone we’ve sent a private message to.
And that would be all. In case we use Slack on a regular basis, the ideal is to download the application that is available for Windows or Macalthough we can also use the app from mobile devices like iOS and android.
The first time we open Slack, it will take us through an automated tour where it will show us some cool features; In this sense, it is worth spending a few minutes to see what each of the options is for.
To get started, we’ll need to choose “Add Teammates” in the sidebar to invite people to our workspace. We can also hover over the word “Channels” on the left hand side until we see the plus sign and then click on that to add a new channel.
How to join an existing workspace
To join a Slack workspace, we will have to have permissions from whoever administers it. An invitation is usually sent to us via email. Although some workplaces allow anyone with an email address from a specific domain to join.
If we have received an invitation by email, we will have to click on “Join now” in the email in question.
To join without an email invitation, we’ll need to enter this site, write our email and click “Continue”. We will have to go to our email to find the message that Slack sent us and obtain the confirmation code to add it to the corresponding spaces.
Slack opens a window that will allow us to create a new workspace and will show us the spaces that we are part of, as well as those that we have been invited to.

