
We just got a new PC, this one works pretty fast. But with the passage of time, installation of programs, accumulation of files, etc. Obviously it is losing this speed, especially those computers that are not so powerful in terms of hardware. That is why it is essential to learn how speed up and optimize a laptop, who are the ones who suffer the most from this kind of problem.
Improve performance, speed up and optimize a laptop step by step
In the following guide, we will look at three foolproof methods so that you can increase performance, speed up and optimize your laptop so that it works wonderfully, in the same way that it worked when you first acquired it.
Disable startup programs
It is very likely that, after a while of use, we will install several programs on our computer. Many of these we use occasionally, but they keep starting when the operating system boots. This makes the computer boot time longer.
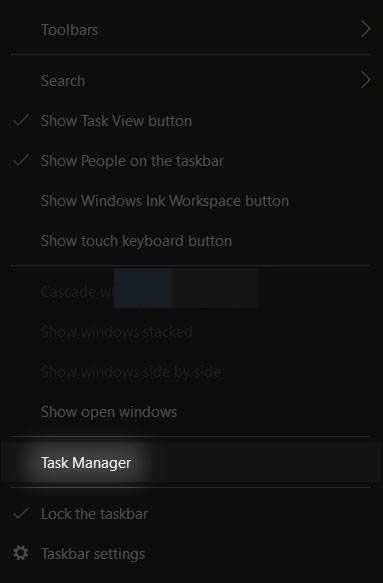
There is a way around it and it is too easy. We will simply have to right click on an empty space on the taskbar and then select “Task Manager”.
Once the Task Manager opens, we will have to click on the bottom left, where it says “More details.”

Next, we will have more options to configure, we will go to the “Start” tab.
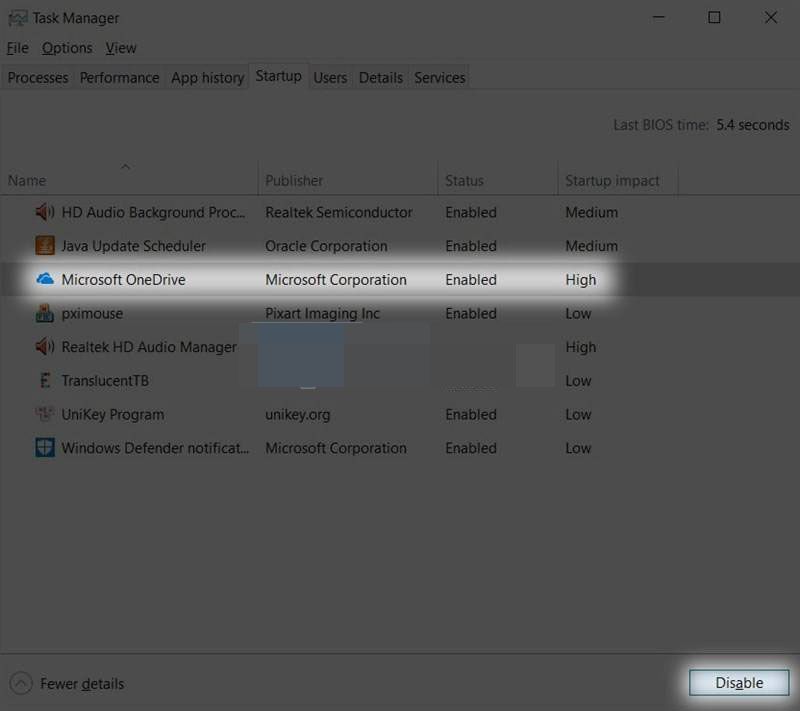
Here we are going to see all the programs that open as soon as we start the computer. What we will do is right click on those that we do not need to open and we will put “Disable”.
Don’t worry that you can rerun them normally. By doing this, we simply prevent them from opening automatically when the operating system starts.
Defragment your hard drive
In this case it is only for mechanical hard drives (HDD) if you have a solid state drive (SSD) you do not need to do this. There are even programs to check the status of an SSD or HDD, something that is highly recommended.
The job of a hard drive is to read and write data from the computer. These elements are placed together for easy access. The problem is when we uninstall and delete something, then empty spaces begin to appear, where it was before, now they are gone.
These spaces make it take longer for the system to find the information, which results in the system becoming slower. When defragmenting the disk, what we do is reorganize all the existing information, eliminating those empty spaces that belonged to the apps or files that we previously deleted.
The only thing to keep in mind is that this process can take a long time. It will depend on the capacity of the disk and the number of applications, programs or files that we have on it.
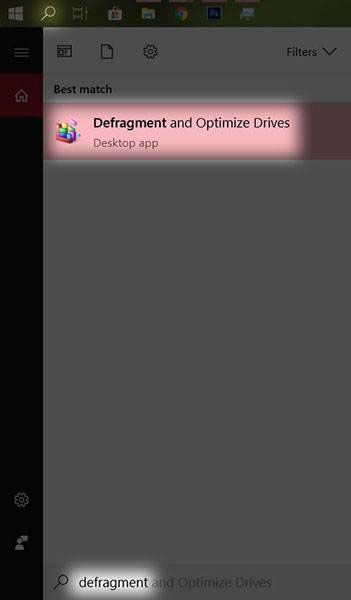
To do so, we simply press the “Windows” key or click “Start” and then type “Defragment” the option we are looking for will appear and press “Enter.”

After this we are going to select all the hard drives that we have and click on “Analyze all” to start the disk defragmentation.
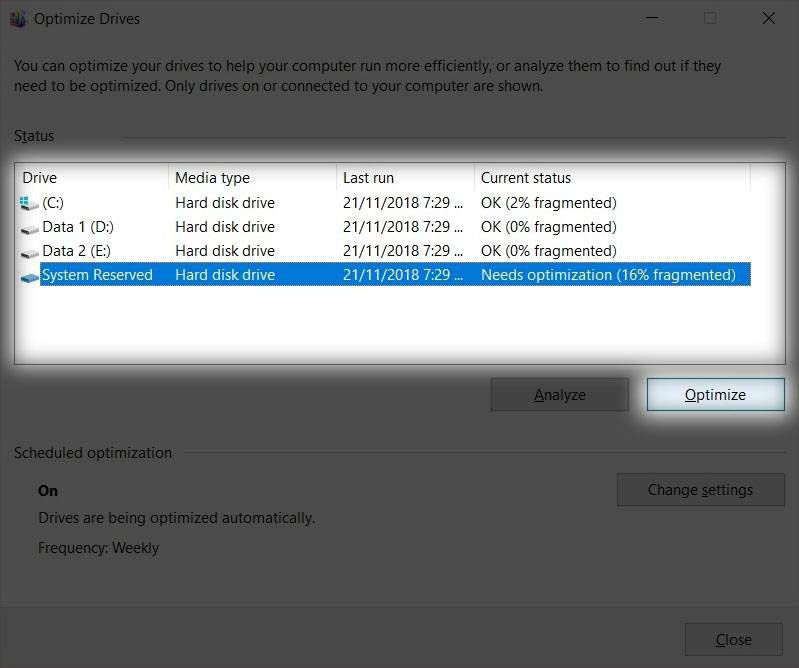
We must bear in mind something, if the word “OK” appears in “Disk status” then we do not need to do anything. In case “Needs optimization” appears then we will have to focus on that disk.
We select the disk that needs optimization and we will have to click on the “Optimize” button found on the right side of “Analyze”. Now we just have to wait for the process to finish.
Increase virtual RAM
When our computer needs more RAM, it will slow down considerably. In case we cannot get more physical RAM, another option is to increase the virtual RAM through the hard disk.

For this we will have to press “Windows” or “Start” and write the word “Advanced system configuration” and then we give “Enter”.

In the “Advanced” tab we will have to go to the “Performance” section and click on the “Settings” button.
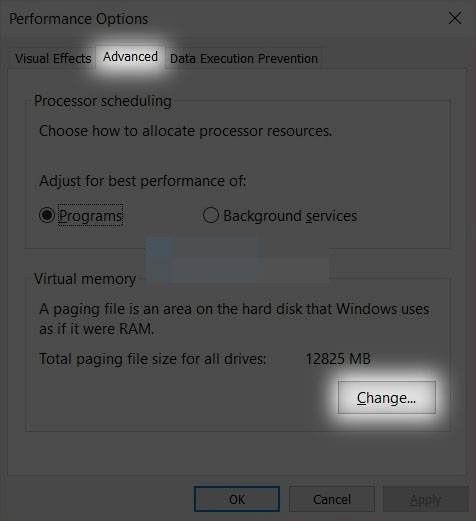
In this new section, we will have to go back to the “Advanced” tab and then we will click on the “Change” button.
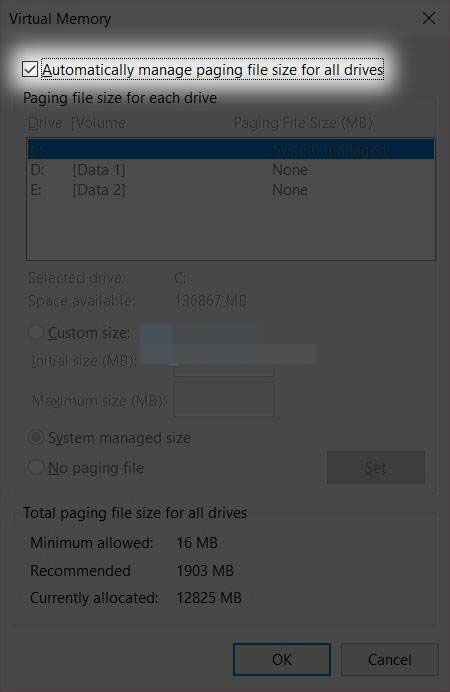
Here we will have to uncheck the option “Automatically manage the paging file size for all units”.
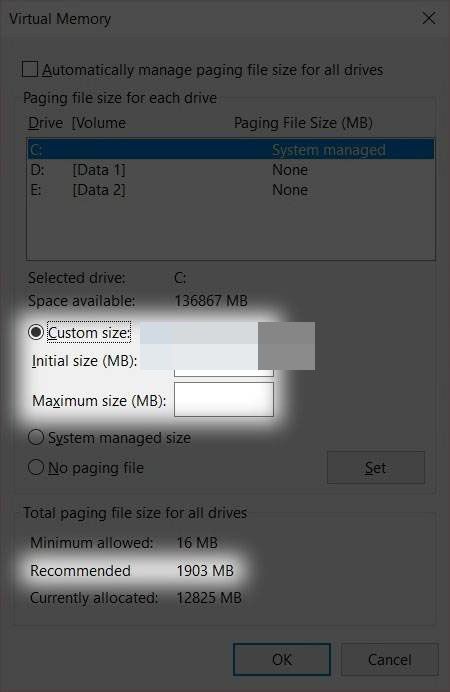
We are enabled to choose a custom size.
- In the box “Initial” is the minimum capacity that we can configure, the parameter 1.5 times the RAM capacity of the computer.
- In the four “Maximum” is the maximum capacity, we can configure up to 3 times the RAM capacity of the current computer, but we do not have to exceed what appears in “Recommended” at the bottom.
Once we finish configuring everything we are going to click on “Set” and then we are going to “OK” at the bottom, finally we are going to have to restart the computer to be able to apply these changes.

