Creating a list with our favorite songs can take us too long, so when there is the possibility of switching from one service to another, the idea of creating these lists again with those songs that we love so much can be frustrating. Fortunately, if you are thinking of pass of Spotify to Youtube musicthere is a way to take our list of reproduction favorite, all that we want.
Advertising

The fact that we want to change the service does not mean that Spotify is of poor quality. Without going too far, it offers interesting “extras” such as the possibility of sending our playlist to a time capsule, which is curious to say the least.
But Spotify is not only available on mobile devices, we can also enjoy our playlists from the web player, something that we can also do from YouTube Music when we transfer the playlists.
Transfer Spotify playlist to YouTube Music
For those people who don’t want to share their Spotify playlists on YouTube account to have them on different sources, there are different third-party apps that can help us achieve the trick.
soundiiz
It is one of the best third-party applications that we can use to convert Spotify playlists to YouTube Music. This gives us the possibility of transferring our data from one platform to another in a matter of a few minutes. Additionally, it is a service that is compatible with almost all music streaming platforms. Before we begin, we must clarify that Soundizz is a web application, so we are going to have to convert our data from a computer.
The first thing we will have to do is enter Soundizz from this link from a computer.
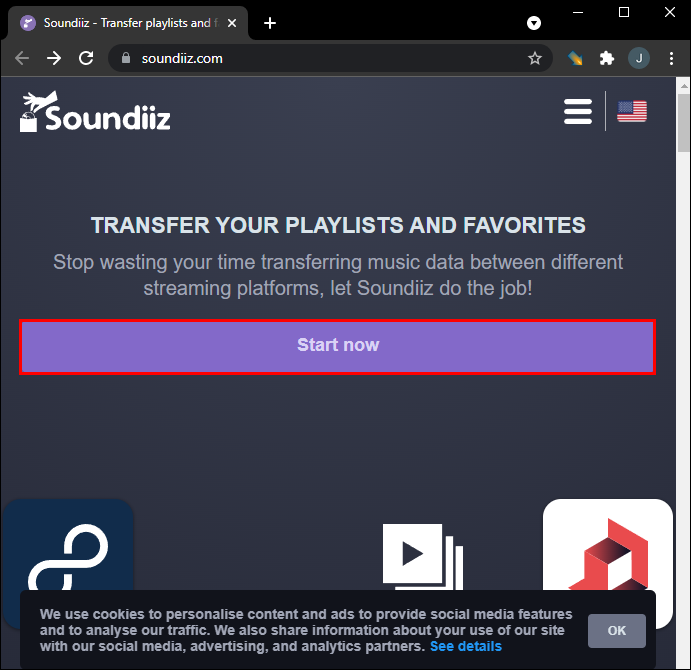
Next, we are going to press the button that says “Start now” which is in the center of the screen.

Here we will have to choose “log in with Spotify”.
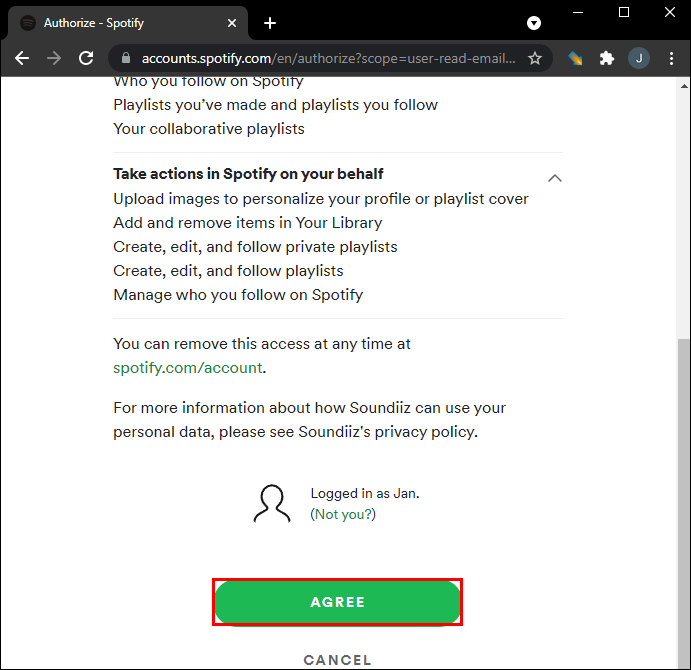
Now we are going to have to click on the “Accept” button, this will allow Soundizz to access the data of our Spotify account, something that is necessary so that it can find our playlists.

Once we return to the application page, we will have to look for the YouTube Music icon from the left sidebar.

We are going to click where it says “Connect” and we will log in to our YouTube Music account.
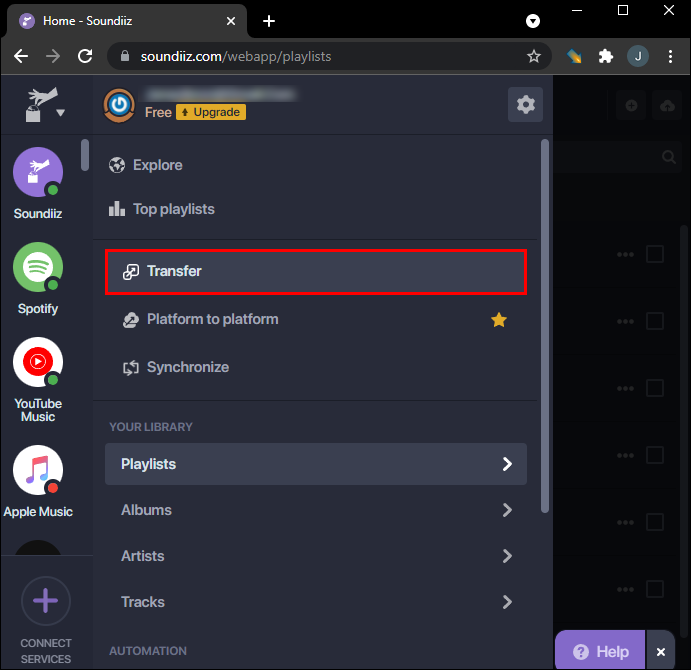
Here we are going to have to select the tab that says “Transfer” which is located on the left sidebar.

We will choose the “Spotify” option.

We are going to click on “Playlists”.

We will choose the playlist that we want to send to YouTube Music and click on “Confirm and continue”.

We are going to proceed to configure the playlists in case we see it necessary, after this we will click on the button that says “Save configuration”.
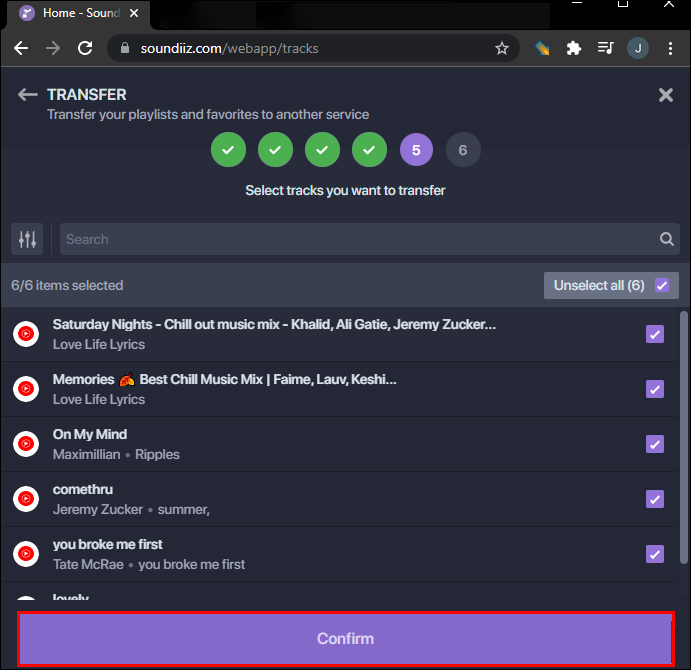
In this step we will have to click on “Confirm”.

Again, we are going to choose “Youtube Music”.
Now the only thing left to do is just wait a few minutes for the playlist we had on Spotify to be transferred to YouTube Music. Additionally, we must mention that Soundizz offers a Premium service that gives us the possibility of converting a large number of playlists in a massive way, including albums, artists and tracks from Spotify.
Also, from YouTube Music, we can transfer our Spotify playlists to Apple Music, Deezer, Napster, SoundCloud, Yandex Music, TIDAL or iHeartRadio, among others.
Playlist Buddy
Second, we have a free web app that allows you to convert playlists for transfer to another platform. The only problem with Playlist Buddy is that it only provides the ability to convert only Spotify playlists to YouTube Music, other streaming platforms are not taken into consideration. But, in this case it works for us and at least it is free.
So we started by entering the official Playlist Buddy website from here.
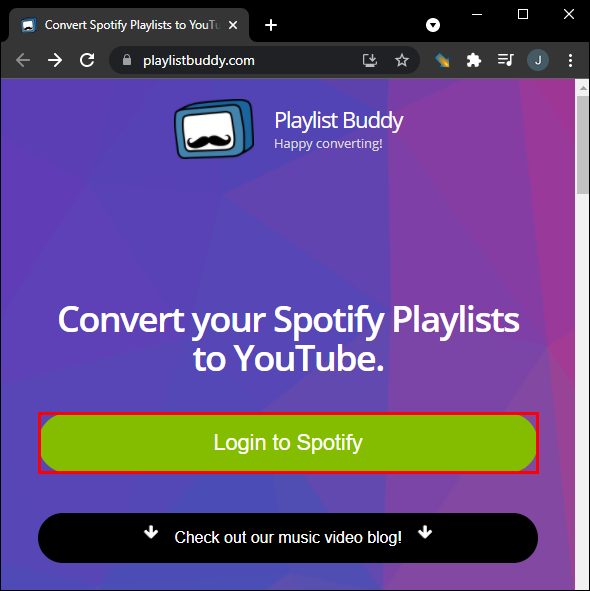
Once we are on the web, we are going to start the process by clicking on “Login to Spotify”.
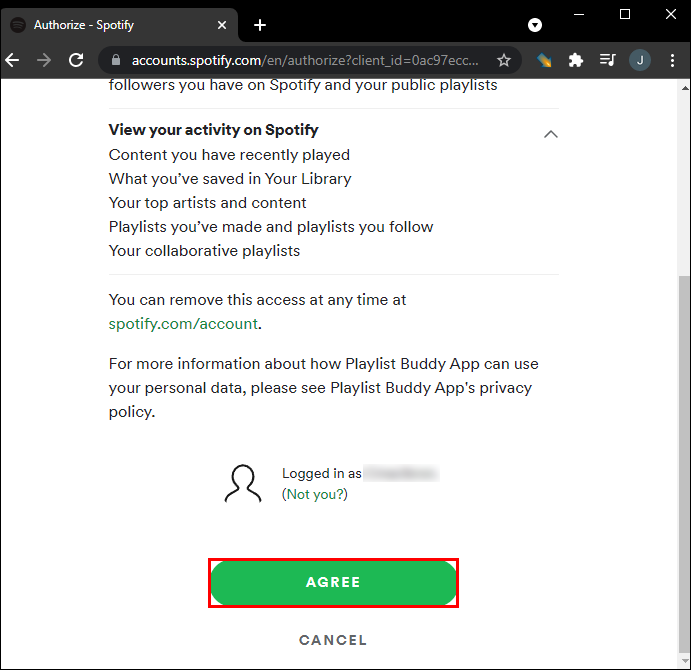
Next, we will click on the “Accept” button, which is necessary so that Playlist Buddy can access our account data and find the playlists that we have saved.

We click on the button that says “Log in to YouTube” on the right side.

We will choose the Spotify playlist that we are going to transfer from the left sidebar.
Advertising


Here we will click on the “Convert playlist” button on the right side.
And that would be all. Depending on the number of playlists we have, it may take a while to finish the process. The app allows a maximum of 250 songs per playlist. Although we must emphasize that it is a completely free web application, so it becomes the preferred option for many.
tunemymusic
In the case of TunemyMusic, we find that it supports several music streaming applications such as: TIDAL, Deezer, Apple Music, Amazon Music, iTunes, YouTube Music and Spotify, among others. Here we can convert up to 500 tracks for free. Although a premium service is also offered that removes that limitation. Although for most people, 500 songs is more than enough.
We open our favorite web browser and go to the website Tunemy Music official.

Once we are on the web, we are going to click on “Let’s start” that is in the middle of the screen.
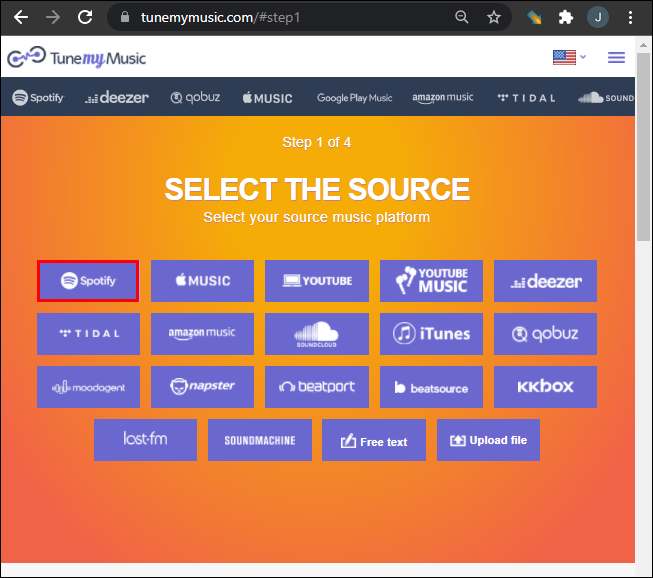
We will see that all the available services appear, the one we are going to choose is “Spotify”.
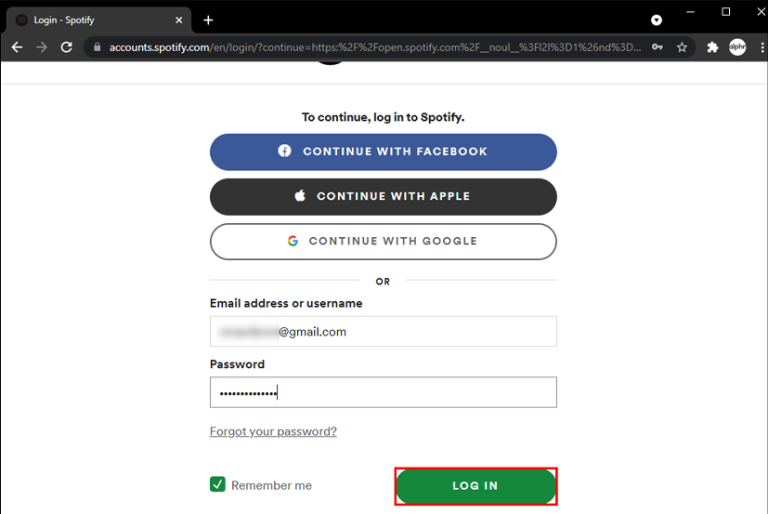
Here it asks us to log in to Spotify by choosing the “Continue with Facebook”, “Continue with Apple” or “Continue with Google” button, or we can log in with Spotify credentials.
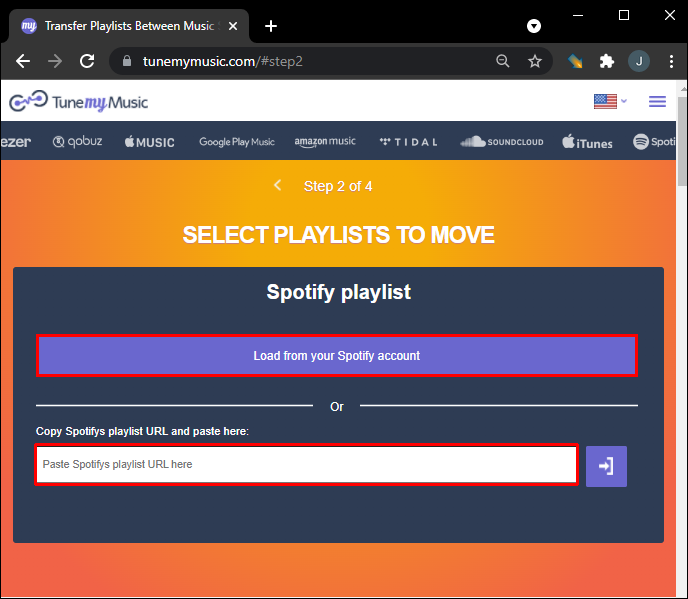
It’s time to select a playlist on Spotify, so let’s click on “Upload from your Spotify account” to make it easier. Additionally, we can copy the URL of the list in the box at the bottom.

Now we are going to click on “Next: select destination” in the new window.

Here we will choose the service where we want to send the playlist, in this case it will be “Youtube Music”.

We click on “Start moving my music”.
But TunemyMusic not only offers the possibility of transferring playlists from one service to another, it also allows you to always keep both playlists in both services in sync. Additionally, we can use it to share music, upload songs and make backup copies of everything we listen to.
SongShift for iOS
In this case we are talking about an application that only exists for iPhone. So for all the Apple users who want to send their Spotify playlists to YouTube Music, SongShift is an excellent app.

We start by downloading the application from the App Store following this link.

Once it is installed, we will start it and click on the button that says “Connect your music”. We will look for Spotify in the “Music services” section and we will choose the “Connect” option. Here we will be asked to log in with the “Spotify” account.

Once we do, we are going to click on the “+” shaped icon.

We are going to choose “New configurations” and here we will click on “Configuration source”.
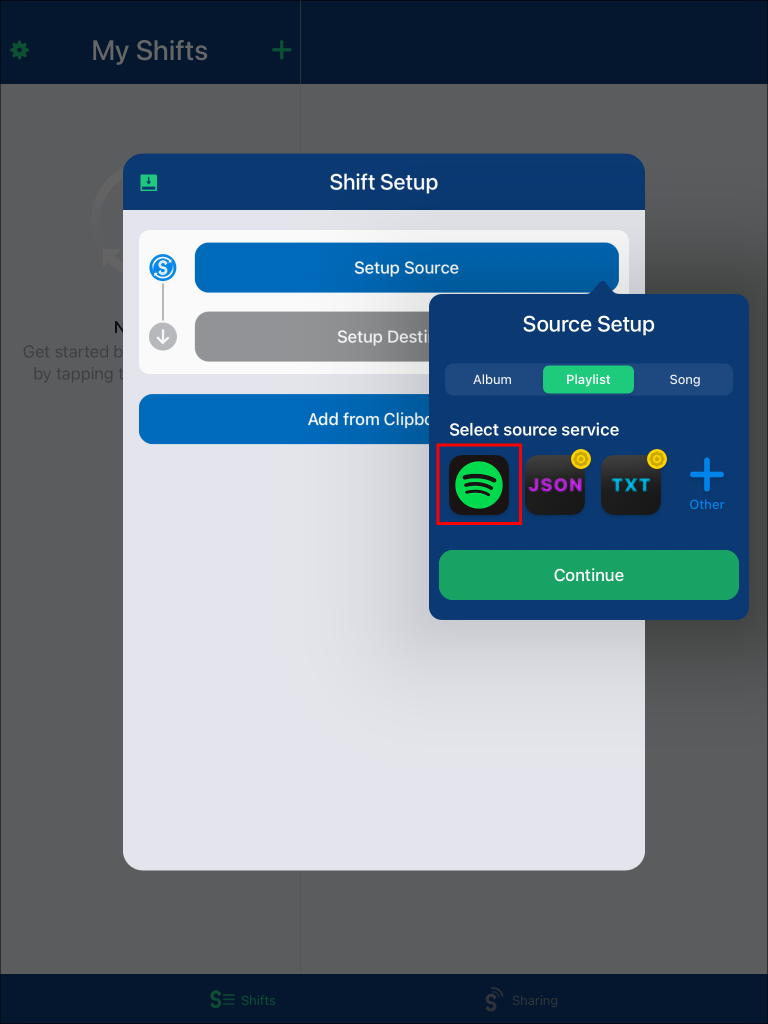
We select “Spotify” as the service where we have the playlists.

In “Select media type”, we will press “Playlist”.

In this section we will look for the playlist that we want to transfer.
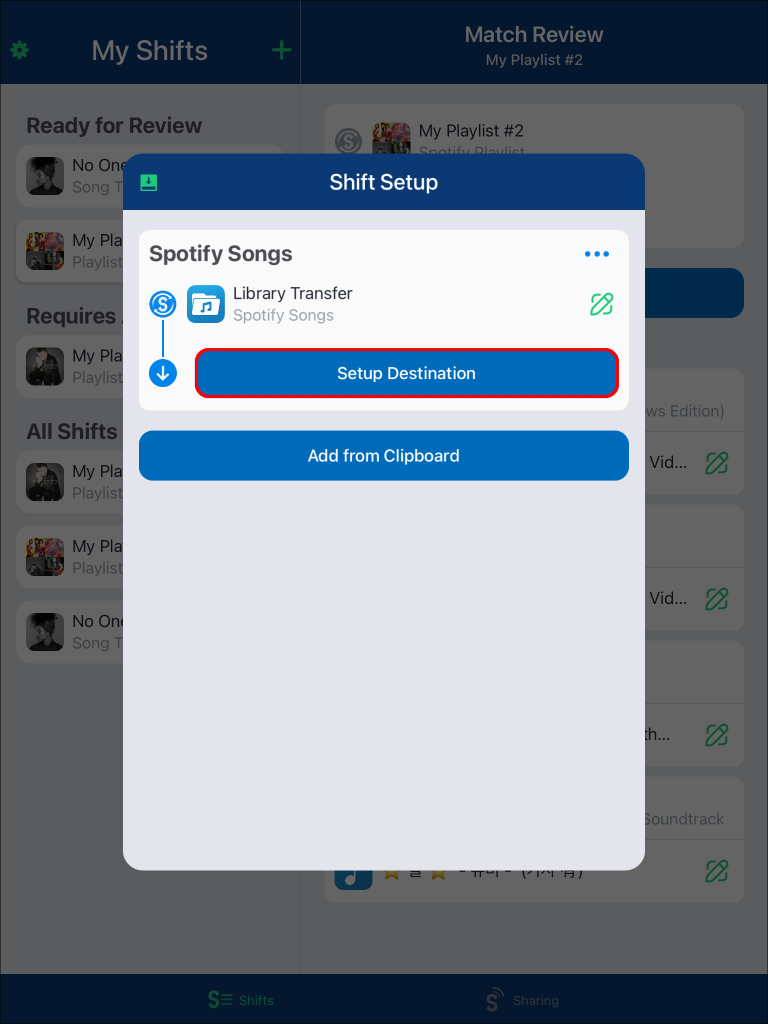
Here we are going to choose “Set destination”.

We choose “Youtube Music” and then “Existing playlist” or “New playlist in the Select destination type section.

To finish, we are going to click on the “I finished” button.
This is when we will have to wait a few minutes for the playlist to be transferred from Spotify to YouTube Music, after which we will be able to listen to all the songs from the Google service.
Therefore, instead of having to create all the Spotify playlists on another service, we can transfer the ones that already exist on the first one to any service of our choice.

