We are enjoying our PC, perhaps watching something on Netflix, surfing the internet or playing an online multiplayer game; Suddenly the blue screen of death appears. What do we do? It’s time to learn how to use an archive from minidump to fix BSOD of Windows, we will explain it to you step by step.
Why would we need a minidump file to fix Windows BSOD?
In previous versions of the operating system, the BSOD showed us several error codes that were not very useful to say. However, starting with Windows 10, it gives us a stop code that can be typed and investigated; even a QR code that we can use with our mobile device. Although this only sends us to the Microsoft website and gives us some error codes.
What is really useful, is to configure Windows to save a file that has a lot of information about the BSOD and how we can fix the error. This is called a minidump file.
Configure Windows to save a minidump file
By default, the option to create a minidump file is not activated, so we will have to enable it. Doing it is a very positive thing, even if we don’t have a problem; otherwise, when we get it, we won’t have a record either.
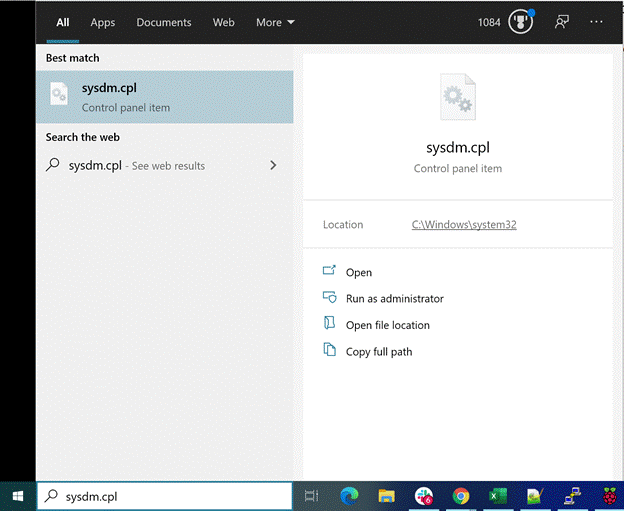
We are going to have to navigate to the System Properties Control Panel. For this we can press “Start” and write “sysdm.cpl”. Alternatively, we can go to Settings > System > About and then click on Advanced system settings.

Once we are here, we are going to have to go to the “Advanced” tab.

We will have to enable the following options: Write an event to the system log, Restart automatically, Write debugging information > Small memory dump (256kb).
With this feature enabled, when Windows crashes, the minidump file will be created in “%SystemRoot%Minidump”. It is also feasible to change this location if we wish. Although we must bear in mind that most programs to solve registry problems look for this location, so we recommend not doing it.
How to read the minidump
Despite having the minidump configured, we are going to have to download an application that is able to read the file and provide useful information. For this we recommend using the tool called BlueScreenView; we simply go to the official website and choose the 32 or 64 bit version, depending on the architecture of our PC.

After downloading and extracting the tool, we will have to double click on “BlueScreenView” to start. The app will look for the default minidump location and examine all the logs that have been created. If we’ve had some issues or haven’t removed old minidumps, we’ll need to pay attention to the dates associated with the logs.
Understanding minidump files
The tool will provide us with a series of data that, at first, may seem somewhat complicated to understand. However, the format is quite simple and will highlight important information for us.
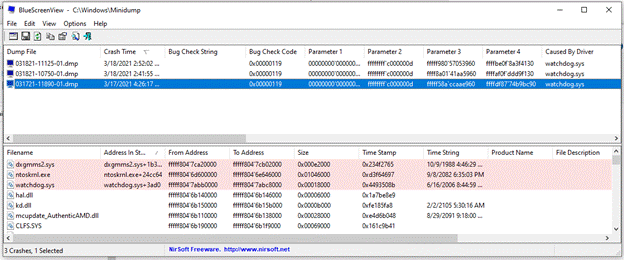
Any files or apps that caused the problem will be highlighted in red, giving us an idea of where we can start digging. If we see the screenshot that accompanies this article, we can see that a problem was detected in three files: dxgmms2.sys, ntoskrnl.exe and watchdog.sys.
On the top panel, we’re going to see in the right column that there’s a section that tells us what caused the crash. In this image, we can see that watchdog.sys caused it. It’s a great starting point, as we can now search the internet for what a problem might be and how to fix it.
If we are clear that watchdog.sys caused the problem, what happens to the other two files? They’re affected files, we’re also going to have to find out what those are, so we’ll have to examine them. If we check through the search engine (Google or Bing) we can see that dxgmms2.sys is related to DirectX drivers, while ntoskrnl.exe is the operating system kernel executable, which makes everything work.
Using this view of the Windows minidump file, we can conclude that the BSOD was possibly caused by an issue related to the graphics driver, which is often fixed by installing the latest version or reinstalling the current version.

