On Microsoft Forms can create more than just forms, surveys and one-dimensional questionnaires. With Branching logic, you can tailor the respondent’s experience and get the exact type of comments or responses you are looking for.
When you use branching, you direct respondents to other questions or sections based on the answer they give to a question. For example, let’s say you have a survey about the products you sell. You can direct respondents who bought clothes to a different section than those who bought electronics.
You may have seen this yourself. A survey may ask you if you are willing to answer a few more questions. If you answer “Yes”, you will see those additional questions. But if you answer “No”, the survey is over.
Here we will show you how to use branching logic in Microsoft Forms for your own forms, surveys or questionnaires.
How to Add Branches to a Question in Microsoft Word
Visited Microsoft Forms, log in and open your form. Before adding the branch, you must have configured the additional sections or questions that you will send respondents to. Otherwise, there won’t be anywhere to branch out, right?
For example, let’s fork a simple Yes / No question to find out whether or not respondents received customer support. If they answer yes, we want them to answer a feedback question about their experience. If they answer No, we will direct them to the next section of the survey.
- Go to the question where you want to add the branching logic.
- Click on More settings for this questiona (three dots) in the lower right and select Add branching.
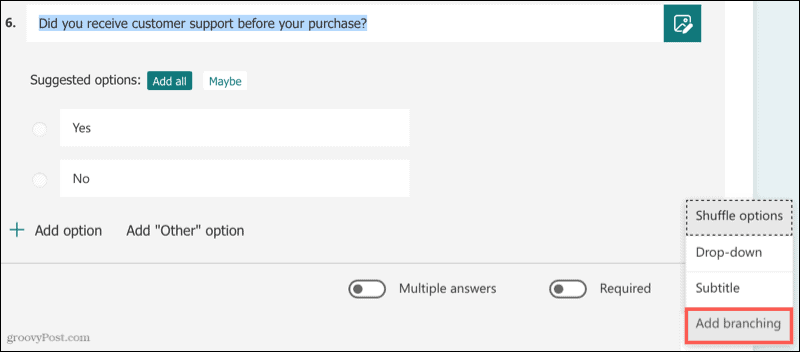
- Next to each answer, select where you want the respondent to go if they choose that answer. You can choose another question in that section, a different section or question, or the end of the form.
- If you want, you can stay on the branching screen to configure additional logic. If you are done, click the arrow Behind at the top left to return to your form.
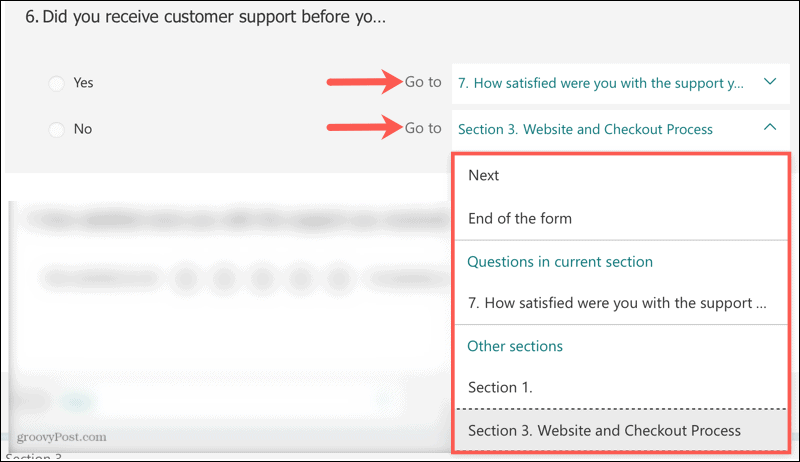
You can then preview your form and select the different answers to the question to ensure that you are targeting respondents the way you intend.
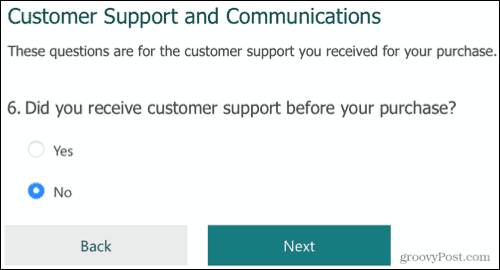
Using our example, you can see that if the respondent answers Yes, the additional question appears.
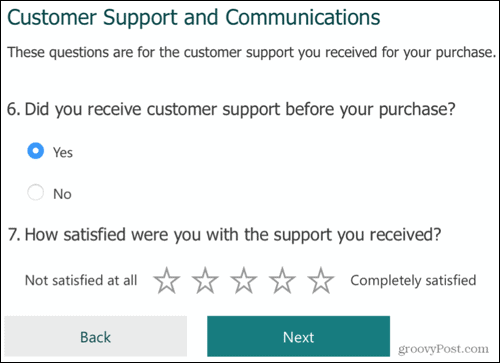
If they answer “No”, they simply see the Next button to go to the next section.
How to Add Branches to a Section in Microsoft Forms
Another way to use branching in Microsoft Forms is with a section. This is a good way to skip a group of questions that do not apply to the respondent. So once they complete a section, you can direct them to another section, question, or to the bottom of the form.
- Go to the section where you want to add the branching logic.
- Click on More settings for section (three dots) in the upper right and select Add branching.

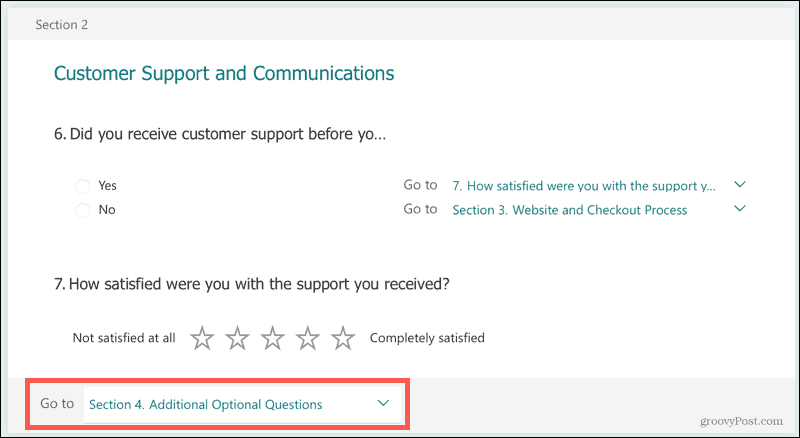
- On the branching screen, click the drop-down box Go to, located at the bottom of the section. Choose where you want respondents to go.
- When done, click the arrow Behind to return to your form.

In this example, we will send respondents who complete the Customer Service section to another section.
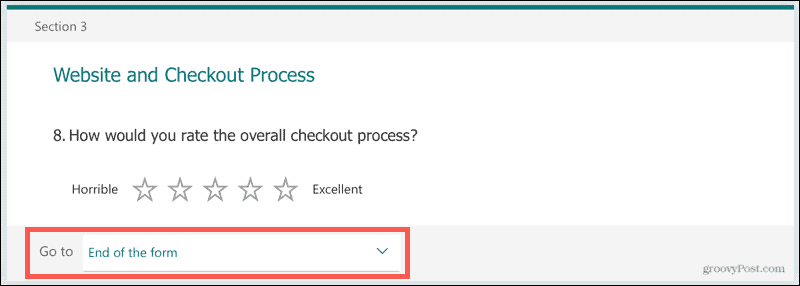
And we will direct respondents to complete the website and checkout process at the bottom of the form.
Note on Branching Logic in Microsoft Forms
When you add branching logic, you must send the respondent to a next location, not a previous one. As Microsoft explains:
Attempting to skip to a previous question, such as question 4 going to question 2, will break your respondent’s experience by skipping questions 5-7 and taking them directly to the bottom of the form with the Submit button. To avoid this, just branch to one consecutive question.
Fork in Microsoft Forms
Forking not only gives you a way to personalize each respondent’s experience, it helps you get the exact data, comments, or responses you need.
