
It often happens that HP Support Assistant can not create a spot of restoration of the system before installing or updating any HP-related drivers. We know that keeping ourselves updated is a fundamental factor in terms of security, leaving aside the new features that different updates generally bring.
Why can’t HP Support Assistant create a system restore point?
In case we are unable to create a system restore point, it may be due to a few factors. The most common would be lack of disk space, in other cases corrupt system files or lack of permissions. It can even happen if the system protection is disabled or we have third-party antivirus problems.
Solution: HP Support Assistant cannot create system restore point
Free up space with Disk Cleanup

Although it is not the most optimal way, we can try Disk Cleanup to verify if we do not have unnecessary files taking up too much storage space.
- Click Start, type Disk Cleanup, and press Enter.
- Here we will have to choose the files that we want to delete.
- It will ask us to confirm our actions.
- We will click on Delete files to continue.
- If we click on Clean system files, we will see more options.
- Thanks to this option, we can delete all system restore points, except for the most recent ones, Windows Update cleaning, old OS installations, etc.
Enable system protection
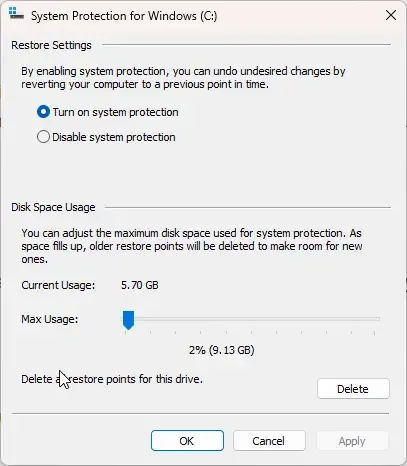
System protection is a considerably useful feature that fixes a lot of issues regarding Windows like installing software, drivers, modifying things in the system. In the event that this feature is disabled, Windows may encounter some problems creating a restore point.
- Press Start, type Control Panel and hit Enter.
- We look for Recovery and press Enter again.
- We click on Configure system restoration and choose Configure.
- We will mark the Activate system protection option and click OK to save the changes.
Repair, reset, or reinstall HP Support Assistant
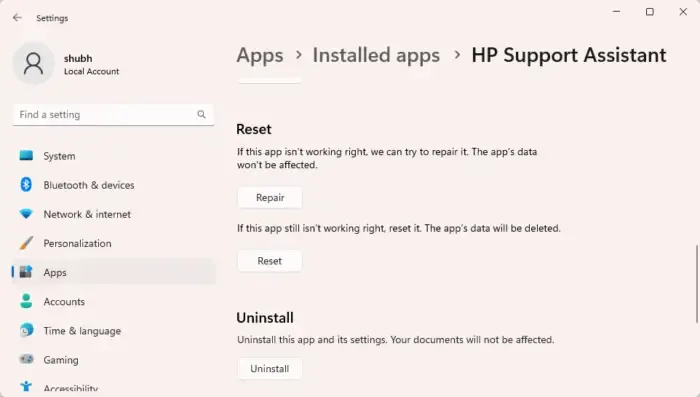
Another alternative would be to repair or reset HP Support Assistant, in case these options do not work, there will be no choice but to reinstall it.
- We press Windows + i to open Settings.
- We go to Applications> Installed applications> HP Support Assistant.
- We scroll down and click on Repair / Reset.
We will follow the instructions on the screen and once the process is over, we will have to check if the problem still occurs.
Use clean boot state
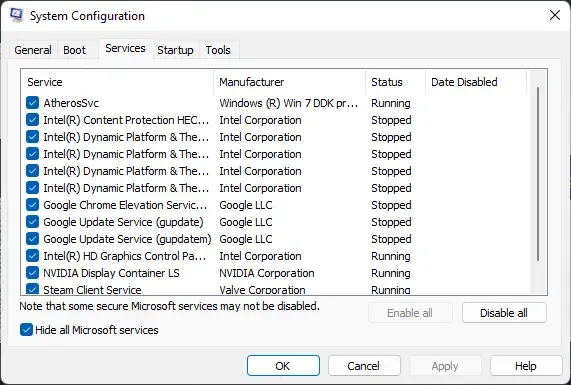
On many occasions, third-party applications installed on the computer can cause HP Support Assistant to not be able to create a restore point. We will have to perform a clean start on our computer to prevent third-party applications from running and check if this is the cause of the problem.
- We go to Start and look for System Settings.
- From here, we go to General, we will mark the option Selective startup and Load system services.
- Then we go to the Services tab and activate the Hide all Microsoft services option.
- Next, we click on Disable all in the lower right corner, press Apply > OK and that’s it.
Using SFC and DISM
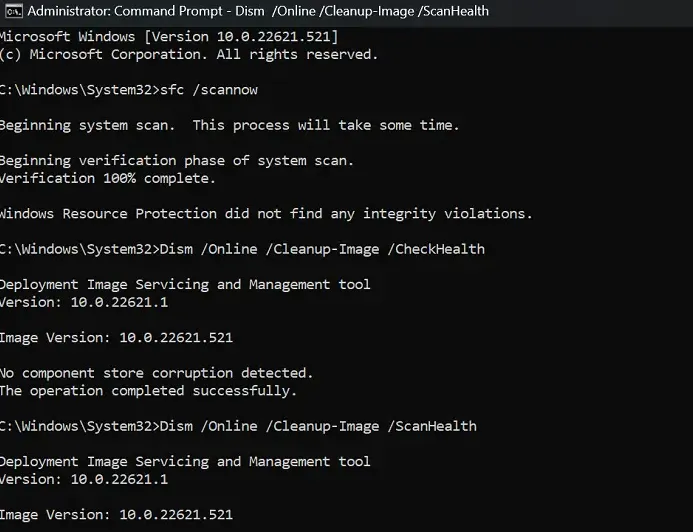
It is also possible that we come across this problem due to damaged Windows system files, etc. Running SFC and DISM to scan and repair them is a good alternative to fix it.
The first thing we will do is press the Windows key, type CMD and proceed to open Command Prompt as administrator by clicking Run as administrator in the right panel.
Next, we will have to type the following commands, one by one and press Enter in the window that opens:
For CFS:
sfc /scannow
For DISM:
DISM /Online /Cleanup-Image /CheckHealth
DISM /Online /Cleanup-Image /ScanHealth
DISM /Online /Cleanup-Image /RestoreHealth
Once the process is complete, we are going to have to restart the computer and check if the problem is resolved.

