
- You may have downloaded some extension accounts that you would like to take wherever you go
- Downloading the extensions in a CRX file is ideal to be able to analyze or share them
- What are the ways to store plugins, without or with other extensions?
If you have been using Chrome as your main browser for many years, which is likely, you may have downloaded some extensions that you would like to take with you wherever you go. And not only is it possible to save Chrome extensions as a CRX file, but also recommended. What are the steps to follow to do it?
Storing these plugins is interesting if you want to send them to someone else, or analyze how they work. In fact, extensions are one of the reasons why users prefer Chrome over other browsers. You can easily add them to this Google program and customize your web browsing experience.
Sometimes, you may want to download the extensions to view them in a CRX file. It’s not difficult at all. You just have to know what is the procedure that allows you to keep them like this, regardless of the reason.
The good news is that there are two ways to save Chrome extensions as a CRX file.and although the one that was normally used can be a bit complicated, the second one is suitable even for beginners.
Package Chrome extensions manually
It is an older process and the one that for years served to package Chrome extensions manually. If your idea is not to download more extensions, you should try your luck with the following detailed tutorial.
- Open the Google Chrome browser on your PC as usual and click on the menu icon, on the top right
- Click on More tools and select Extensions from the popup menu
- Once in that section, activate Developer Mode in the upper right corner
- Scroll to the bottom and find the extension you want to pack, noting its unique ID
- With the ID noted down, press Win + E and navigate to the “C:UsersUsername” location in File Explorer
- Find the AppData folder, which is hidden by default, by making it appear from the three dots located at the top of the window, by going to Options, View, Show files, folders and drives…
- Double click on the AppData folder in File Explorer
- Now go to Local, Google, Chrome, User Data, Default, Extensions
- You will see all the extensions you have installed in Chrome, each listed with its own ID
- Find the ID you noted earlier and click on it
- Access the folder inside by double-clicking on it
- In the address bar, tap the down arrow icon to view your route
- Select it, press the right button and then select Copy
- On the Extensions page, click the Package Extension button
- A pop-up window will open, in which you need to paste the link, omitting the Private Key field
- Another pop-up window will inform you that the extension has been converted to the new file format.
- If you go back into the extension folder, you will notice that it is a CRX type file
Save as CRX file with a plugin
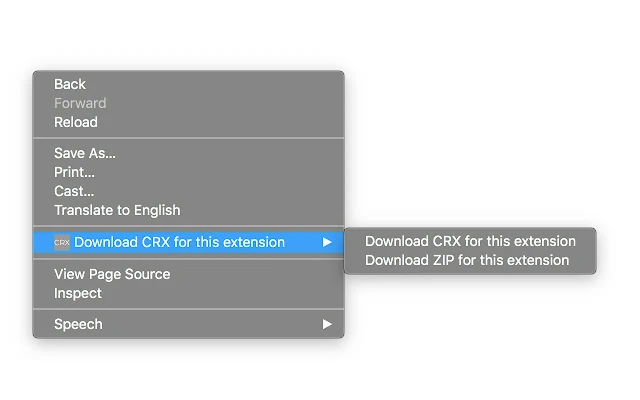
If what has been previously explained seems too cumbersome and you think it is better to find another alternative, let us tell you that there is a plugin that has been specially designed to get a CRX file from chrome extensions without having to perform the steps that we discussed. It is CRX Extractor/Downloader.
- Download the CRX Extractor/Downloader extension in Chrome from this link
- In the Chrome Web Store, navigate to the extension you want to convert to CRX
- Click the Browser Extension button next to the address bar
- Open CRX Extractor/Downloader and wait for the new window to appear
- In it you will see three options, but click on Download as CRX
The CRX file should automatically be available in your Downloads folder. Much easier, right?
Have you been able to save Chrome extensions as a CRX file? With which of the tricks have you done it?

