
This post shows students and new users the steps to add or remove the network location when using Windows 11 to create shortcuts to network services. A network location is simply a direct access to network services such as a website or an FTP site.
Adding a network location or place allows you to access FTP, sFTP, Windows file shares, and some HTTP servers directly in Windows, without having to use an FTP client. Unlike a mapped network drive, a network location has no drive or attached label, can point to external or internal resources, and is easy to configure.
The network location is very useful for people connecting to sFTP or FTP servers. It allows them to simply connect from Windows File Explorer without the need for an FTP client.
The new Windows 11, when it is released generally for everyone, will come with many new features and improvements that will work great for some while adding some learning challenges for others. Some things and settings have changed so much that people will have to learn new ways of working and managing Windows 11.
Although Windows 11 is new, the network location is not. In fact, it was first introduced in Windows XP.
To start adding or removing network locations in Windows 11, follow the steps below:
How to add a network location in Windows 11
As mentioned above, the network location is simply a direct access to network resources such as FTP, sFTP, and other resources.
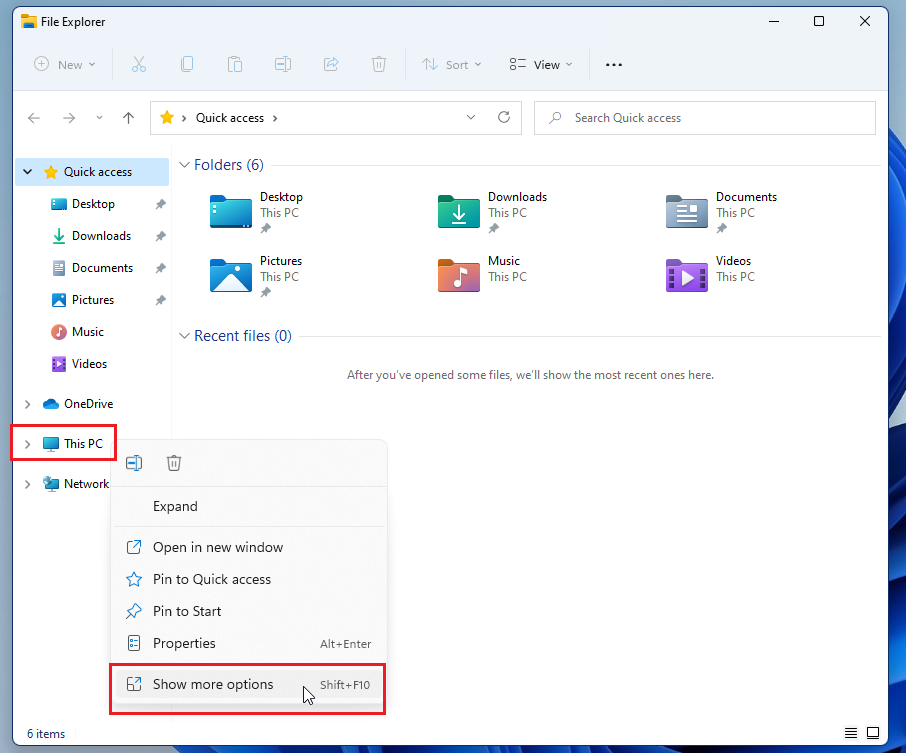
To create a network location in Windows 11, just open File Explorer. There, right-click, click on This PC and select the Show more option
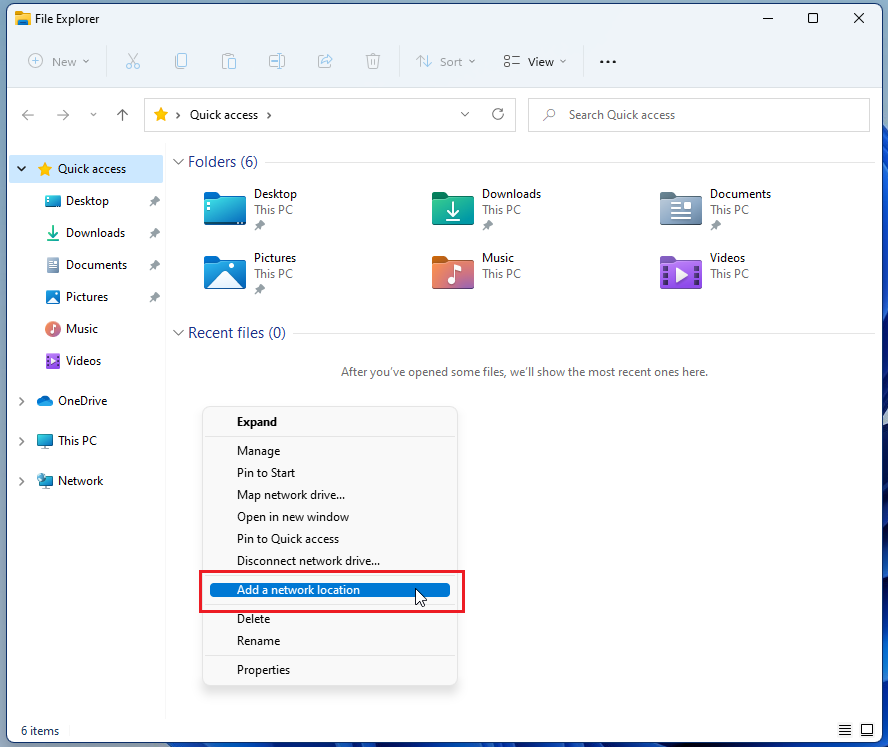
In the next context menu, select Add a network location as highlighted below.
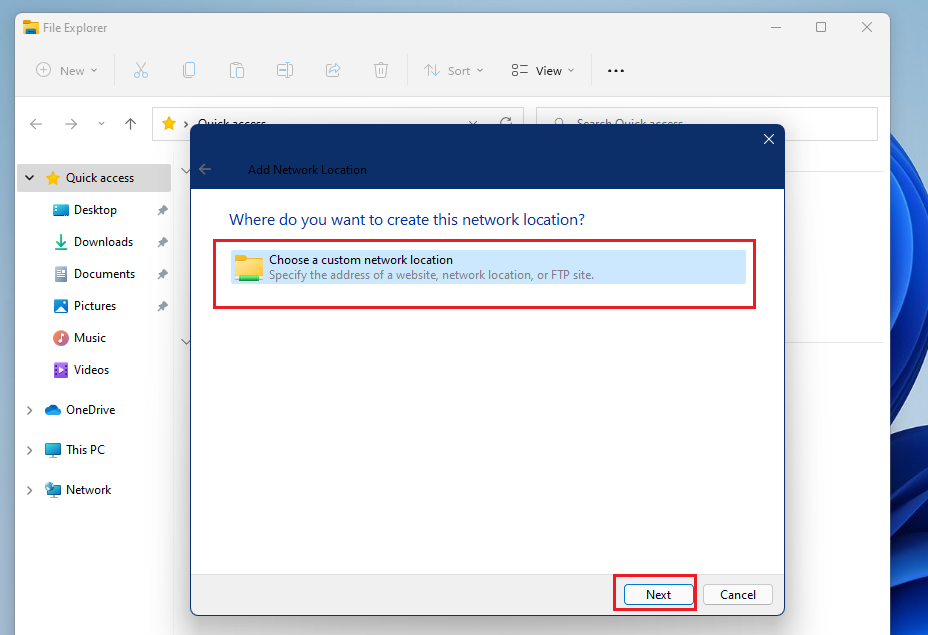
A welcome page should appear. There, click Next to start adding a network location.

Then click on the folder that says Choose a custom network location. Then click Next to continue.
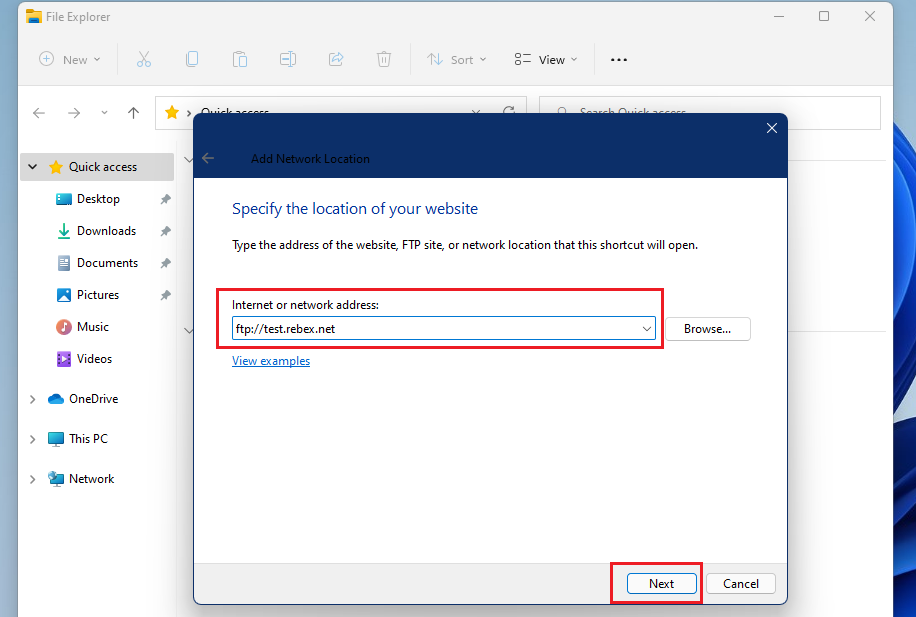
For this post, we will add an sFTP host as our network location.
Next, enter the network resource that you want to add.
- For FTP: ftp://example.com
- For actions: server share resource
- For websites: http://example.com
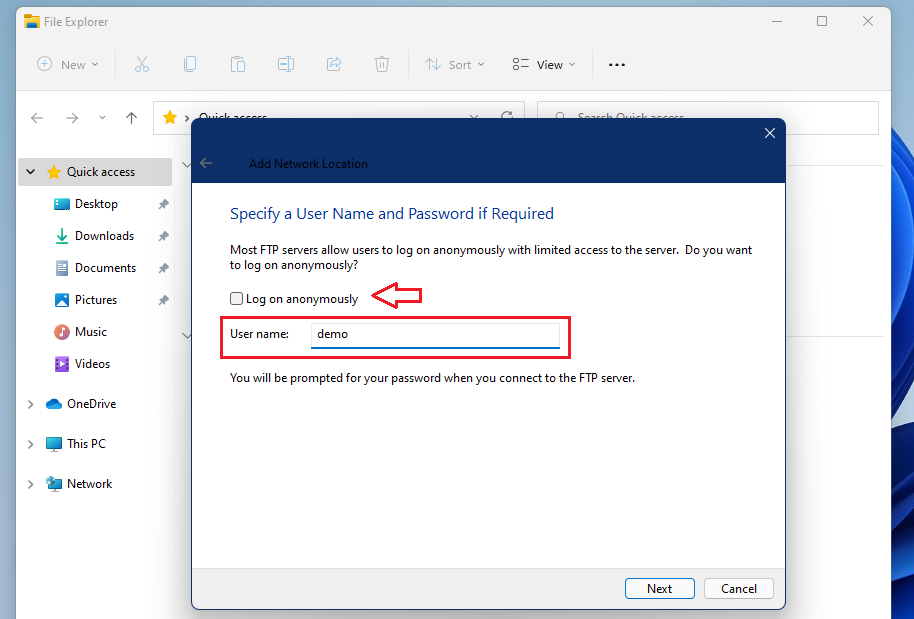
On the next screen, choose Sign in anonymously if the host allows anonymous access. Otherwise, enter the username provided to log in.
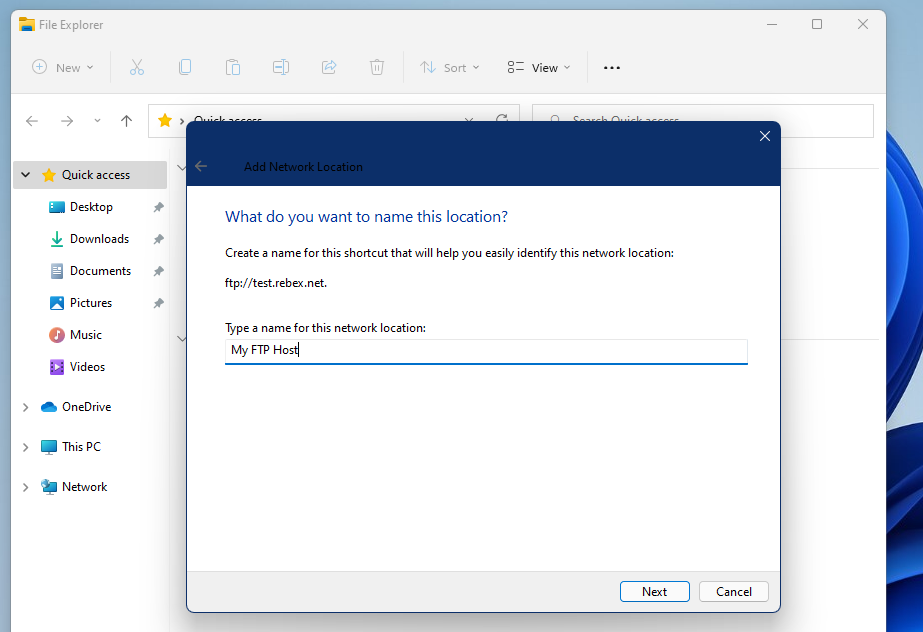
Then enter a name for the network location that you are adding.
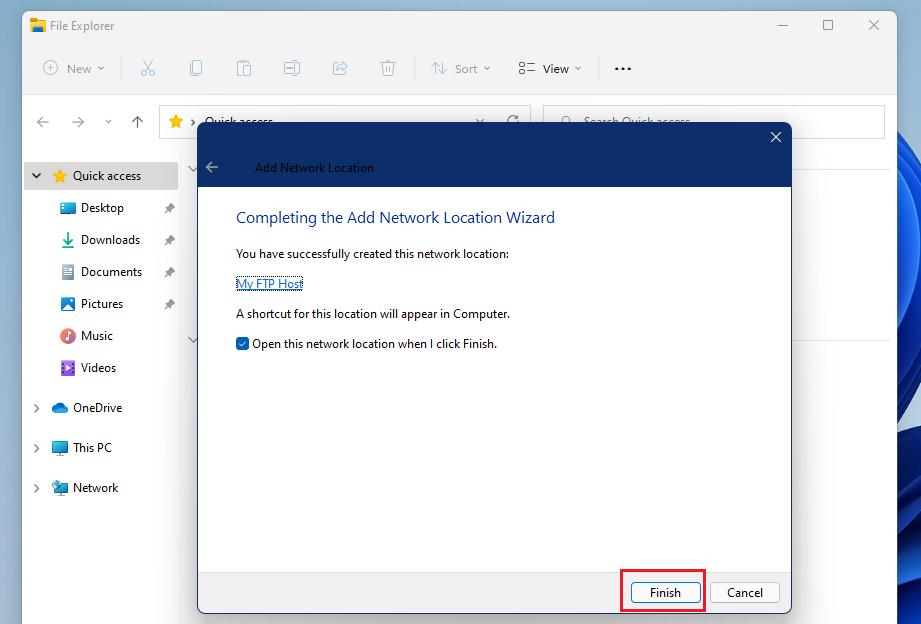
Finally, click Finish to complete the network location wizard.
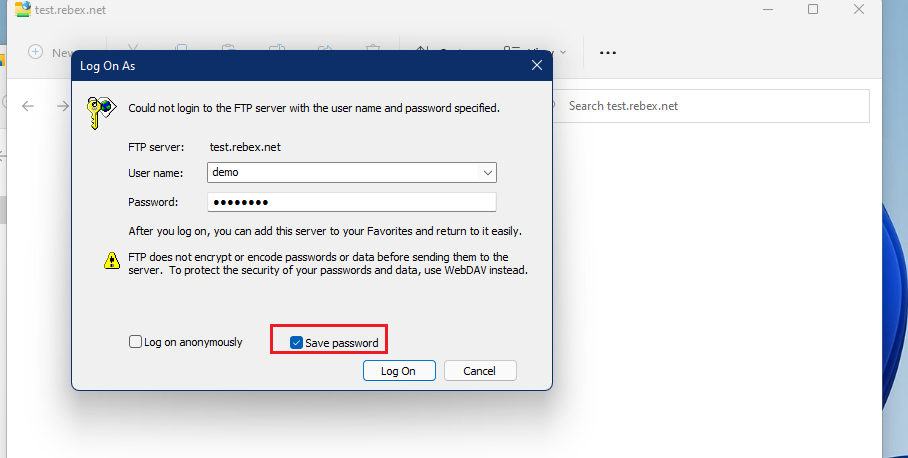
After setting the location, a pop-up window will appear to log into the server. You can also save the password. Enter the username and password and click the To access button.
After successfully logging in, you should see the content of the sFTP host.
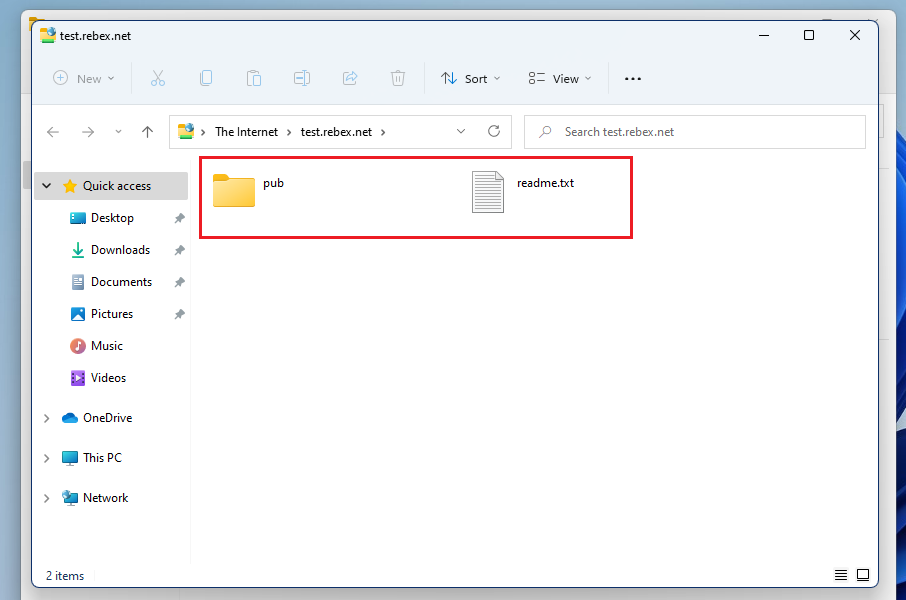
In File Explorer, a new folder in Network location it should appear with the name of the host you just added.
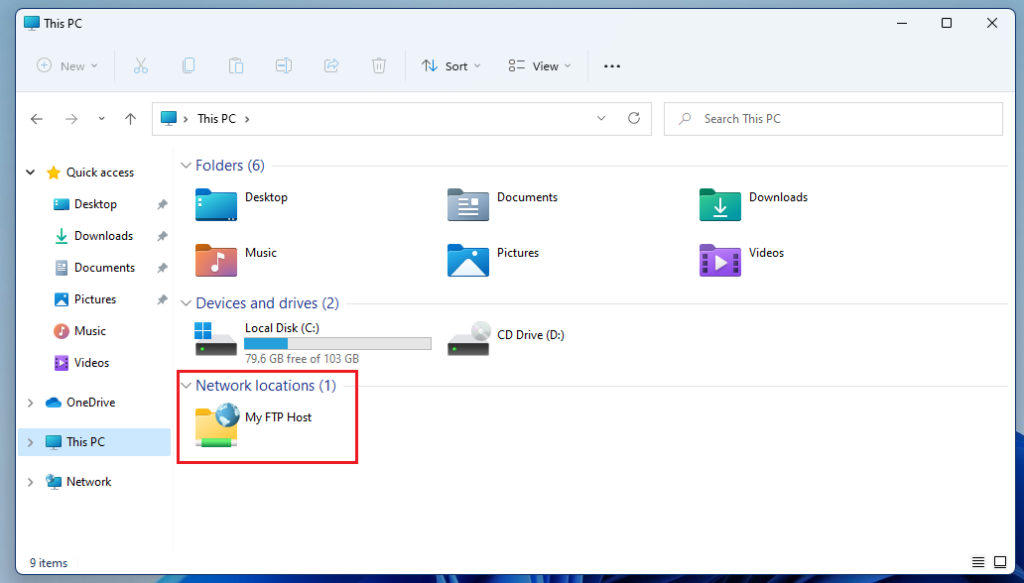
The next time you want to connect, just open the folder and log in. You can use File Explorer to copy and move things to and from the sFTP host.
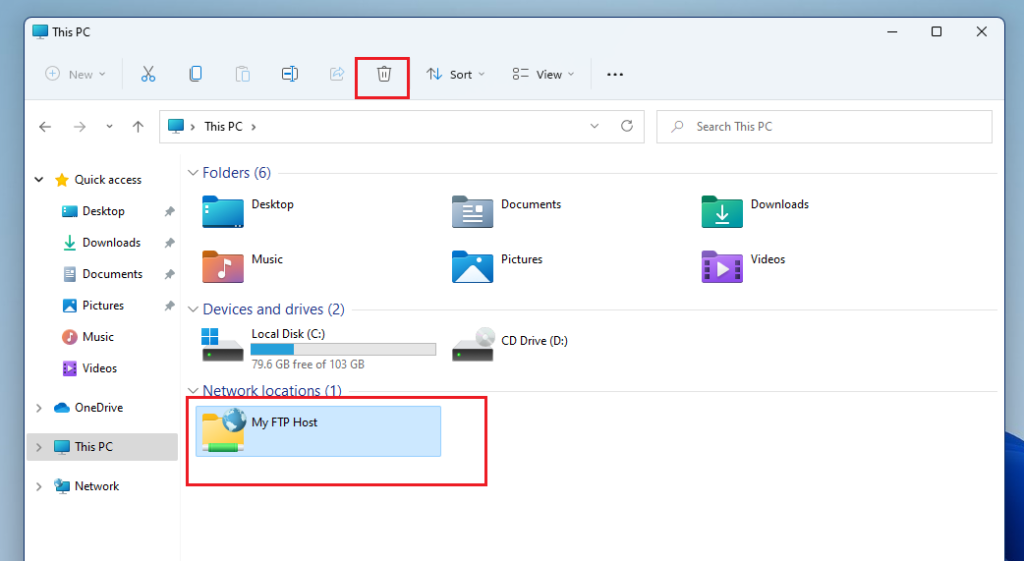
How to delete network location in Windows 11
If you change your mind about the network location listed above, just delete the location. Select the network location folder and click Delete on the toolbar menu. Or right-click the location folder, select Show more options, then select Delete.
You should do that!
Conclusion:
In this tutorial we have seen how to configure a network location in Windows 11. If you find any errors above, use the comment form below to report.


