
This post shows students and new users how to configure Windows 11 to automatically disable Wi-Fi when Ethernet (wired) connection is enabled. When you connect an ethernet cable to your computer that is already connected to the Wi-Fi network, Windows will automatically use the ethernet connection.
However, the Wi-Fi connection will not turn off automatically. You will have to manually turn off or disable Wi-Fi to save power. Most Wi-Fi adapters have a feature that can automatically turn off the Wi-Fi connection when an Ethernet connection is activated.
When the Ethernet or wired connection is disabled, the adapter is automatically reactivated and connects to the available Wi-Fi network. This post shows you how to turn on or enable that feature in Windows 11.
The new Windows 11 comes packed with many new features with a new user desktop, including centered Start menu and taskbar, rounded corner windows, themes and colors that will make any Windows look and feel modern.
If you’re excited about Windows 11, keep reading posts about it.
To start enabling or disabling “Disable on Wired” in Windows 11, please follow the steps below.
How to enable disable when connecting by cable in Windows 11
If your adapter supports it, you can enable “Disable when connecting by cable”In Windows 11. To enable it, continue below.
Windows 11 has a centralized location for most of its settings. From system settings to creating new users and updating Windows, everything can be done from your System settings crystal.
To access the System Settings, you can use the Windows key + i shortcut or click Start ==> Settings as shown in the following picture:
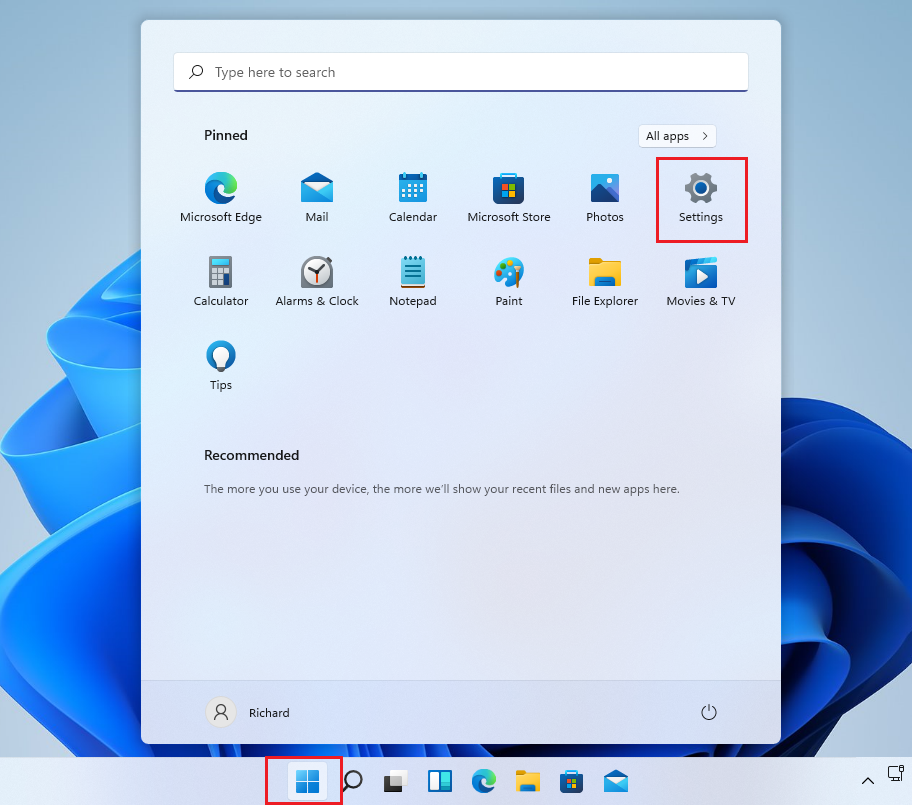
Alternatively, you can use the search box on the taskbar and find Settings. Then select to open it.
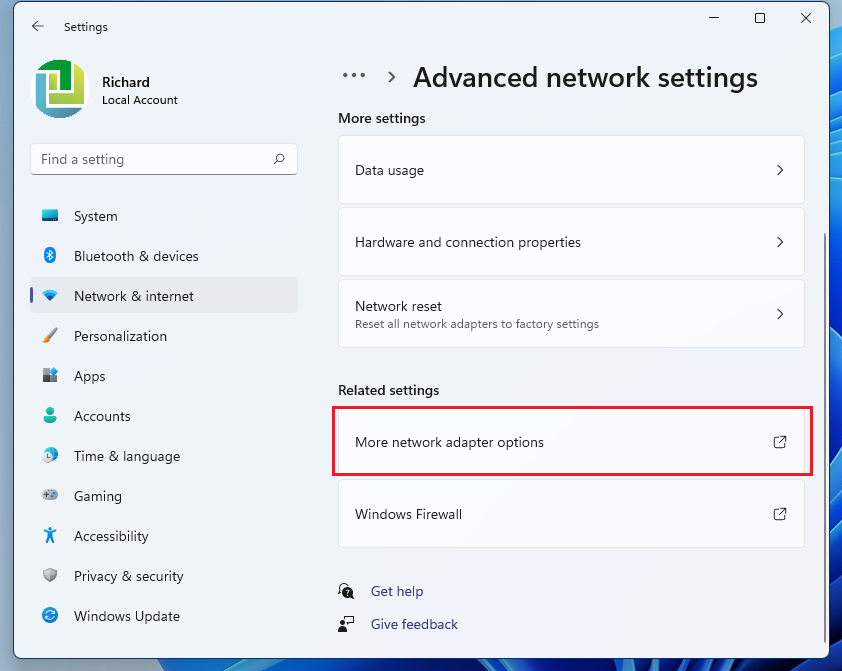
The Windows settings panel should look similar to the image below. In Windows settings, click Network and Internet , then select Advanced network settings on the right panel of the screen shown in the image below.

In the Advanced Network Settings panel, select More Network Adapter Options
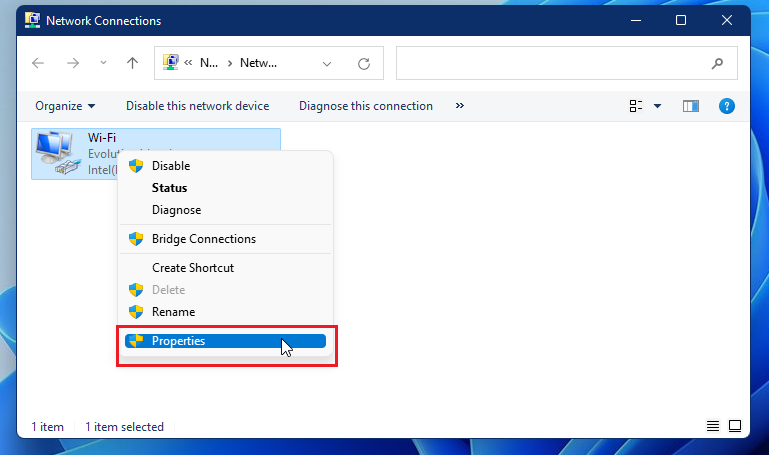
This will open the network connections in the control panel. Right click on the Wi-Fi connection and select Properties as shown below.
In the Properties panel, click Set up As shown below

Then scroll down the list and select “Disable when connecting by cableAnd change the value to Activated.

Click OK to save your changes and exit.
How to disable disable when connecting by cable in Windows 11
If you change your mind about the above setting and want to disable it, just reverse the steps above by going to the network adapters control panel, right-clicking on the Wi-Fi adapter, and then selecting Properties. Then click on Configured and select the setting for “Disable when connected by cable” and change the value to Disabled.


