
This post shows students and new users the steps to change the date and time format when using Windows 11. By default, Windows formats dates with bars (8/9/21). If you want to use a different format, like dots instead of bars, you can easily change it in Windows.
Regardless of what the date and time format changes, it will appear in the taskbar in the lower right corner. It can also appear in applications and documents that you create, unless you override the formatting in individual programs.
The new Windows 11, when released to everyone in a few weeks, will come with many new features and improvements that will work great for some while adding some learning challenges for others. Some things and settings have changed so much that people will have to learn new ways of working and managing Windows 11.
Don’t be afraid though, as we’ll continue to write easy-to-follow tutorials on how to use Windows 11 here.
To start changing the date and time format in Windows 11, follow the steps below.
How to use dots in the date in Windows 11
As mentioned above, Windows uses bars in the date and time when it is displayed. You can change that to a different format at any time and the steps below show you how.
To access the System Settings, you can use the Windows key + i shortcut or click Start ==> Settings as shown in the following picture:
To access the System Settings, you can use the Windows key + i shortcut or click Start
Alternatively, you can use the search box on the taskbar and find Settings. Then select to open it.
The Windows settings panel should look similar to the image below. In Windows settings, click Time and language, then select Language and region on the right panel of the screen shown in the image below.

In the Language & Region settings panel, under Related Settings, click “Administrative language setting “

Then select the Formats tab. Here you can add or remove custom formats. This dialog also allows you to select built-in date and time formats, as does Change Date and Time Formats.
However, you will not see a dotted format. You will have to enter that manually.

To create a custom format, click on “Additional Settings” at the bottom of the tab.

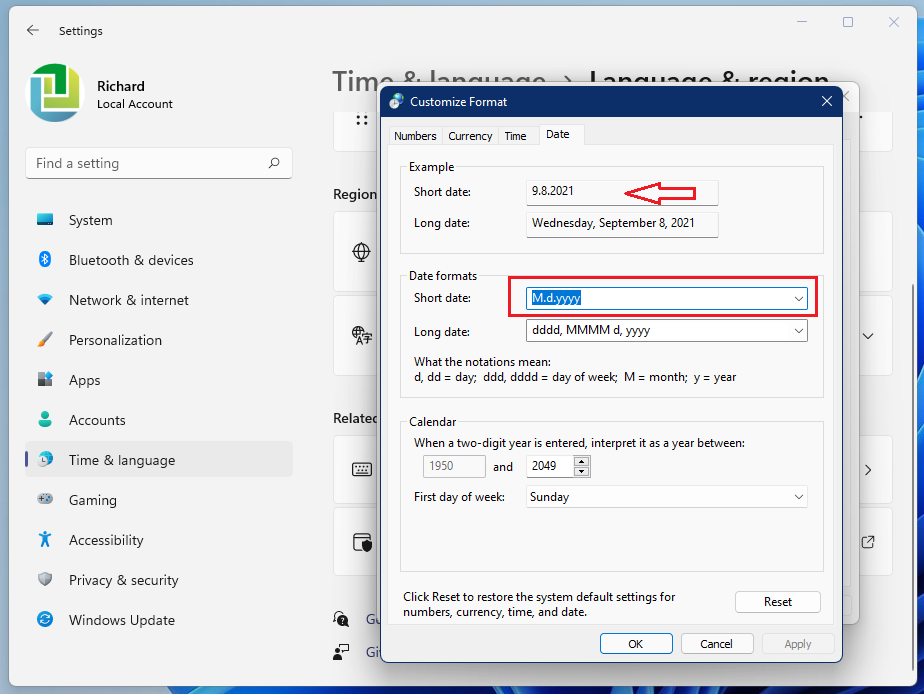
In the Custom Format dialog box, click “Date” tab.
In the Date Formats section, the “Short Date” drop-down list box is also an edit box, allowing you to enter a different format.

For example, if you want to use dots instead of bars, change it here. After clicking Apply, you should see a preview of the new date format for the shot date.
You can also customize the short time format by using the notation that appears in the dialog box. Once you are done, click the OK button to save and exit.
The new format should show up on the taskbar similar to the one shown below.

You should do that!
Conclusion:
In this tutorial we have seen how to change the date and time format when using Windows 11. If you find any errors or want to add something, use the comment form below.


1 Comment
Pingback: How to Activate Windows 11 for Free: 3 Methods - TechRechard