Windows 11 has the potential to absorb a large amount of data with updates, analytics, and more. If you have a limited data plan, this can incur additional costs and penalties, especially in rural areas.
However, it is not necessary to hit the data limit, as you can configure Windows to recognize that a metered connection is being used. You can use metered connections to manage your data usage in Windows 11, which will help you stay within your data usage limits. Below is explained how to set up a metered connection in Windows 11.
What is a metered connection in Windows 11?
A metered connection allows you to limit the amount of data that Windows uses. Using a metered connection allows you to limit your data usage, stopping the connection completely once the connection’s data limit is reached.
You can configure your Ethernet, mobile, and Wi-Fi network connections as metered connections in Windows 11. Wi-Fi or Ethernet connections are not set to metered use by default, so you will have to manually enable the feature for those connections. However, in Windows 11, mobile phone connections are set to metered usage by default.
Microsoft notes that some applications and services will not work as expected on a metered connection. These applications will receive less data in the background to help manage overall data usage. Also, some Windows updates will not install automatically.
How to configure metered connections in Windows 11
To configure a metered connection in Windows 11, follow these steps:
- Open the menu Beginning and select Setting.
- On Setting, press Internet and Network.
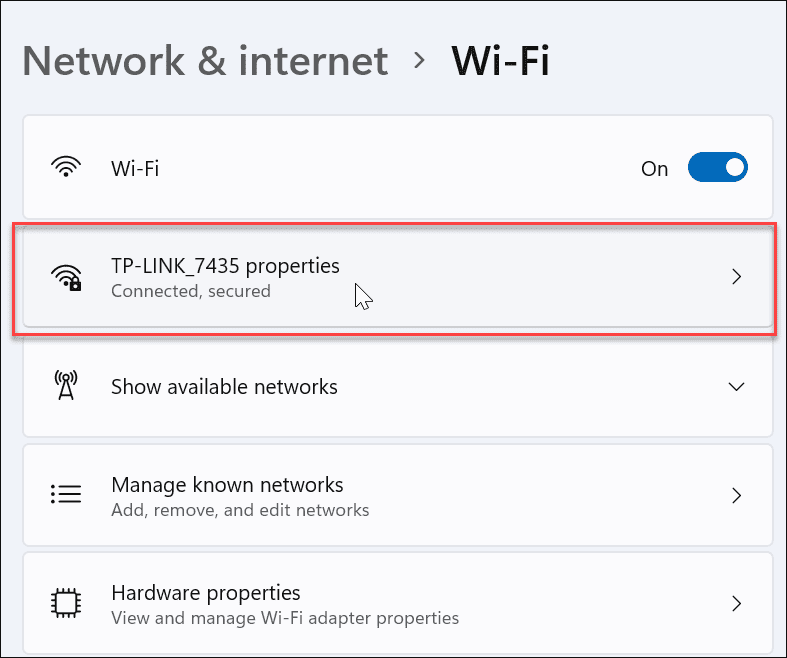
- Select your connection type (for example, Wifi or Ethernet) at the top of the menu Internet and Network.
- Next, click on the properties of your connection (for example, the name of your WiFi network).
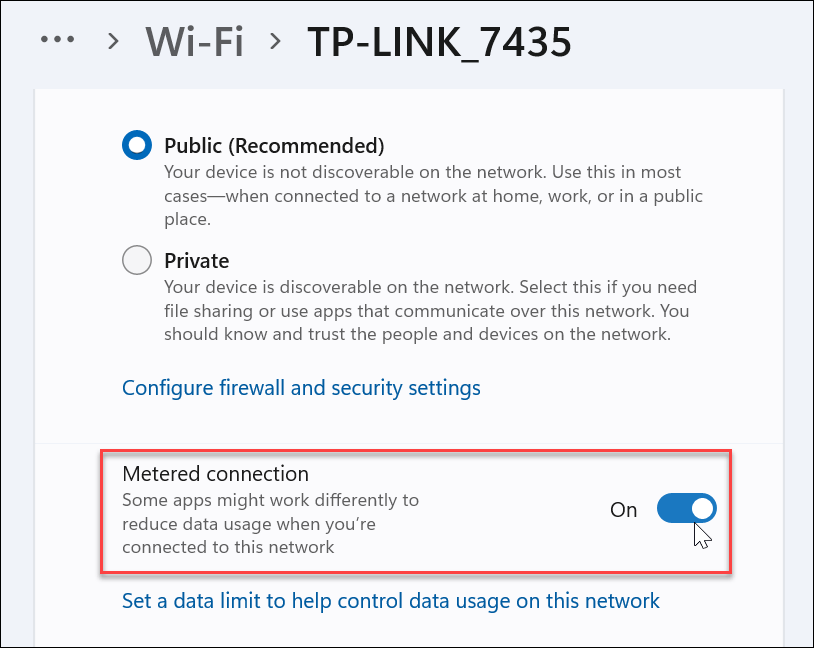
- Scroll down and select the slider next to the Metered Connection to activate it.
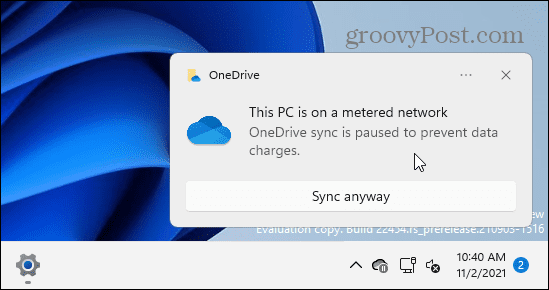
After enabling a metered connection, you may receive notifications from applications that let you know that they are not running in the background. For example, the OneDrive sync feature stops on a metered connection in Windows 11.
Configuring data usage on a metered connection in Windows 11
You can also configure the amount of data that Windows can use while on a metered connection.
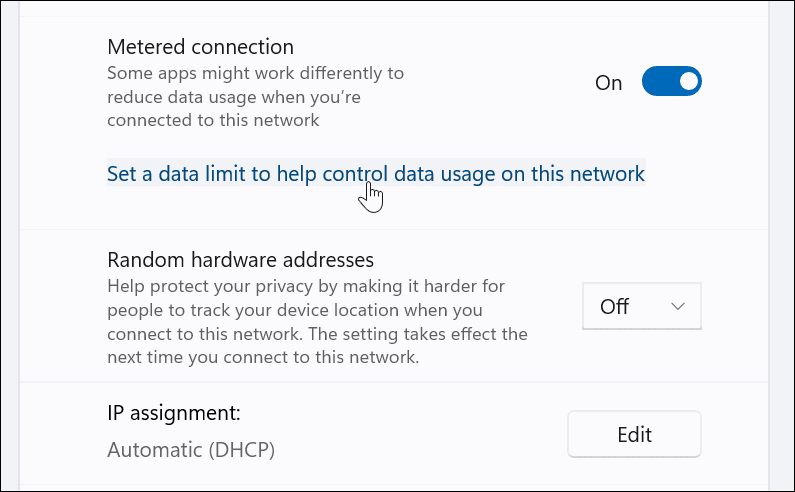
To do this, press the option Set a data limit to help control data usage on this network, visible under the measured connection configuration.
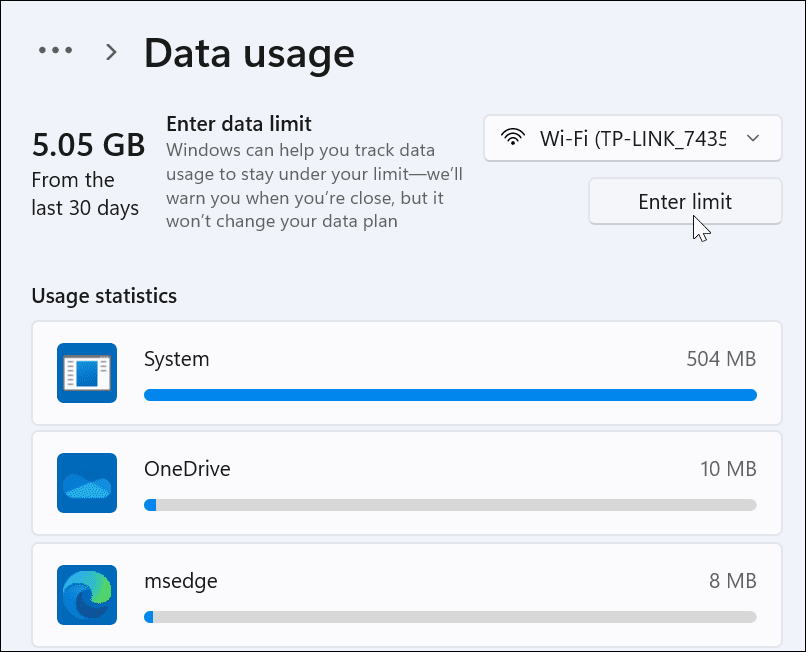
You will see the data usage statistics of various installed applications in the menu Use of data. At the top of this section, click the button Enter limit.
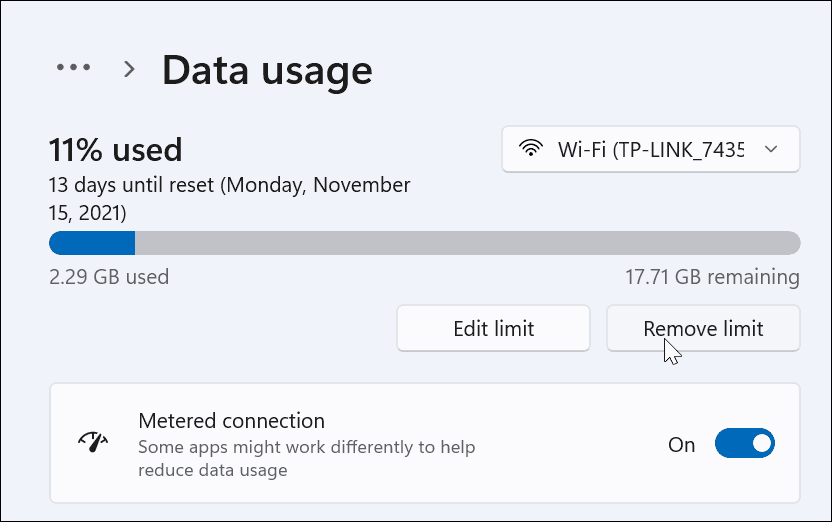
Next, set the data limit that you want to use for the meter connection. Select the type of limit (for example, monthly), set the reset date and data limit, and click Keep.

At this point, your Windows 11 PC is now configured to use a metered connection, reducing the amount of data that Windows uses. If you’ve set a custom data limit, Windows will stop using your connection once the limit is reached.
Monitoring data usage in Windows 11
If you want to control data usage or change settings in the future, open the app Setting through the Start menu.
From there, write “data usage“In the search field at the top and select”Data usage summary”From the drop-down menu.

This will take you to the Advanced network settings. Scroll through the list of settings and select Use of data in the section More settings.

In the menu Use of data, you can quickly review your usage information and settings. You can control which apps are using the most data and adjust the measured connection settings as needed.

Taking control of Windows 11 data usage
If you are using a connection with a limited data plan, you will need to set up a metered connection in Windows 11 by following the steps above. This setting prevents your PC from using too much data.
It’s also a good idea to configure metered connections when sharing mobile data, especially when using Windows 11 as an access point with another team. Other data saving options, such as pause windows updates.


