
This post shows students and new users how to create wallpaper slideshows and replace the desktop background in Windows 11 with photos or images that are special to them. This could help users who want to display photos of family members, pets, or other important people and places in their lives.
Windows 11 will allow you to change the desktop background with any photo you want. You can also create a slideshow of images in folders that you want to display. You don’t have to settle for default images that come with your computer. Go ahead and customize your desktop to your liking.
To create a slideshow, all you need to do is create a folder and add as many images as you want to show. Then go to the customization settings panel and choose the folder with the images.
The new Windows 11 will come with many new features and improvements that will work great for some while adding some learning challenges for others. Some things and settings have changed so much that people will have to learn new ways of working and managing Windows 11.
Creating a wallpaper slideshow is nothing new. This feature has been a part of Windows since XP. You can do this in the Windows settings panel, at Personalizationor by right-clicking on a blank area of the desktop and selecting Personalization to take you to the configuration panel.
To start changing your Windows 11 background with a slideshow of your pictures, follow the steps below:
How to create wallpaper slideshows in Windows 11
For those who want to replace the default desktop background with a slideshow of their choice, the steps below show you how.
Windows 11 has a centralized location for most of its settings. From system settings to creating new users and updating Windows, everything can be done from your System settings crystal.
To access the System Settings, you can use the Windows key + i shortcut or click Start ==> Settings as shown in the following picture:
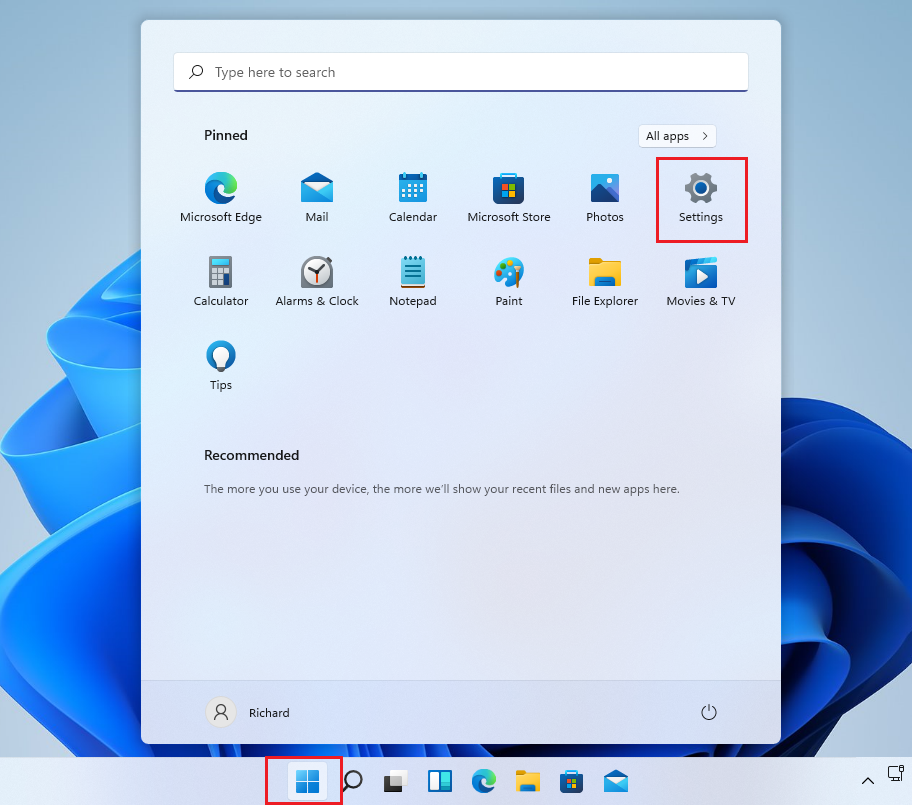
Alternatively, you can use the search box on the taskbar and find Settings. Then select to open it.
The Windows settings panel should look similar to the image below. In Windows settings, click Personalizationand select Bottom on the right panel of the screen shown in the image below.

The option in the Background section allows you to create a background from an image, a color or a slide show. A slide show is a combination of photos that changes automatically at preset intervals.
If you have multiple images that you want to set as your desktop background, select Slideshow instead of Photography from the drop-down options.

Once you select Slideshow, click the Browse to browse your photo album containing all the images you want to show as a slide show.
Find the place where you have your photos and select it. Background files can be stored as BMP, GIF, JPG, JPEG, DIB, or PNG files.

Your images will start immediately as a slide show on your desktop background. By default, the images are changed every 30 minutes. If you want it to change quickly, select 1 minute.

Photos in the selected folder will start playing as a slide show immediately.

Windows tries to choose the most attractive settings for your photos. Not all photos will fit perfectly on your desktop, especially if your desktop is quite large. Small photos may not look as good on your desktop and may need to be stretched to fit on the screen, which can make it appear distorted. If the background photo you selected doesn’t fit or doesn’t look good on your desktop background, please try the Fill in or To fit in option to select a good fit for your desktop.

You should do that! Windows should start playing your photos as a slideshow.
Conclusion:
In this tutorial we have seen how to create a background slideshow in Windows 11. If you find any errors above, please use the comment form below to report.


