
This post shows students and new users the steps to create a full system backup in Windows 11 using the system image backup. When you create a system image, you need a full backup of everything on your PC’s hard drive, similarly, to take a snapshot of the entire disk, system files, and everything.
Backing up the system image is useful in cases where you want to restore your entire PC at the time the image was created. Typically, a complete system image is taken after the PC has been tested and is fully operational.
Taking a full system backup is not the best solution for all situations. For most users, backing up important documents is sufficient.
If you are concerned about losing important documents that are difficult to replace, taking a full system image backup should not be your backup strategy. A system image backup is ideal for situations where an important PC with critical applications and settings is difficult and time-consuming to rebuild. In this case, taking a full system backup and storing it somewhere is the best case in this situation.
For most users, the backup strategy in this post below should be considered.
How to Backup and Restore in Windows 11
For a full image backup, continue below:
How to create a full system backup in Windows 11
Windows 11 comes with a built-in backup solution that can back up the operating system, applications, and files at a specific time, and save them to an external hard drive in the event of a system failure.
As mentioned above, system image backup is not ideal for most situations. System images are very large and contain many files that you don’t really need.
Windows 11 has a centralized location for most of its settings. From system settings to creating new users and updating Windows, everything can be done from your System settings crystal.
To access the System Settings, you can use the Windows key + i shortcut or click Start ==> Settings as shown in the following picture:
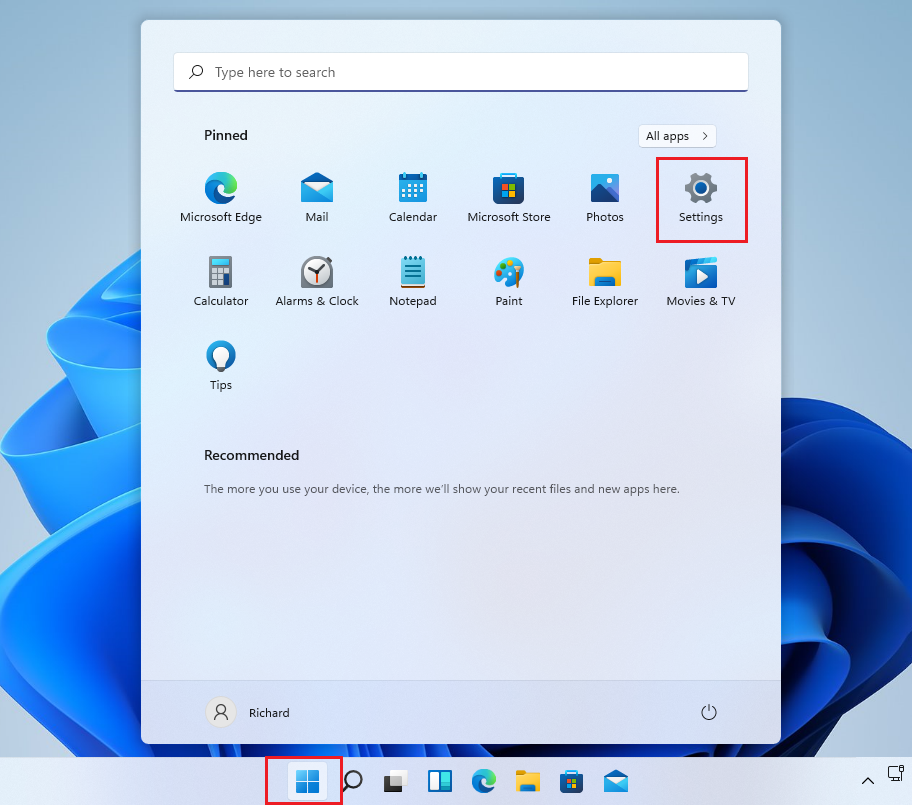
Alternatively, you can use the search box on the taskbar and find Settings. Then select to open it.
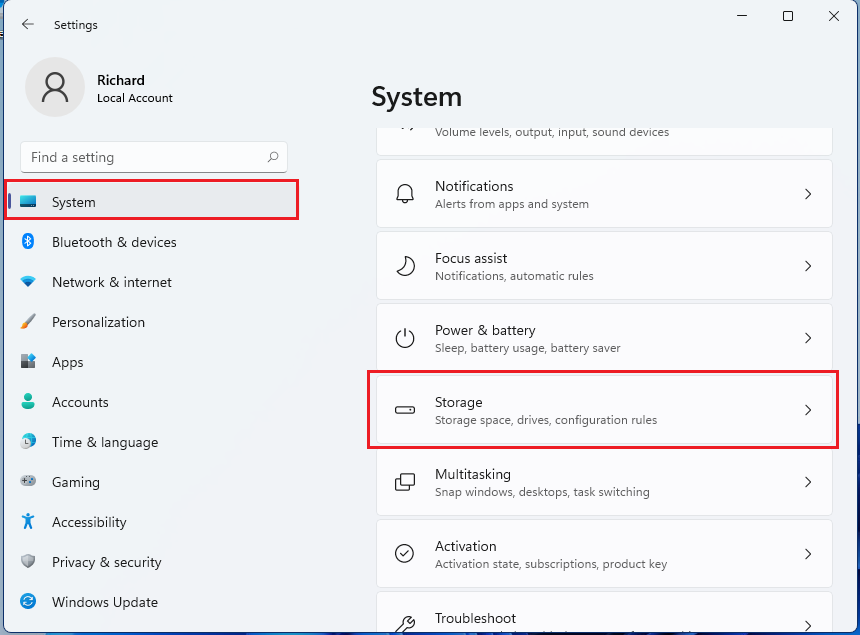
The Windows settings panel should look similar to the image below. In Windows settings, click System, Select Storage on the right panel of the screen shown in the image below.
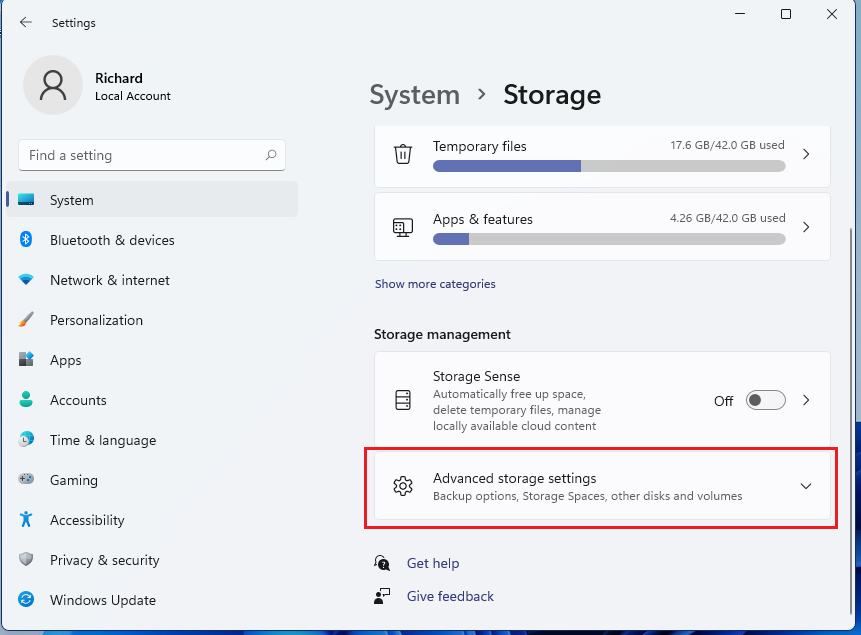
In the Storage Settings panel, under Storage Management, select Advanced storage settings to expand more storage options.
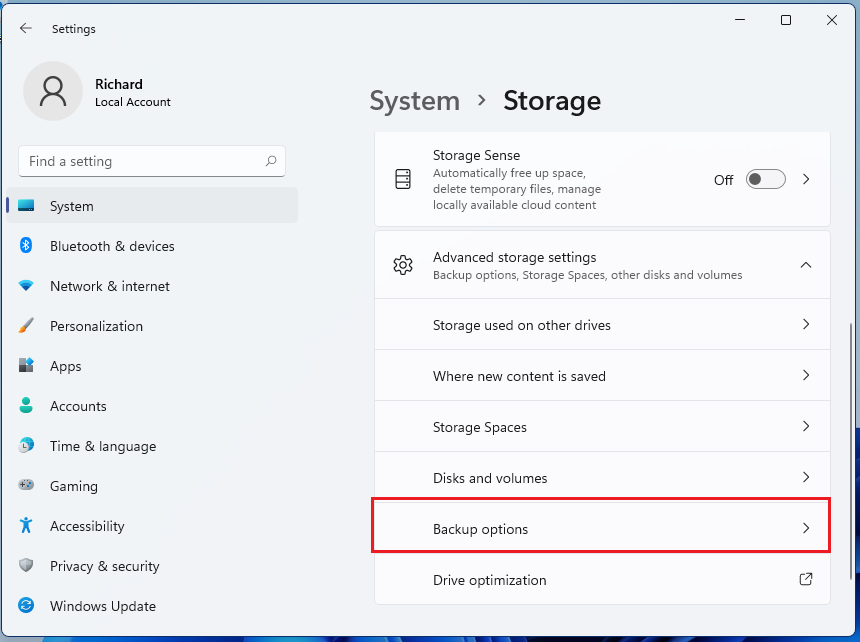
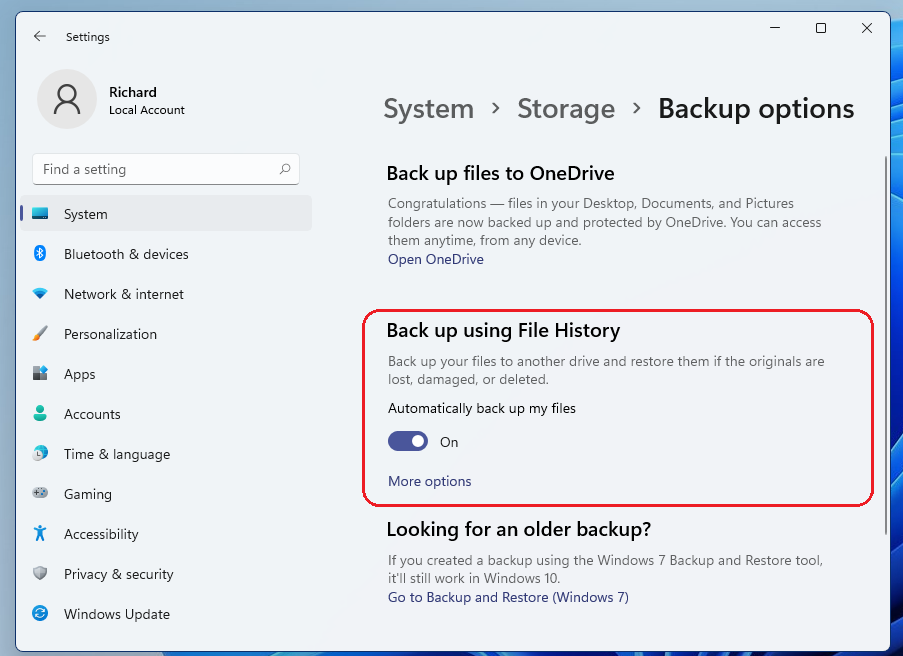
Then select Backup Options
Move the button to enable file history backup.
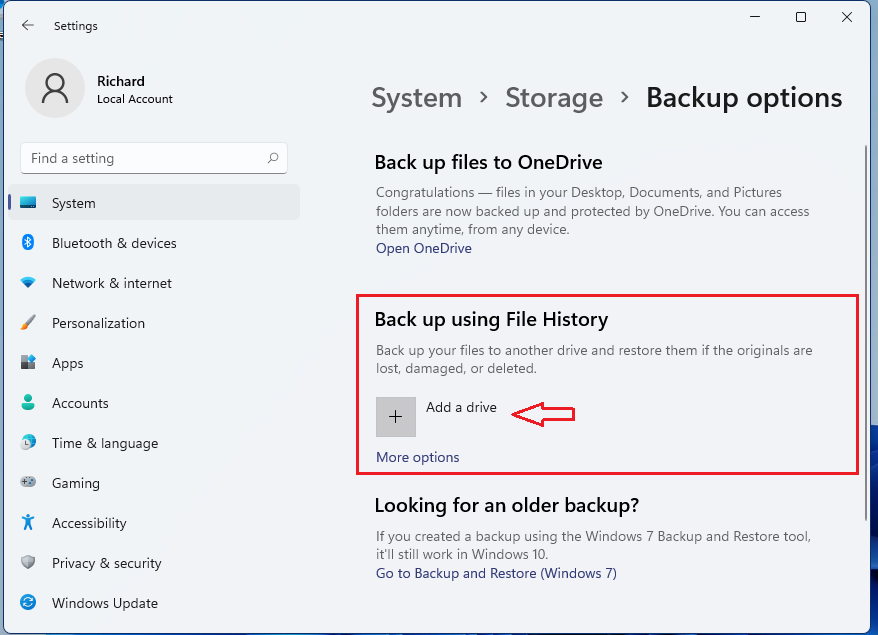
Then click Add a unit to select the drive to back up the system image. The system image can only be saved to an external drive, a CD / DVD disc, or a network location.
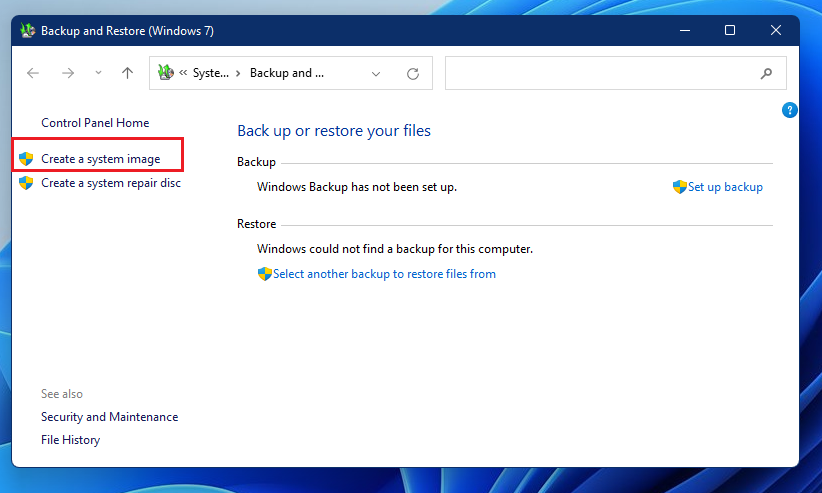
Then click the link to go to Backup and Restore (Windows 7). Doing so will open other windows in the Control Panel.
Click on Createsgive you a picture of the system.
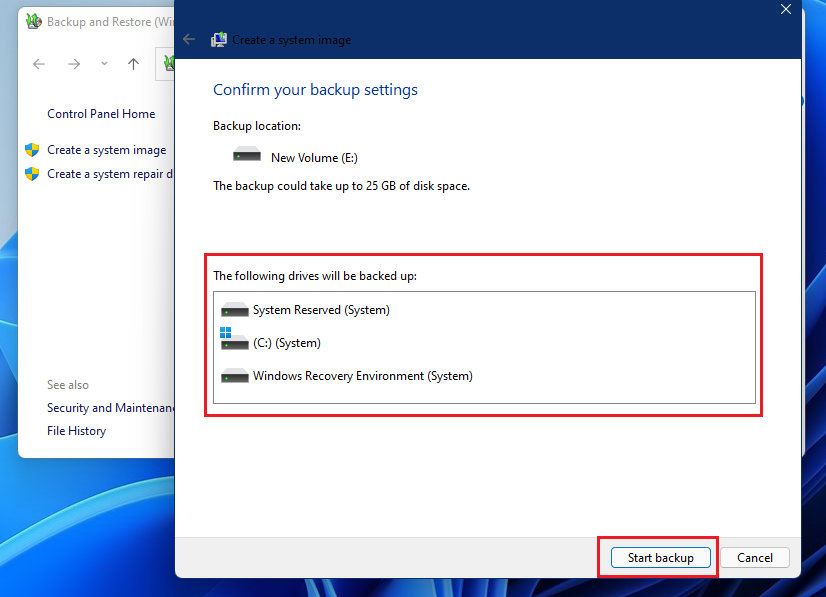
Then select the destination to save the system image. For this post, we are going to save to an external hard drive.

Finally, click on Start backup to start the backup process.
Wait for the process to complete. Depending on the size of your hard drive, this could take hours.
Once the backup is complete, remove the drive and store it in a safe place. The drive image can be used to restore your PC to the creation date and time.
Conclusion:
In this tutorial we have seen how to create a system image backup in Windows 11. If you find any errors above, please use the comment form below to report.


