
This post shows students and new users the steps to disable or enable IPv6 when using Windows 11. IPv6 is enabled by default in Windows 11. If your environment does not need IPv6 or you simply want to disable it so that it does not interfere with the application settings , you can deactivate with a few clicks.
IPv6 is the nextgen Internet Protocol (IP) standard intended to eventually replace IPv4, which has fewer features and is limited in number compared to IPv6. However, the adoption of IPv6 in some areas is slow, for legacy systems, it is not fully available.
If you have a good reason to disable it, just do it. For home users and people using Windows 11 for basic work, they shouldn’t worry about IPv6. Having both IPv4 and IPv6 running on the system will not hurt in many cases. There are very few situations where IPv6 can be disabled or turned off.
The new Windows 11 comes packed with many new features with a new user desktop, including centered Start menu and taskbar, rounded corner windows, themes and colors that will make any Windows look and feel modern.
To start disabling or enabling IPv6 in Windows 11, follow the steps below:
How to disable IPv6 in Windows 11
By default, IPv6 is enabled and running on Windows 11. Both IPv4 and IPv6 are available and running them will not hurt in some cases.
However, if you have special cases where you need to turn off IPv6, please follow the steps below.
Windows 11 has a centralized location for most of its settings. From system settings to creating new users and updating Windows, everything can be done from your System settings crystal.
To access the System Settings, you can use the Windows key + i shortcut or click Start ==> Settings as shown in the following picture:
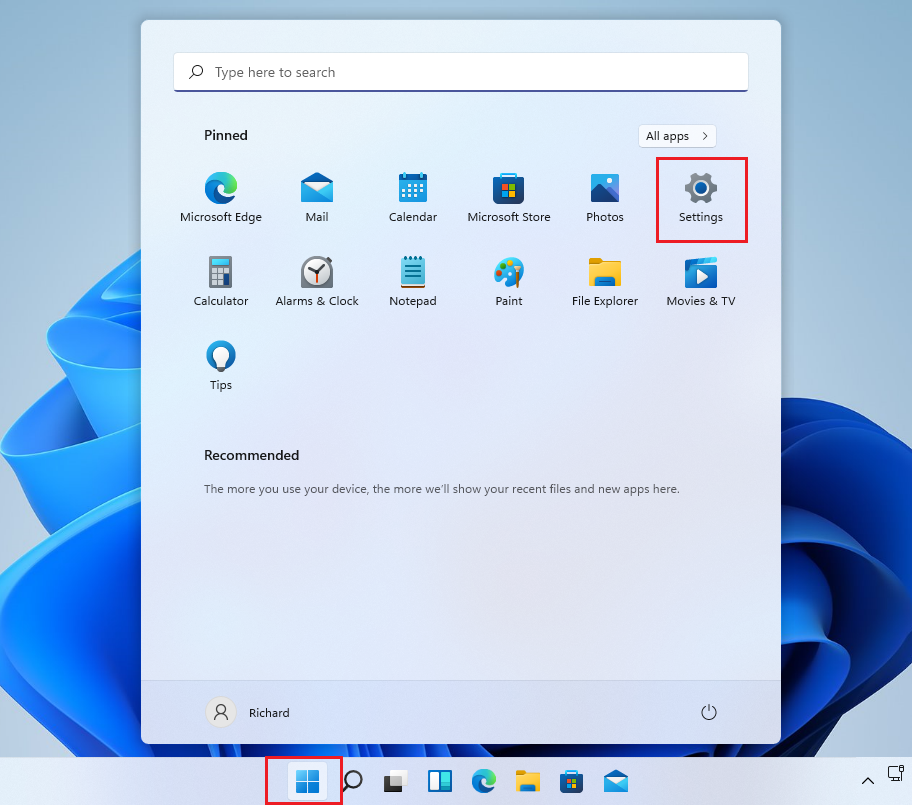
Alternatively, you can use the search box on the taskbar and find Settings. Then select to open it.
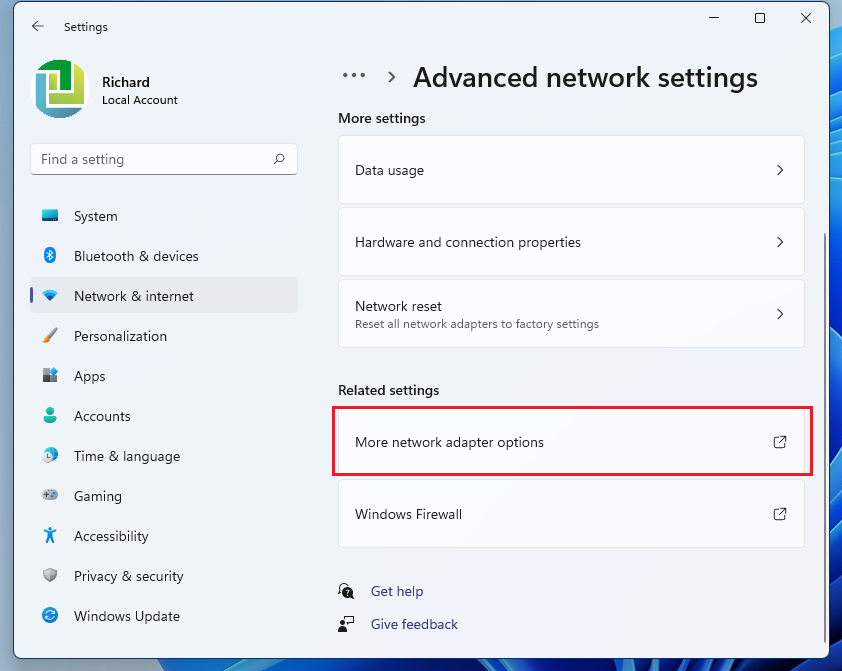
The Windows settings panel should look similar to the image below. In Windows settings, click Network and Internet, Select Advanced network settings on the right panel of the screen shown in the image below.

In the Advanced Network Settings panel, select the More Network Adapter option as highlighted below.
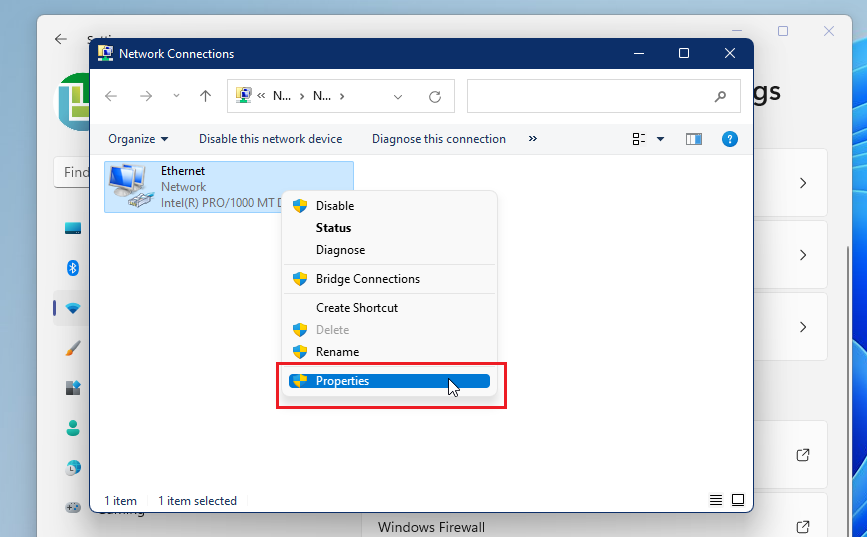
That will open the Windows Wi-Fi and Ethernet adapter settings panel. In the Network Connection panel, select Wifi or Ethernet Connection. Right-click the connection and then select Properties.
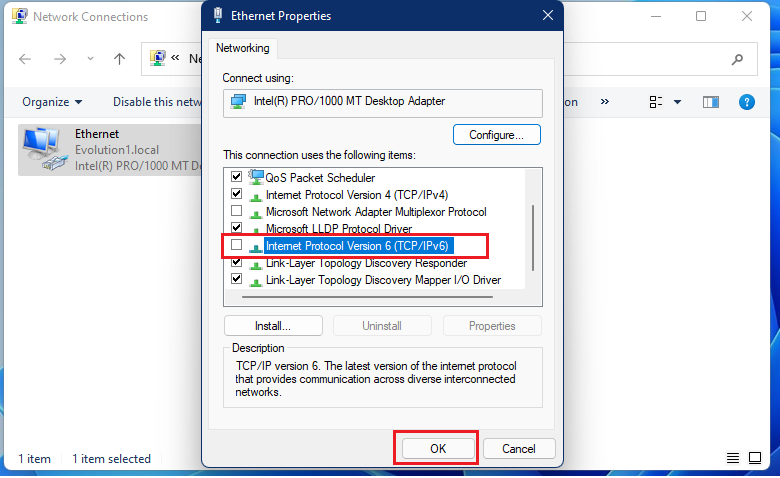
When the Properties settings panel opens, scroll down the list and uncheck the box to Internet Protocol version 6 (TCP / IPv6) as highlighted below. After unchecking the box, click OK to save your changes.
How to disable IPv6 through PowerShell in Windows 11
Another way to disable IPv6 in Windows 11 is from the PowerShell console. To do that, click the Start button, then find and select “PowerShell.” Right-click Windows PowerShell applications and select Execute as an administrator.

When open, run the following command to list all network adapters in the system.
Get-NetAdapterBinding -ComponentID ms_tcpip6
Look at the list, make a note of the adapter names below the Name column.
Name          DisplayName                             ComponentID    Enabled
----         -----------                              -----------    -------
Ethernet     Internet Protocol Version 6 (TCP/IPv6)   ms_tcpip6      True
Wi-Fi        Internet Protocol Version 6 (TCP/IPv6)   ms_tcpip6      True
Now to disable it, run the following command with the name of the adapter.
Disable-NetAdapterBinding -Name "Adapter Name" -ComponentID ms_tcpip6
Replace the “Adapter Name” in the above command with the adapter on which you want to disable IPv6.
If you want to disable IPv6 on all adapters, just run the following commands:
Disable-NetAdapterBinding -Name "*" -ComponentID ms_tcpip6
How to enable IPv6 in Windows 11
If you change your mind after disabling IPv6 on your network adapters, you can enable it by simply reversing the steps above.
The PowerShell command to enable IPv6 is:
Enable-NetAdapterBinding -Name "*" -ComponentID ms_tcpip6
You should do that!
Conclusion:
In this tutorial we have seen how to disable or enable IPv6 when using Windows 11. If you find any errors above, please use the comment form below to report.


