
This post shows students and new users the steps to easily disable or enable sound devices when using Windows 11. In some cases, your computer may have speakers, headphones, and other audio devices attached. If a default sound device is not set, sound may be output from all connected devices.
Windows 11 allows you to easily disable or enable sound devices with just a few clicks. When you disable a device, it is connected and working. However, it will not make any sound. You don’t have to uninstall or disconnect it, just disable the audio output and you’re done.
The new Windows 11 comes packed with many new features with a new user desktop, including centered Start menu and taskbar, rounded corner windows, themes and colors that will make any Windows look and feel modern.
If you’re excited about Windows 11, keep reading posts about it.
To start disabling or enabling sound devices in Windows 11, follow the steps below.
How to disable a sound device in Windows 11
As mentioned above, one can simply disable a sound device in Windows settings with a few clicks. To do that, open the Windows Settings app.
Windows 11 has a centralized location for most of its setup applications. From system settings to creating new users and updating Windows, everything can be done from the System settings crystal.
To access the System Settings, you can use the Windows key + i shortcut or click Start ==> Settings as shown in the following picture:
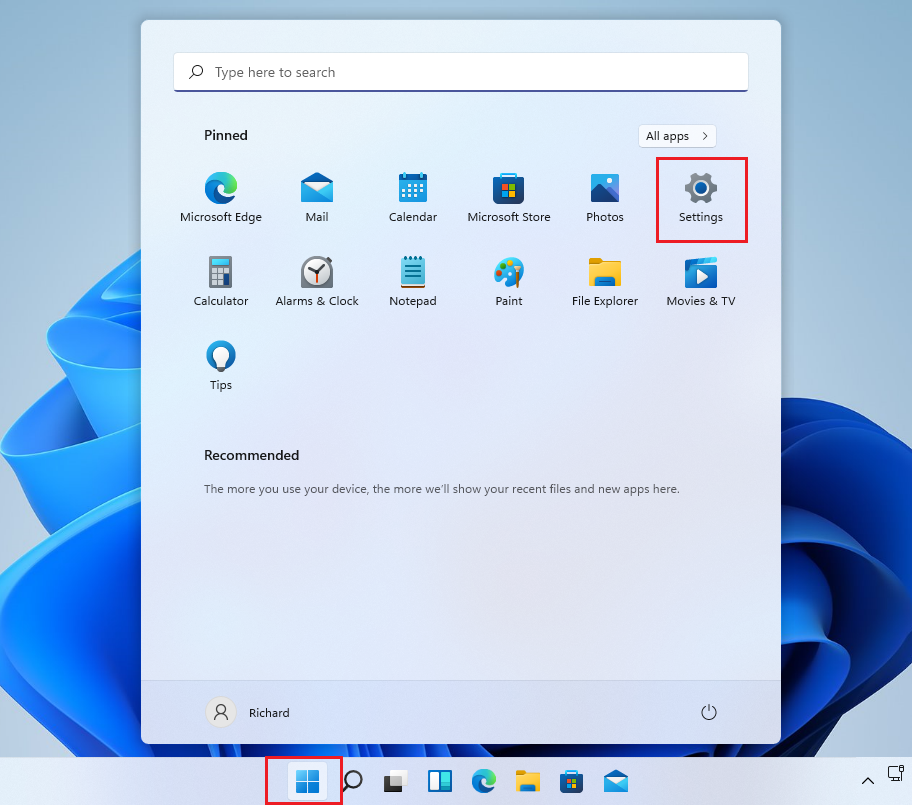
Alternatively, you can use the search box on the taskbar and find Settings. Then select to open it.
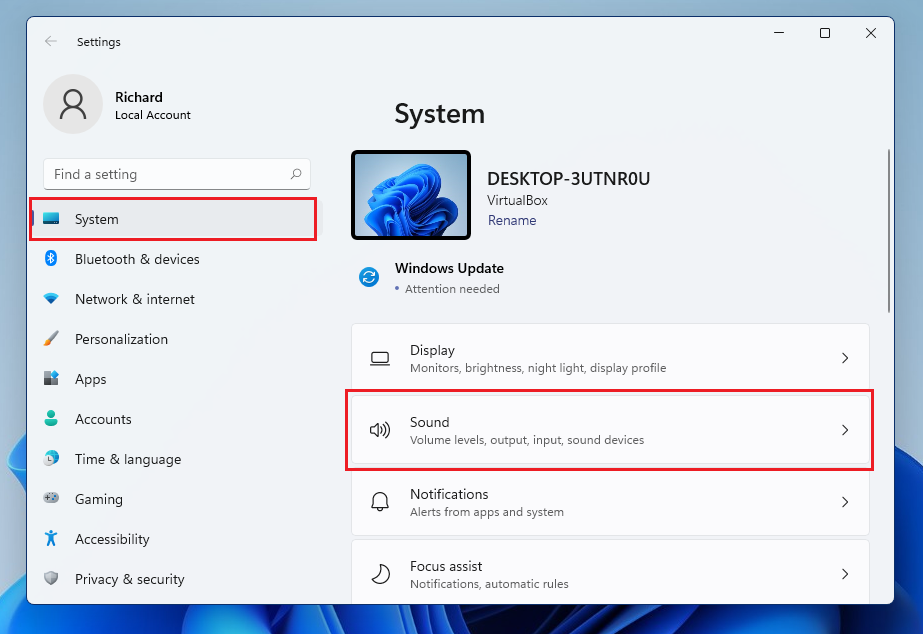
The Windows settings panel should look similar to the image below. In Windows settings, click Systemand select Sound on the right panel of the screen shown in the image below.
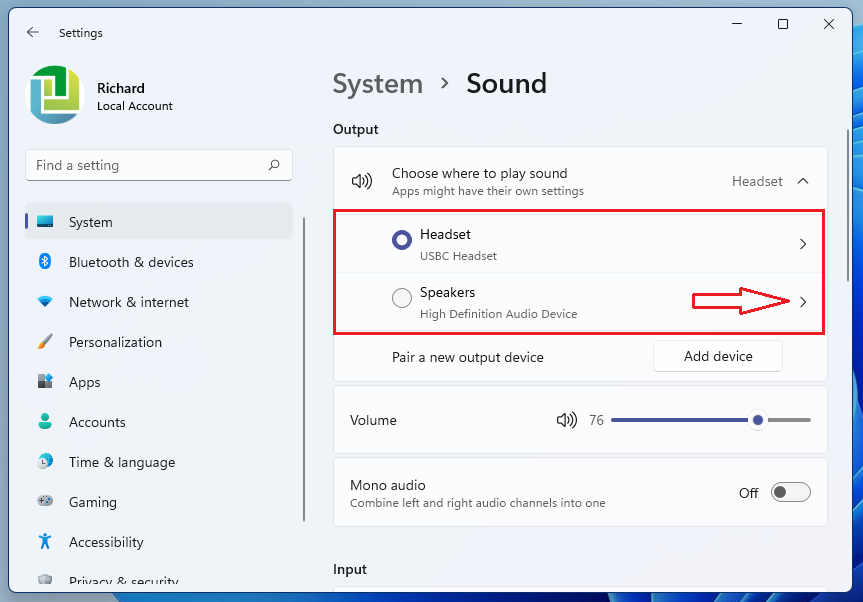
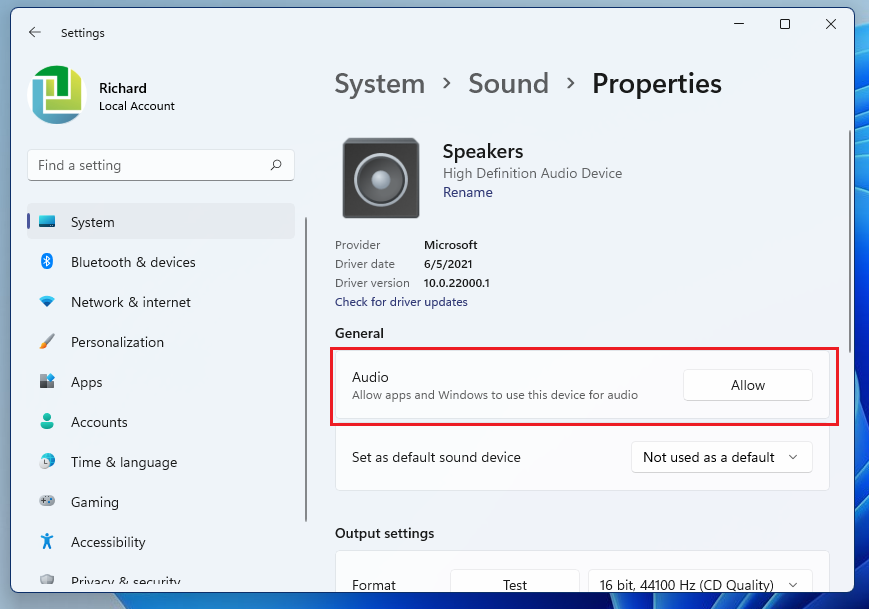
In the sound settings panel, under Production, click the side caret (right arrow) next to the audio output device you want to disable.
There, in General, click on the Do not allow Button for “Allow apps and Windows to use this device for audio”.
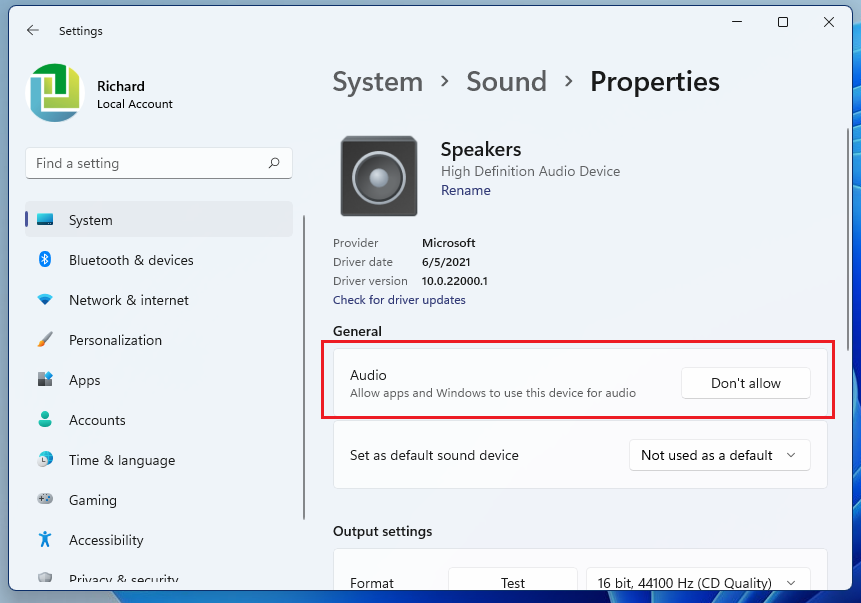
That will disable the output device and stop all sound.
How to enable sound device in Windows 11
If you change your mind about disabling a sound device in Windows 11 and want to re-enable it, just reverse the steps above by going to the Settings ==> System ==> Sound and selecting the device in Production.
Click the side caret (right arrow) of the device you want to re-enable and in the device settings panel, below general, click on Let button for “Allow apps and Windows to use this device for audio”.
That should reactivate the sound device.
Conclusion:
In this tutorial we have seen how to easily disable or enable sound devices in Windows 11. If you find any errors above or have something to add, use the comment form below to do so.


