
This post shows students and new users the steps to enable or disable password protected sharing when using Windows 11. Windows 11 comes with password protected sharing enabled by default. This allows only those who have username and password accounts on the system to access shared resources.
With password-protected sharing enabled, only account holders on your computer can access shared files and folders, printers, and public folders. This is a safety feature. However, you can disable it so that anyone who is connected to the same network can access folders and shares.
The new Windows 11 comes packed with many new features with a new user desktop, including centered Start menu and taskbar, rounded corner windows, themes and colors that will make any Windows look and feel modern.
If you’re excited about Windows 11, keep reading posts about it.
To start turning password-protected sharing on or off in Windows 11, follow the steps below:
How to disable password protected sharing in Windows 11
As mentioned above, password-protected sharing is enabled by default in Windows 11. With this enabled, only people who have accounts on the computer will be able to access shared files, printers, and other resources.
To give other people access to your shares, you will need to disable password-protected sharing, and the steps below show you how.
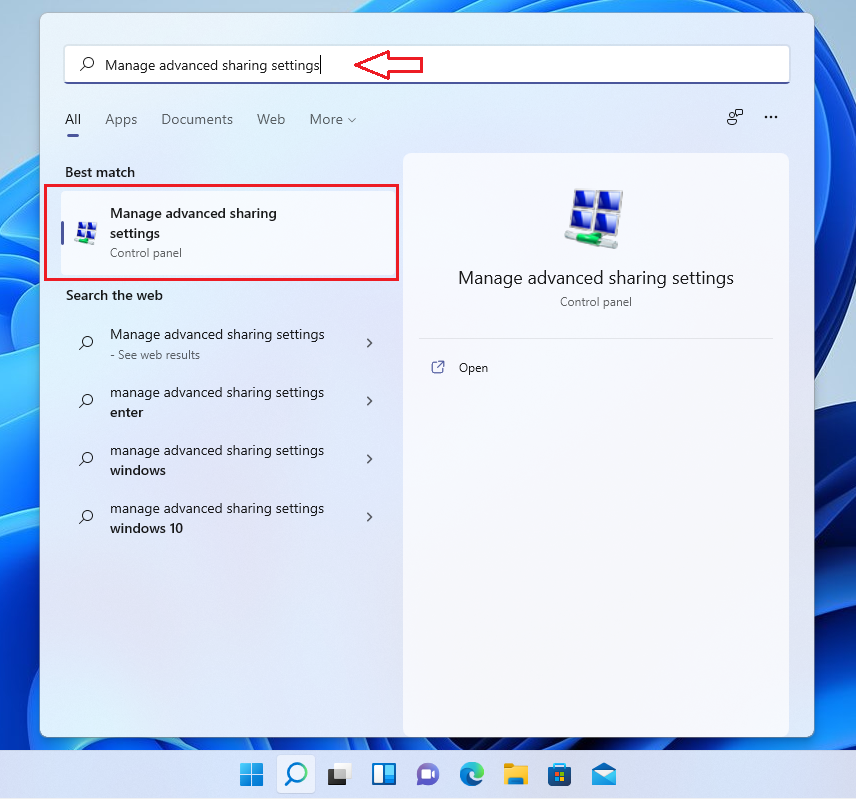
To enable this, click the Start menu, then search for “Manage advanced sharing settings“, Select the relevant highlighted result.
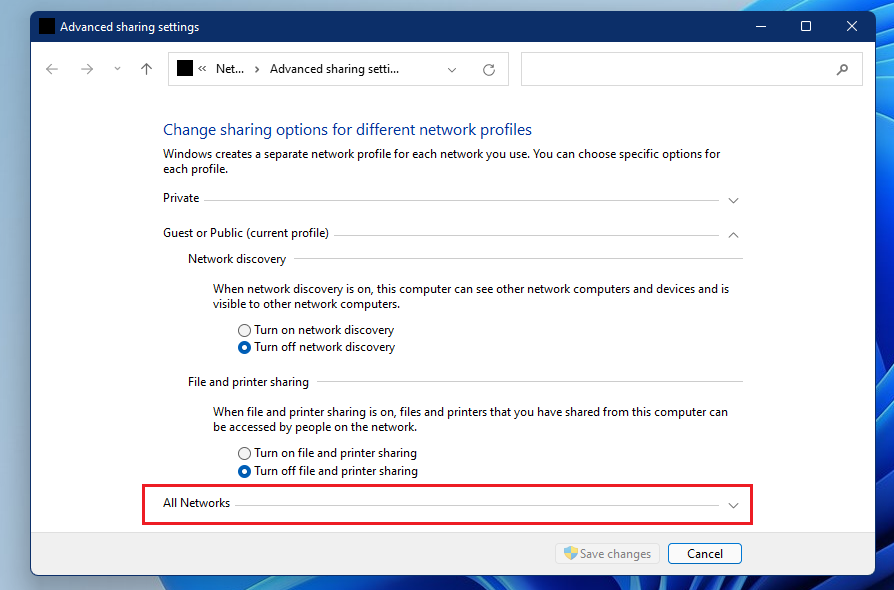
When the advanced sharing settings panel opens, click the arrow to expand All networks.
There, select the option “Turn off password protected sharing”As highlighted below. Then click Save Changes.
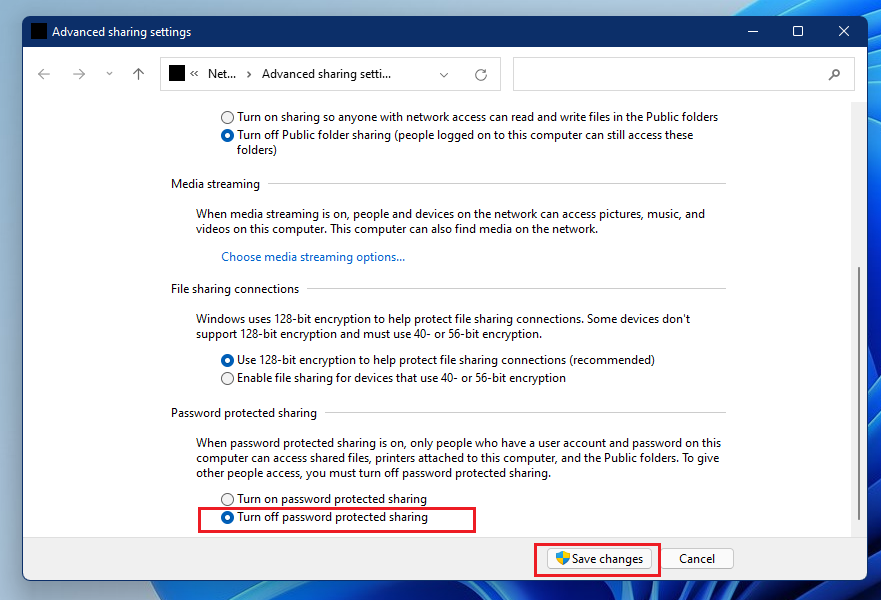
You should do that!
How to enable password protected sharing in Windows 11
If you changed your mind about enabling password protected sharing above, just go back and reverse the steps above by going to the Start menu ==> searching for “Manage advanced sharing settings“, And expanding All networks, then select”Enable password-protected sharing“

You should do that!
Now when you enable file and printer sharing in Windows, other users who do not have accounts on the system should be able to see and access the shares as long as the resources are shared with everyone.
Conclusion:
In this tutorial we have seen how to enable or disable password protected sharing in Windows 11. If you find any errors above, please use the comment form below to report.


