
If you are upgrading from one major version of macOS to another, you may run into issues. Conflicting settings, corrupted system files, lack of storage… all of which can make life difficult when trying to update your Mac.
If you want to do a clean install of macOS Monterey on your Mac, for example, you will have to follow several steps. However, keep in mind that a clean installation will cause data loss, so make a backup of your Mac before you begin.
To begin a clean installation of macOS Monterey, this is what you will need to do.
Why should I do a clean install of macOS Monterrey?
If you are considering a clean install of macOS Monterrey, consider your Mac’s performance. Are you experiencing speed or storage issues, for example?
A clean installation will free up the space currently used by third-party applications. It can also help speed up older Macs by removing old system files. However, if you are not experiencing system performance issues, you may want to upgrade to macOS Monterey using the standard upgrade method.
Options for clean installation of macOS Monterrey
There are three ways to do a clean install on macOS Monterey, but only two are worth considering.
Like previous versions of macOS, you can create a bootable copy of the macOS installer on a flash drive or USB stick. However, this feature is largely deprecated for anyone other than a sysadmin, and we wouldn’t recommend it for this version of macOS.
You can also use the built-in macOS recovery tool to perform clean installs, or use a new Monterey exclusive feature (the feature Clear all content and settings) to complete the installation. To use this option, your Mac will need a T2 security chip.
You should also keep these points in mind before you start:
- Make sure you have your admin password. You may need to use it if you receive a message to unlock your disk during installation.
- If the system cannot see your computer or volume, you will first have to erase your disk. You will be prompted to do so during installation if necessary.
- If prompted, name your install drive as Macintosh HD. This will ensure that macOS correctly identifies it as the system drive.
- Keep your Mac awake to allow the installation to finish; do not let it turn off or enter power saving modes. This means keeping the lip open on MacBooks and not putting it to sleep on other Mac models.
Using the macOS recovery tool
If you want to use the macOS recovery tool to perform a clean installation of macOS Monterey, you will first need to consider what type of Mac you are using. The steps to start the recovery tool will vary depending on whether you are using an Intel-based Mac or a newer Mac with Apple silicon technology.
- For the Intel-based Macs: Turn on your Mac and immediately press and hold Command + R on your keyboard until you see an Apple logo or custom boot image.
- For Mac Apple Silicon: Turn on your Mac and hold down the power button until I see the window of startup options. Next, click on the gear icon labeled as Choices, and then click Continue.
You may be asked for your administrator password to continue at this point.
Performing a clean install using macOS recovery
The steps above should take you to the recovery tool, where you can begin the installation process.
To start a clean install:
- Please select Reinstall macOS.
- Then choose Continue.
- Follow the additional instructions on the screen.
Using the Clear all content and settings option
The option Clear all content and settings allows iPhone and iPad users to quickly erase and restore their devices; this feature is now available in macOS Monterey.
This feature offers Mac users a quick and safe way to erase all their settings, data, and applications, while keeping the operating system. As a reminder, this option is only available on Apple Silicon and Intel Macs that have a T2 security chip. Also, it’s only available on Macs with macOS Monterey already installed.
As Apple explains, this is also the preferred method of doing a clean install on macOS Monterey if your system has a T2 security chip. However, you are still free to use the recovery tool to reset your device, if you prefer.
To perform a clean installation of macOS using the Erase All Content and Settings feature:
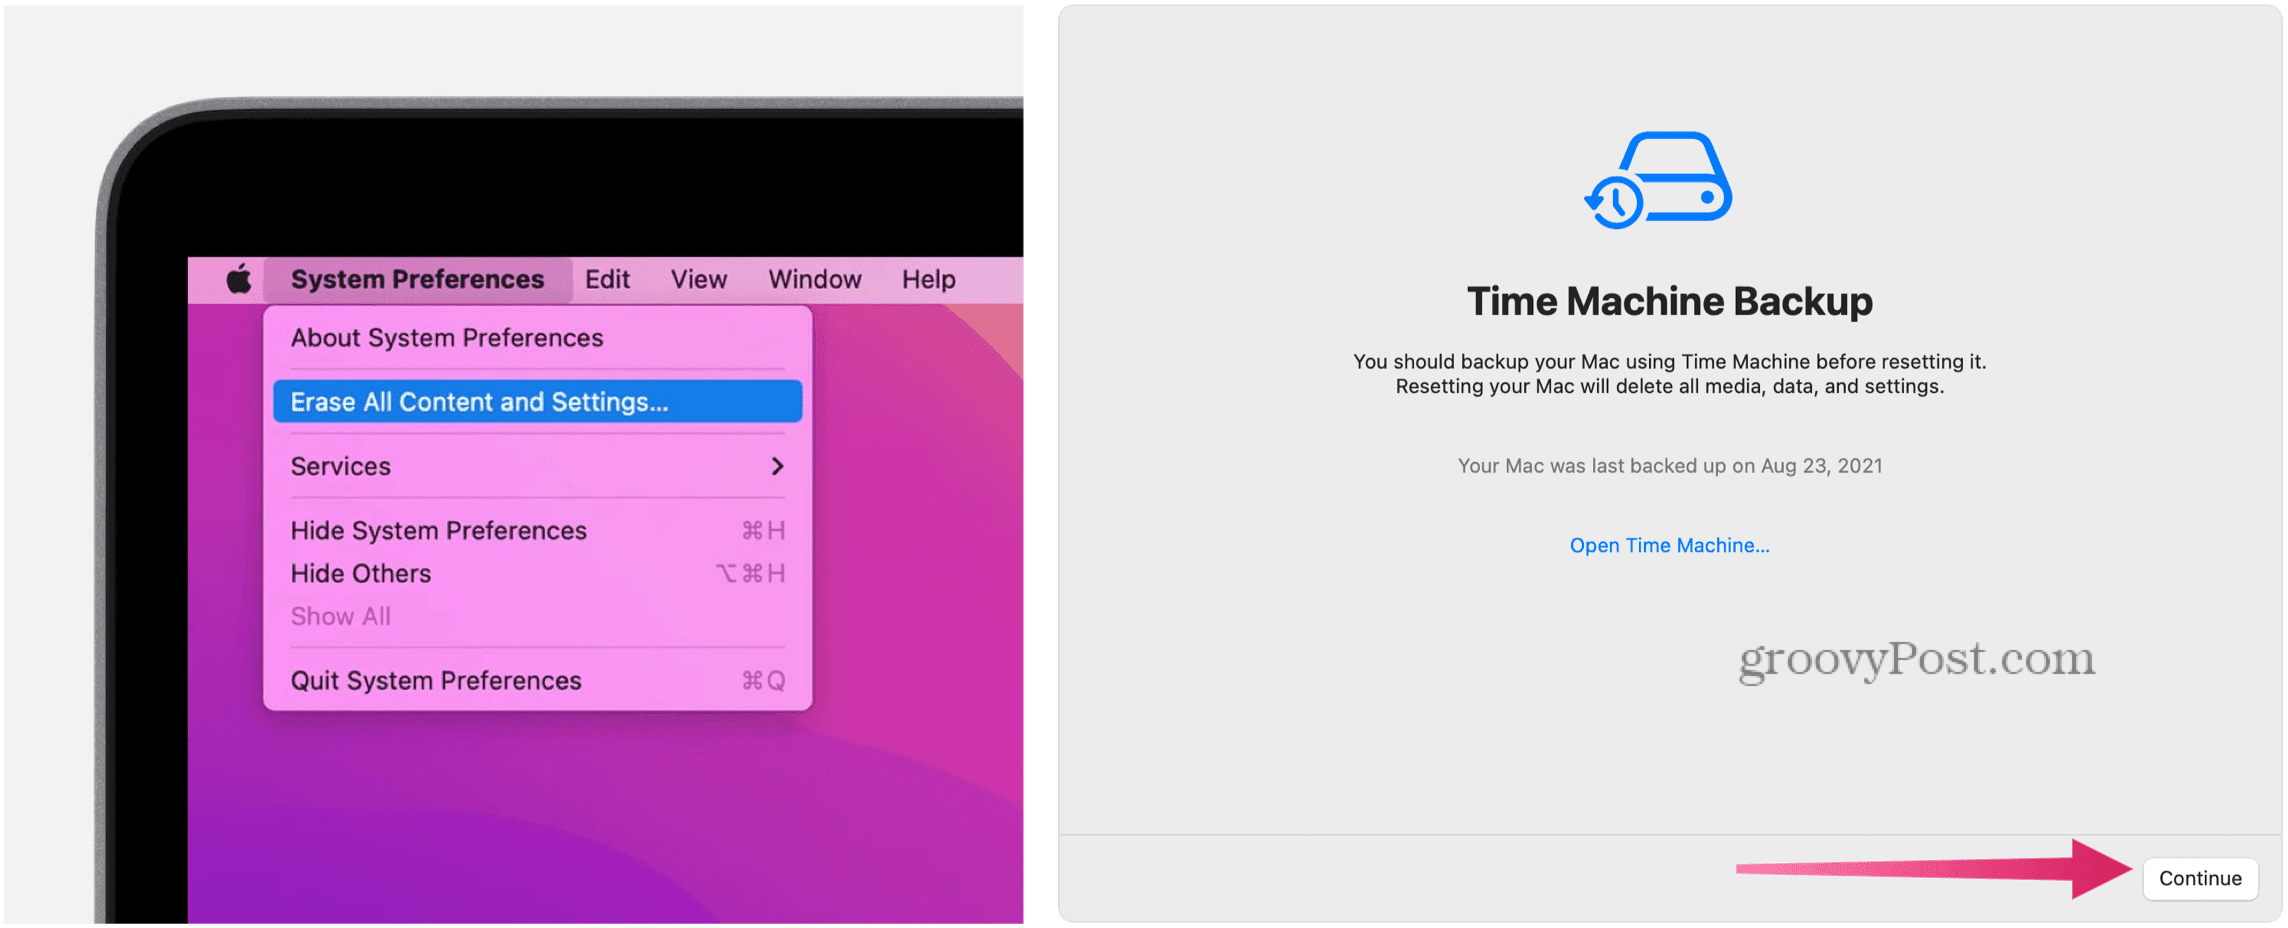
- First, open the System preferences on your Mac.
- Please select Clear all content and settings in the menu System preferences.
- If you have Boot Camp installed on your Intel-based Mac, you will be prompted to perform other tasks at this point. Other users can skip this step.
- Login with your administrator credentials. This is the username and password that you typically use to log into your Mac.
- Make a backup to Time Machine or click Continue to continue.
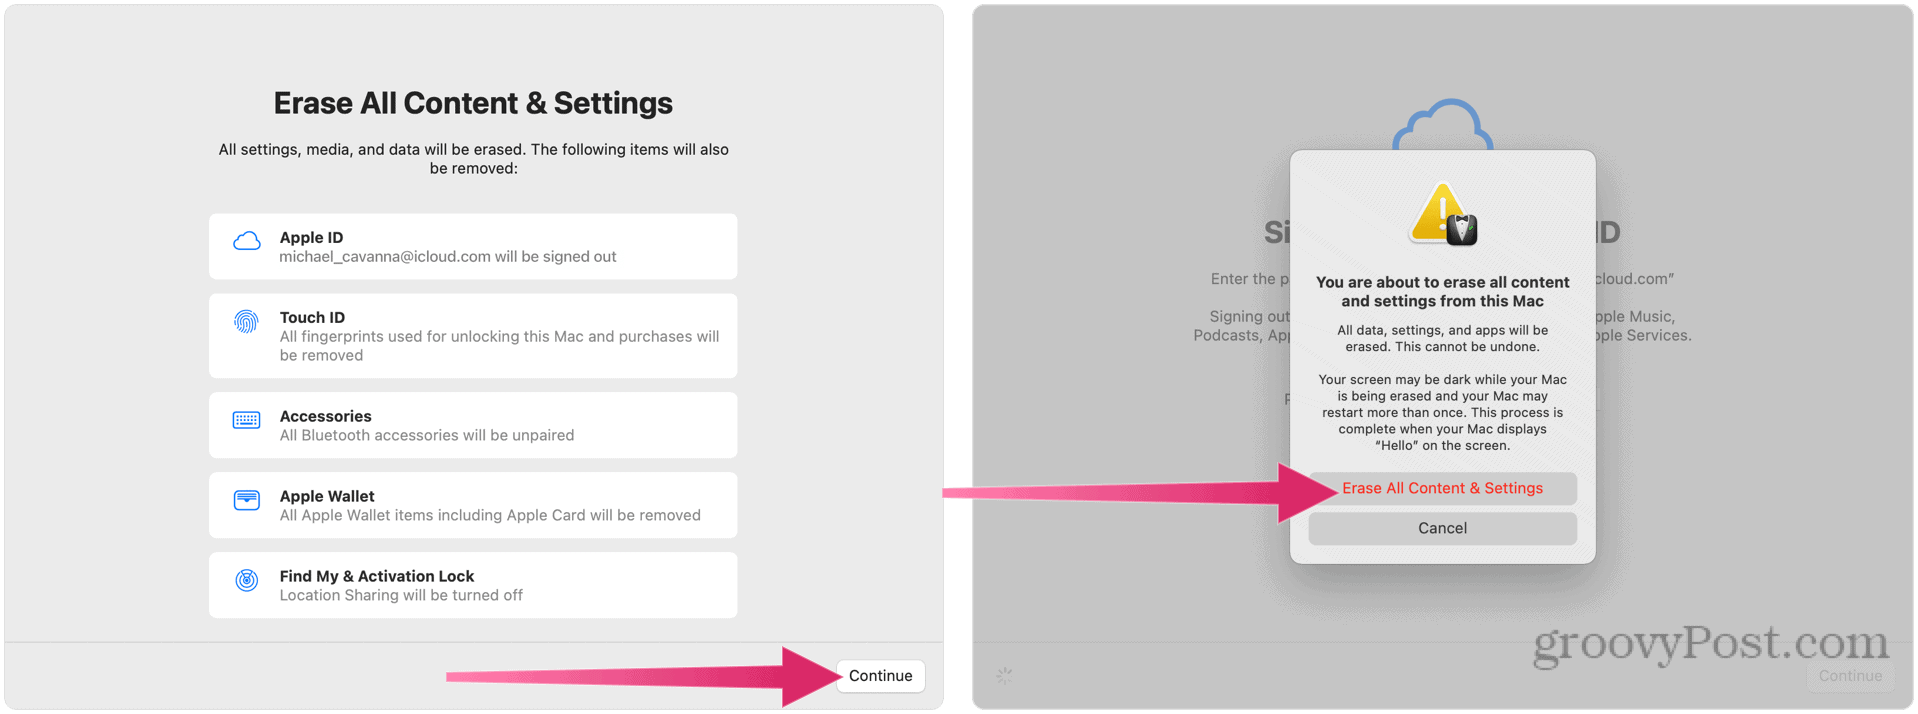
- Click on Continue to remove settings, media, data, and other items from the list.
- Log out of the Apple ID, if applicable.
- Click on Continue.
- Click on Clear all content and settings to continue. Let your Mac restart.
- If your bluetooth accessories (keyboard, mouse) stop working, turn them off and on again to reconnect if necessary.
- Once your Mac restarts, go back to connect to your Wi-Fi network, if required.
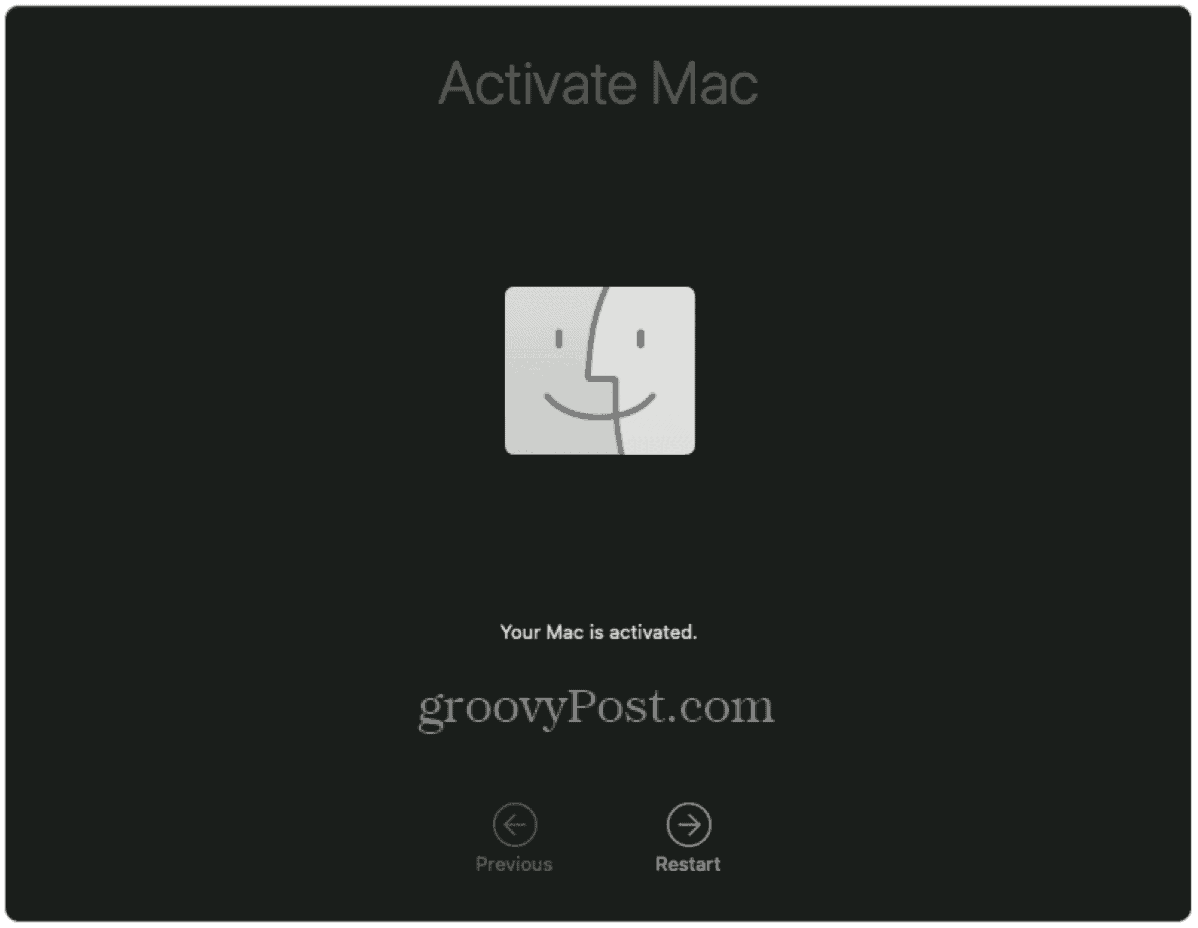
- Click on Restart.
- The macOS installation will start; Follow the instructions on the screen. If you have a Time Machine backup available, you can restore your content using this backup at this point.
Using macOS Monterey
If you decide to do a clean install of macOS Monterey, you can erase your device and start over. The steps to do this will vary, depending on your device. If your Mac has a T2 chip, use the erase all content and settings method, but if you’re not sure, you can always use the recovery tool again.
These steps have been written with Monterey in mind, but they should work for whatever version of macOS is released later. Don’t forget to try some of Monterey’s new features, like the AirPlay compatibility.


 a Screenshot on Mac")
