Your Windows 11 PC uses a graphics processing unit (or GPU) or a graphics card to display graphics. Sometimes it is necessary to know which GPU your PC uses, but it is not always obvious. Here’s how to check it.
The quickest way to see which graphics card your PC is using is to use the built-in Task Manager utility. To start Task Manager, right-click the right button of the mouse on the Start button and select “Task Manager” on the list.

When Task Manager opens, click on the “Performance“. If you have more than one GPU on your machine, each one will appear with names like “GPU 0” or “GPU 1” in the sidebar. Click on the one you want to find information.
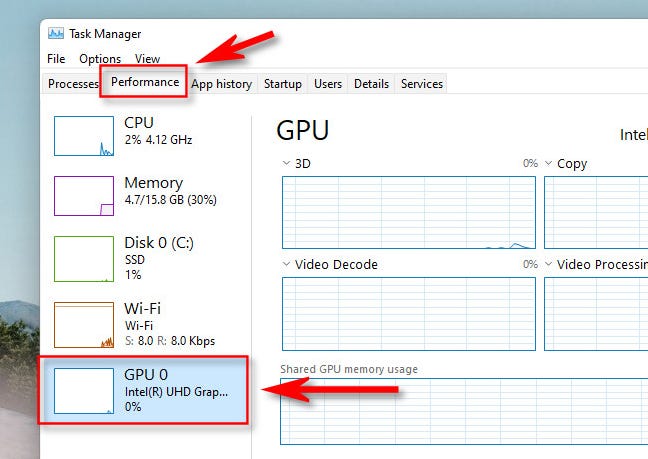
In the information panel for the GPU you selected, you can find the name of the GPU or graphics card in the upper right corner, just above the graphics. In this example, the GPU is “Intel (R) UHD Graphics 620”, but it will probably be different in your case.

In the same GPU task manager panel, you can also find information about how much memory your GPU has. You will find it in the lower left corner under “GPU memory“.

When you’re done, close the Task Manager. When you need to check again, just restart the Task Manager and check the tabs Performance> GPU.


