
This post shows students and new users the steps to install and use TeamViewer when using Windows 11 to provide or enable remote support and desktop sharing.
TeamViewer is cross-platform remote support software that is free for personal use. If you want to use it to provide remote support services for your business or for non-personal use, you must purchase a license to use it and comply with its license terms.
There are several remote support tools available to Windows users. Many of these tools are cross-platform, which means that they also work on other operating systems, such as MacOS, Linux, and a few others.
Not only can you provide remote support services, TeamViewer can also be used to connect to connect with contacts and teams through secure video conferencing and VoIP calls, instant chat, screen sharing and more on devices and platforms anywhere in the world.
To start installing TeamViewer on Windows 11, follow the steps below.
How to install and use TeamViewer in Windows 11
Installing TeamViewer on Windows is pretty straightforward. All you need to do is download the installation package, run it, and you’re done.
Click the link below to go to the TeamViewer download web page.
Download TeamViewer for Windows
Click the Download button – 64 bit only for Windows 11 systems.
Once downloaded, the TeamViewer_Setup_x64 The file should be saved in your Download folder. Go to the Downloads folder and double-click the file to begin installing.

During the installation, you will be asked to choose the installation types. Depending on your situation, you should choose one. In most cases, Default installation It will be OK.
However, if you need to access your computer remotely at any time without having to confirm a connection each time, then you will want to choose Unattended access option.
On the other hand, if you simply want to run TeamViewer without installing it, use the option Just run (one they use).
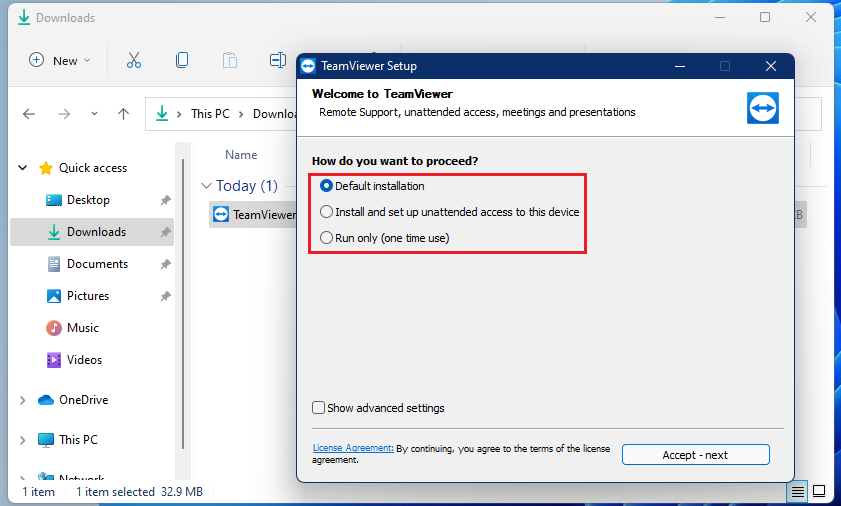
For this tutorial, we chose the default installation.
At the end of the installation, select how you would like to use TeamViewer. As mentioned above, if you are going to use it for commercial purposes, you will have to purchase a license to use it.
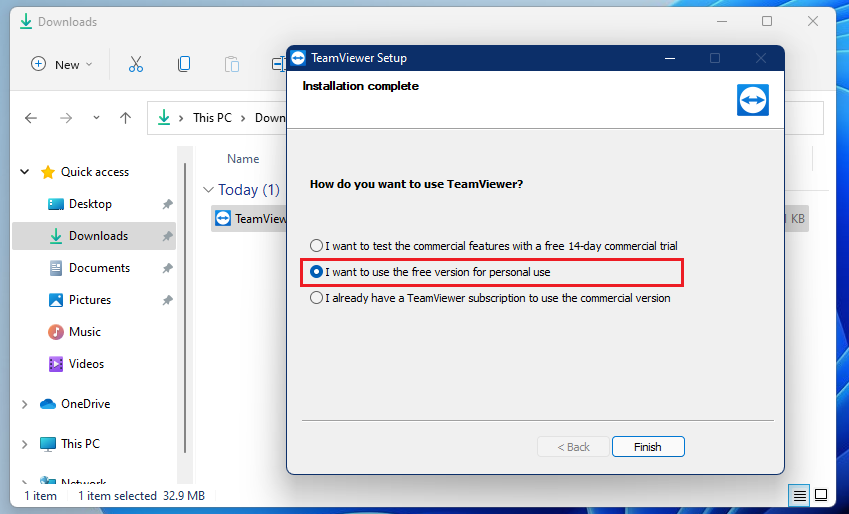
For this tutorial, we will use TeamViewer for personal use. Once selected, click Finish to complete the installation.
How to use TeamViewer in Windows 11
Now that TeamViewer is installed, a TeamViewer icon should be added to your desktop or in your application list. Open TeamViewer and start using it.
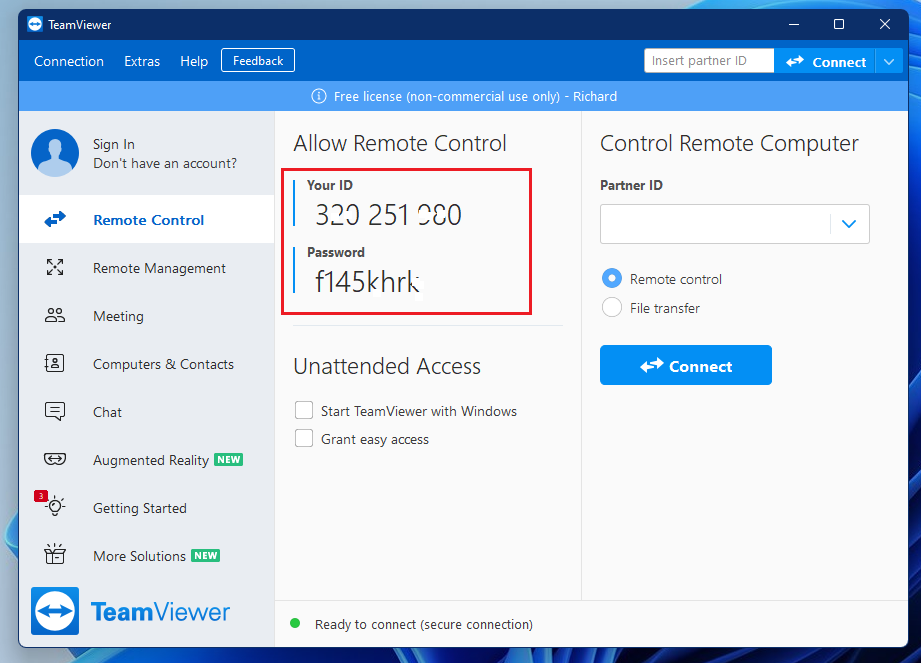
TeamViewer will provide you with an ID and password. To allow other TeamViewer users to access your computer, provide your ID and password. When they connect, you will also have to confirm and accept their connection to your computer.
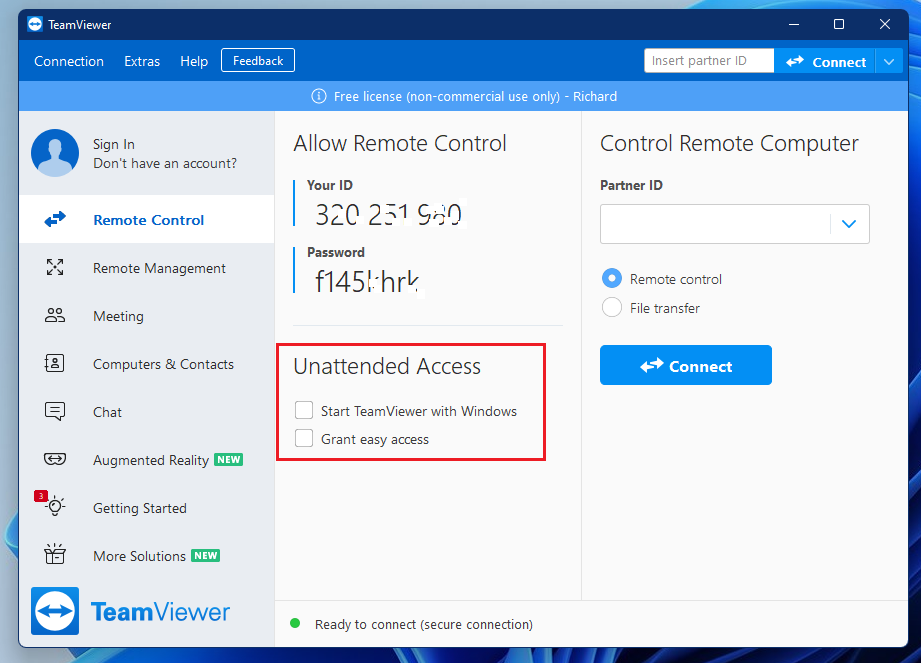
If your partner will be connecting frequently and probably won’t have time to always confirm and agree, please check the boxes below Unattended access and Start TeamViewer with windows and Grant easy access.
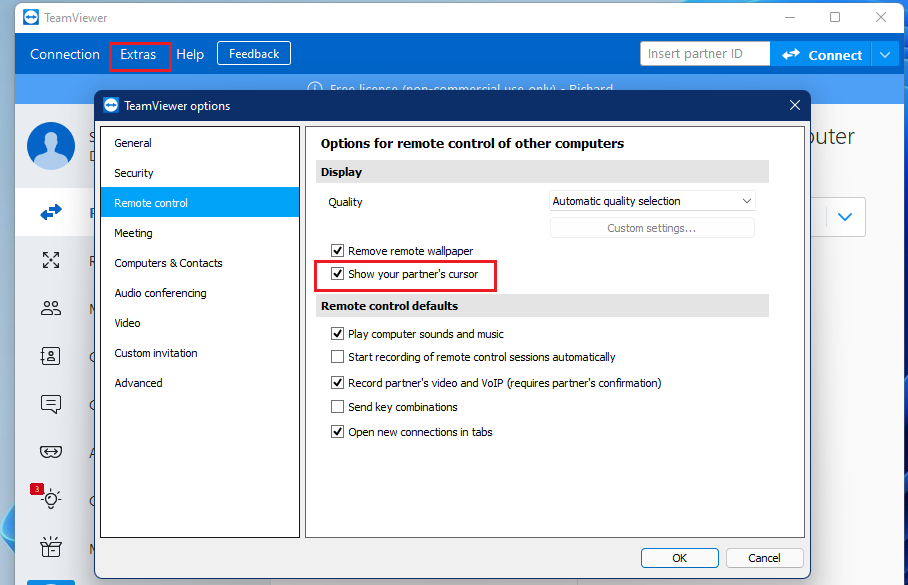
Finally, one last change you’ll want to make is to display your partner’s cursor while connected to your computer. Click on Extras ==> Options ==> Remote control. Then check the box to Show your partner’s cursor.
Save and go.
There are many more configuration options you can choose from depending on your environment. Review the settings and see what makes sense for you.
Conclusion:
In this tutorial we have seen how to install and use TeamViewer on Windows 11. If you find any errors above, use the comment form below to report.


