
This post shows students and new users how to schedule a task to automatically shut down the Windows 11 computer at a specific time. If you want your computer to shut down automatically at a certain time, Windows allows you to create a task and schedule it to shut down your computer.
In some environments, users forget to turn off their computer at the end of the day. Keeping your computer turned on allows you to receive important updates and patches from Microsoft. However, it also consumes a lot of power when a computer stays on for a long time.
You can have your computer receive updates, but also automatically shut down at a specific time so it doesn’t stay on all day using power that could be used elsewhere. The steps below will show you how to do it when using Windows 11.
The new Windows 11 comes packed with many new features with a new user desktop, including centered Start menu and taskbar, rounded corner windows, themes and colors that will make any Windows look and feel modern.
If you’re excited about Windows 11, keep reading posts about it.
To start programming Windows 11, follow the steps below:
How to automatically shut down your Windows 11 computer
As mentioned above, it is important to keep Windows 11 turned on to receive important updates. However, keeping your computer on forever may not be a good thing for your energy bills. You can program your computer to automatically shut down so no power is wasted.
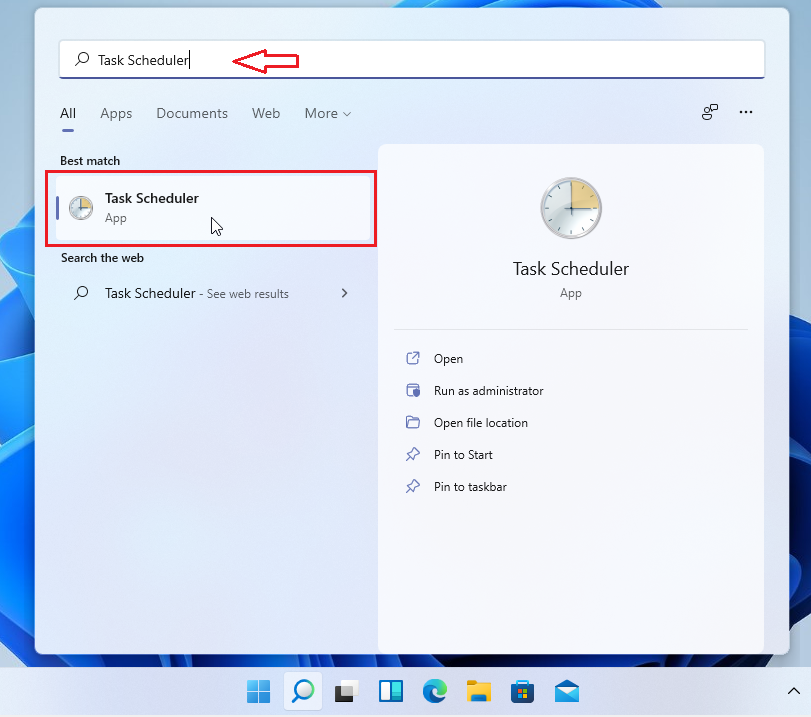
To do this, go to the Start menu, then find and select “Task scheduler”As shown in the image below.
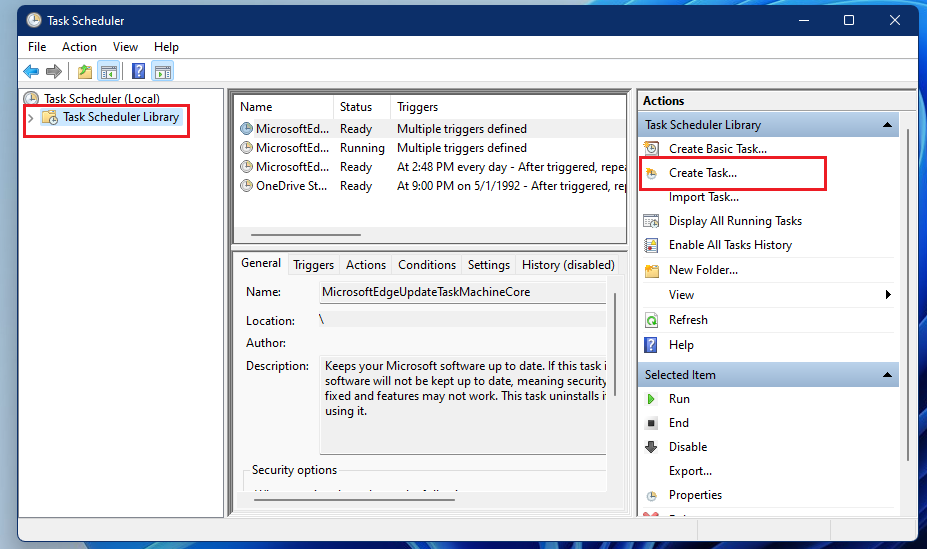
When Task Scheduler opens, click Task Scheduler Library and in the right pane, click Create task …. as highlighted below.
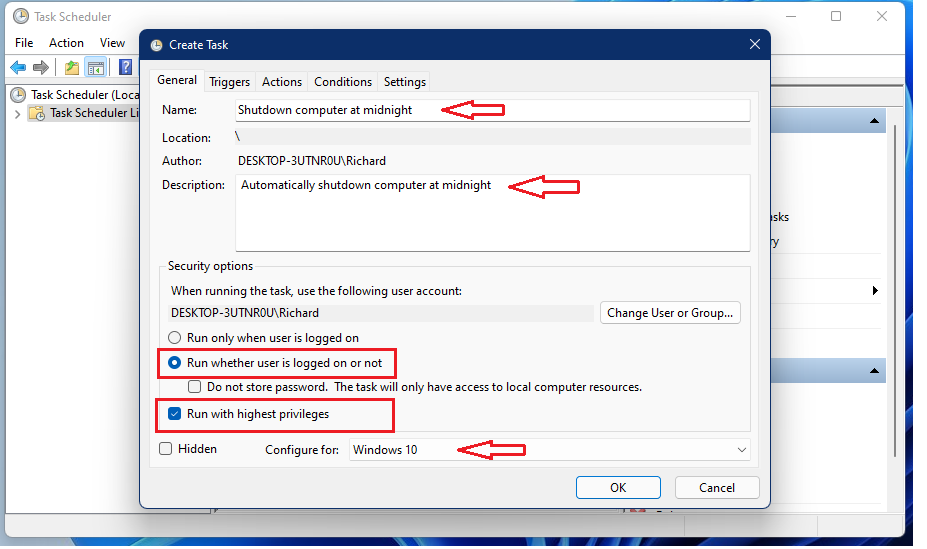
A new pop-up configuration panel should open. About him General tab, enter a name for the task, a description (optional), select “Run if user is logged in or not” and “Run with highest privileges“. All highlighted below.
Then select “Configure for: Windows 10 or Windows 11“
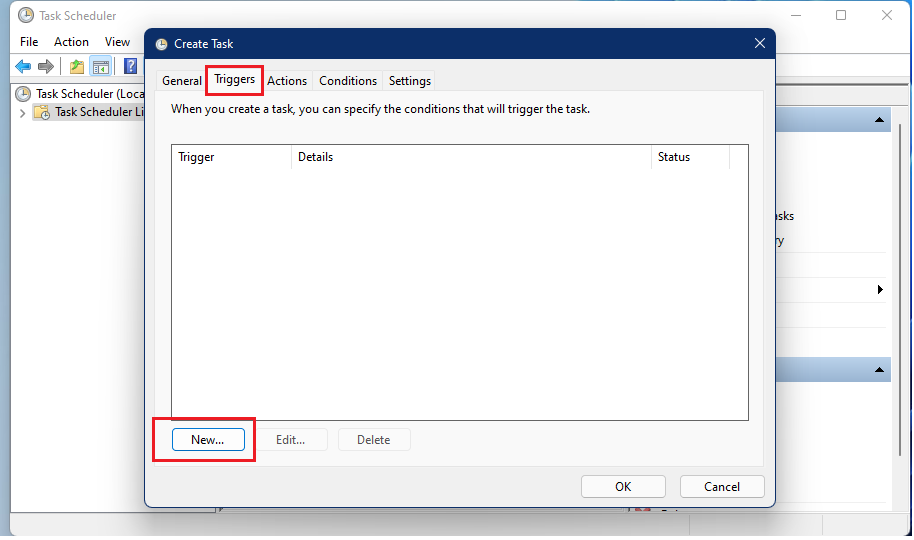
Then select the Triggers tab. Then click on the New… button.
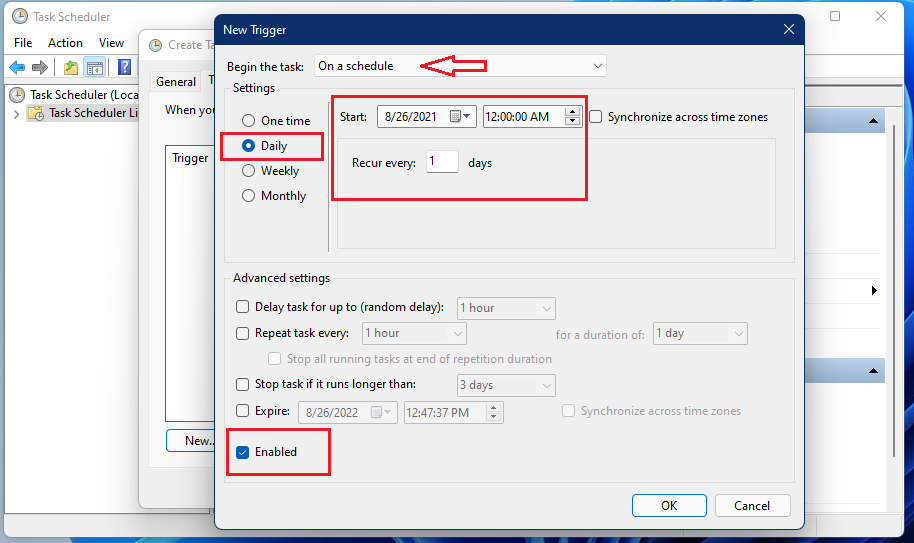
In the pop-up configuration panel, select the task to start “On a schedule“, Then choose”Daily“For the task to run. Choose the start date and time, and the task should be repeated every “1” days.
Also check the Activated box as the bottom to enable the task. Click OK to close the trigger settings.
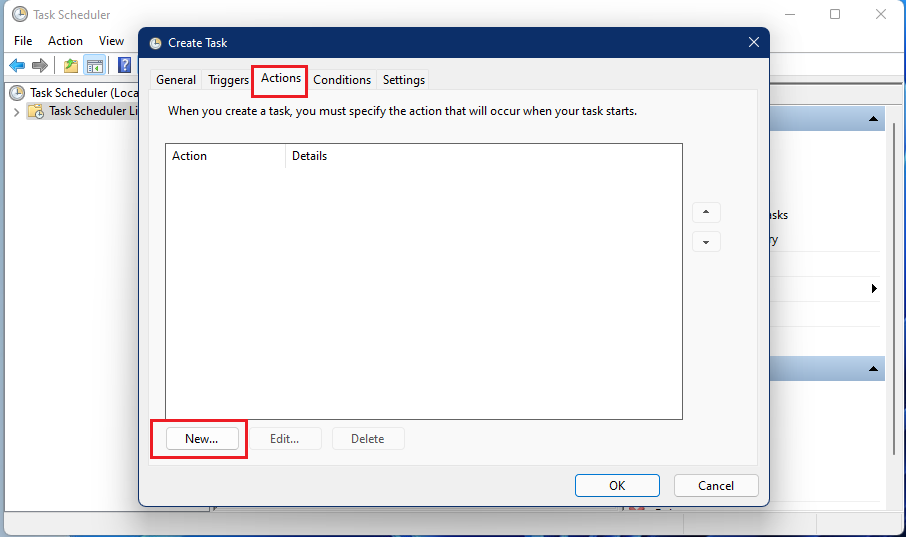
Then click on the Behaviour tab, and click the New… button.
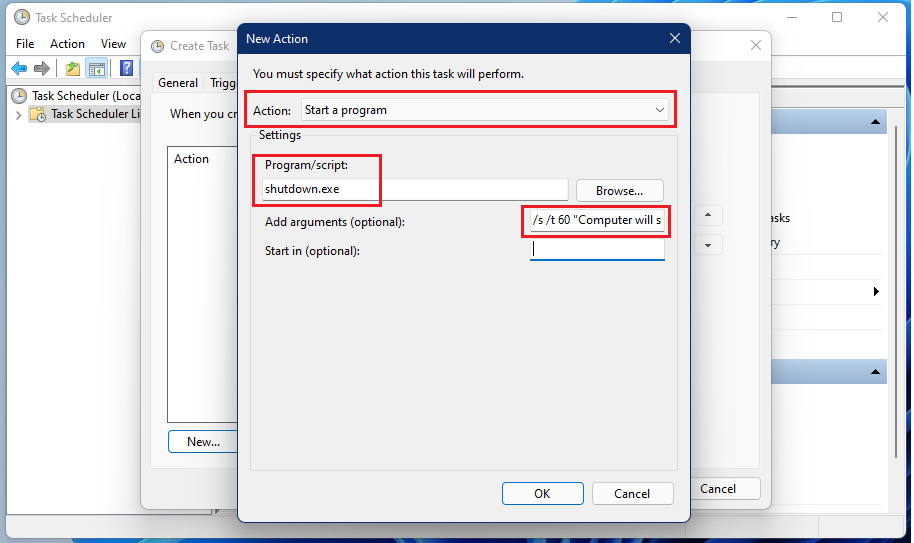
A new action pop-up configuration panel should appear. There, select “Start a program” for the action. In Program / Script: type shutdown.exe with arguments: / s / t 60 “The computer will shut down in 60 seconds”.
Program / script: shutdown.exe
Add arguments (optional): / s / t 60 “The computer will shut down in 60 seconds”
Click OK to save your settings.
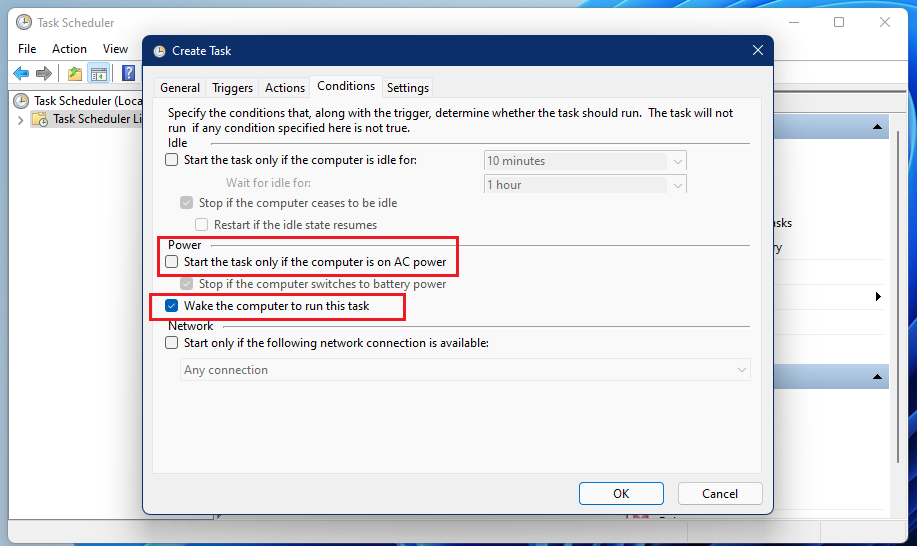
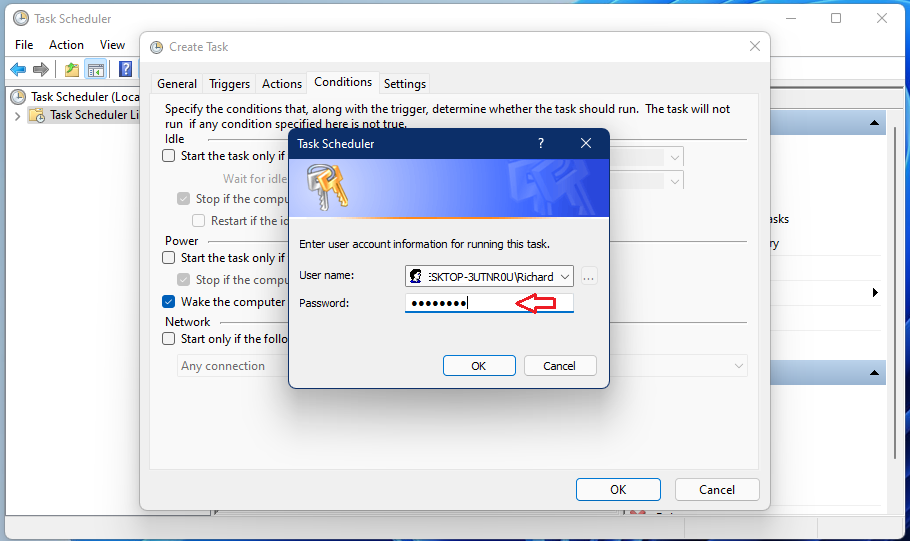
Then select the Conditions tab. Then uncheck the box that says “Start the task only if the computer has AC power“And check the box”Wake up your computer to run this task“. Click OK to exit.
When you click OK on the last screen, you will be prompted to enter your account password to save the task. Retype your password and click OK.
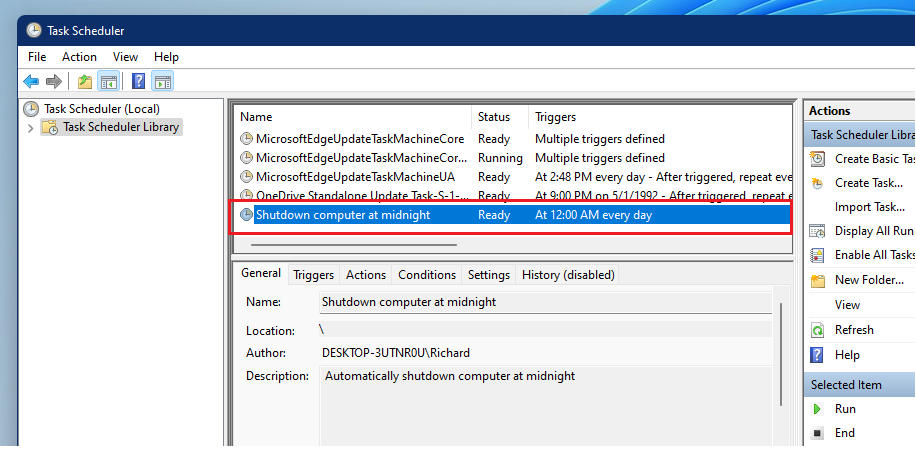
Once you are done, a new task should be created with the settings you created earlier.
That is all!
If you change your mind about shutting down your PC automatically, just log back into Task Scheduler and delete the task.
Conclusion:
In this tutorial we have seen how to schedule a task in Windows to automatically shut down the computer at a specific time. If you find any errors above, please use the comment form below to report.


