
Like Windows 10, Microsoft’s new Windows 11 will automatically update the operating system with cumulative and other updates in the background. It will then try to restart your PC at a time when you are not using it outside of Active Hours. But there may be times when a major after-hours emergency patch needs to be installed as soon as possible. Or maybe you like to stay on top of updates. Whatever the case, the following explains how to manually update your Windows 11 computer.
How to Manually Install Windows Updates 11
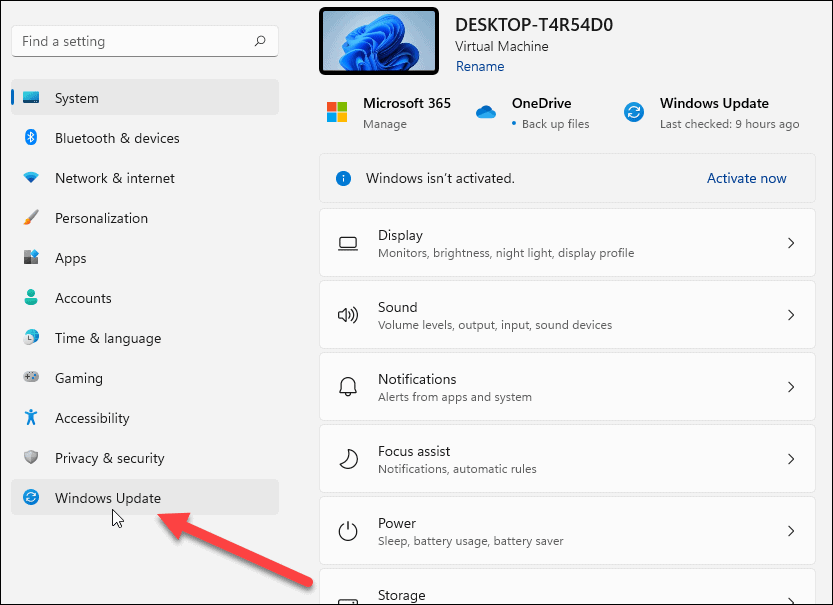
To check for and install updates manually, click the button Beginning and in the icon Setting. You can also use the keyboard shortcut Windows + I to directly open the Settings.

Once you have the Settings menu open, click Windows update in the sidebar on the left.
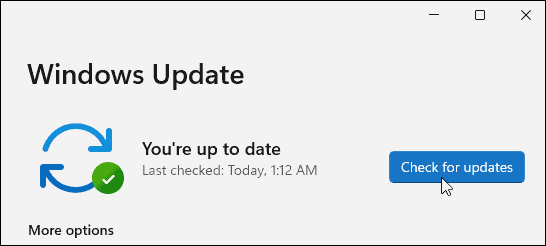
On the next screen, click the button Search for updates.
Note: If an update is ready to be installed, you should see it already in this list. Then you can click the button to download and install it without checking it first.
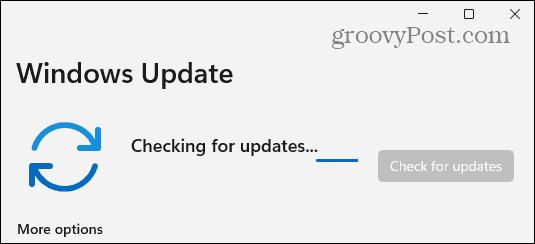
Now wait while Windows checks Microsoft’s servers for new updates.
If one is available, you will see the KB number of the update and you can click the button download now to install it. Then click the button Restart now if required. It should also be noted that the approximate time it will take for the reboot to complete the installation will be displayed.

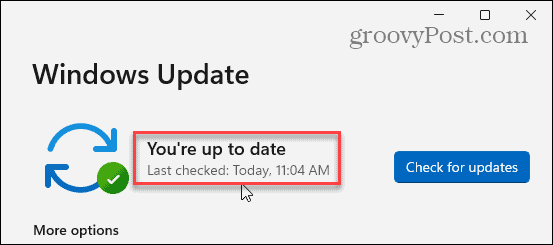
If nothing is available, it will show that your system is up to date. It will also show you the day and time the updates were last checked.
Finding and installing Windows Update is straightforward and essentially the same as Windows 10. It is also worth noting that if an update is available in Windows 11, you will see a small update icon in the lower right corner of the toolbar. chores. If you see it, you can click on it, and the settings will open to the Windows Update section.


