
A WordPress plugin conflict can crash your entire site or cause some functionality to behave incorrectly. But what is it, and how can you get a resolution of disputes when they arise?
Plugins are an essential component of the WordPress ecosystem. With plugins, you can make your WordPress sites function the way you want without writing any code.
The look and functionality of your WordPress site is highly dependent on the plugins and themes you install.
However, the disadvantage of using plugins is that they can conflict with each other. This is technically called a plugin conflict.
Conflicts come in three primary forms. The plugin may be conflicting with another installed plugin on your WordPress site. In other cases, this happens when the installed theme conflicts with the plugin. It could also be the result of a conflict between the plugin and the main WordPress files.
Whatever the reason, plugin conflict is always a frustrating experience. Depending on the severity of the conflict, you will experience specific symptoms or errors on your site. Common symptoms include unusual site behaviour due to the plugin not working as expected.
Or worse, you can experience a horrific white screen of death. That is, everything becomes empty, and the only thing you see is a white screen. You can also find it difficult – if not impossible – to access your site.
Understanding plugin conflict
Plugins are snippets of code added to the WordPress core to enhance its functionality. Therefore, if a plugin is written in such a way that it doesn’t match your WordPress version, a conflict is inevitable.
This conflict can also result from the plugin developer, not following proper coding standards for WordPress.
In some cases, the problem may not be coming from the plugin. A feature in an installed theme may override a similar feature in a plugin.
Outdated or recently updated plugins are also notorious for causing conflicts.
And finally, the version of WordPress you are using could also be the culprit. Many webmasters report seeing error messages after updating their version of WordPress.
Let’s look at some of the diagnostic symptoms.
Plugin conflict symptoms
Here are general symptoms that can help you recognize conflicts with your plugins (note, however, that other issues may cause some of these outsides of the plugin conflict).
Symptom 1: you just installed a plugin, and suddenly your site stops functioning as it used to. Maybe the registration form no longer pops up, or the menu doesn’t open. This indicates a plugin or theme conflict.
Symptom 2: After updating the plugin, some elements of your site break. Let’s say your navigation menu becomes wobbly or even disappears altogether. This is also proof that conflicting plugins exist.
Symptom 3: Your site starts to slow down after doing a batch plugin update. That is, after all your plugins are automatically updated, everything goes awry.
Symptom 4: This is the worst thing – the white screen of death. That is, everything becomes empty, and all you see is a white screen. Even worse, you don’t have access to your WordPress admin panel.
How to fix wordpress plugin conflicts?
Once you’ve verified that your WordPress site is experiencing a plugin conflict, the next step is to take corrective action to fix the issue.
Here are the steps you can take to troubleshoot the issue.
Step 1: Clear your browser cache
As simple as it sounds, clearing your browser cache can help fix this problem. The reason is that after updating the plugin, the codes from the outdated plugin must be removed from the browser cache.
To clear your browser cache, hold down Shift + Ctrl + Delete (PC), all at once. For Mac, press the Option + the Command + E . then click clear data or empty respectively.
If the issue persists after clearing the cache, go to Step 2.
Step 2: Consider creating a staging site.
The steps I’m going to show you will require you to make drastic changes to your site. It’s not a good idea to implement them on a live site.
On a staging site, any changes you make will not be reflected on your live site until you commit the changes.
Of course, a staging site will only make sense if you can still access your site.
After creating the staging environment, proceed to the next step.
Step 3: Switch to the default WordPress theme
As we mentioned earlier, the theme can sometimes be the culprit. The only way to find out is to switch to a different topic that you can trust. And the most reliable themes are the default theme that comes with WordPress.
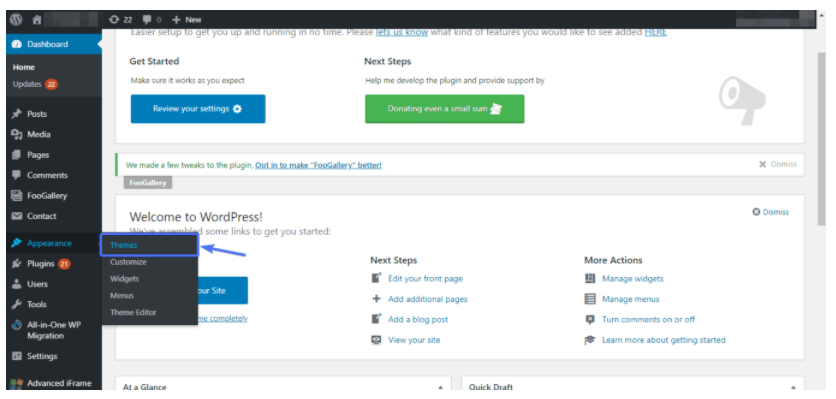
To do this, simply login to your WordPress dashboard and then go to Appearance >> Themes.
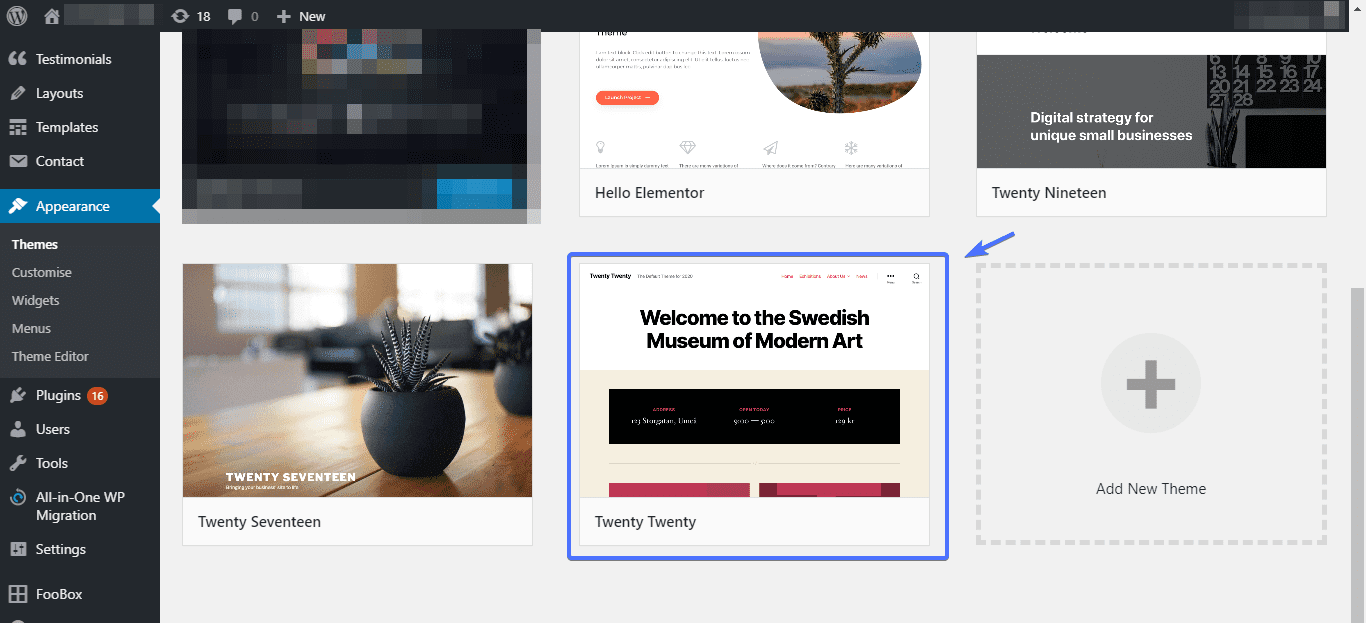
In the theme directory, find the Twenty Twenty theme. If you don’t see her, check out Twenty Nineteen or Twenty Seventeen.
Activate the theme and check your site.
If the problem goes away, obviously the problem originated from the topic.
At this point, you have a choice: replace the problematic theme, or sort the list of active plugins to find what conflicts with the theme. If the latter is your preferred choice, skip to step 4.
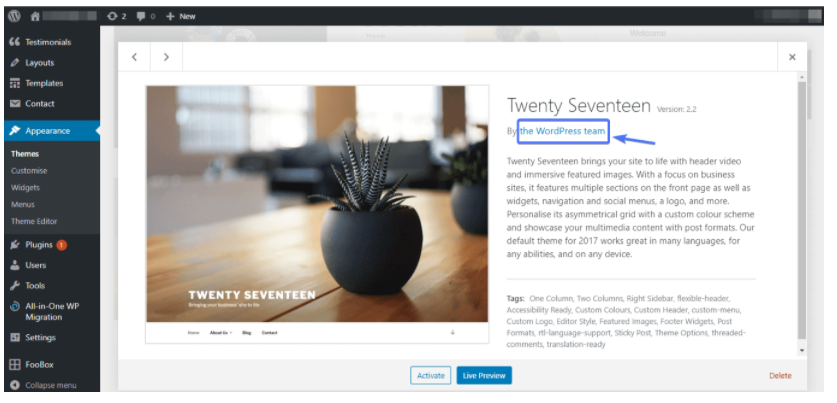
Another thing you can do is hand the complicated topic over to its developer. To contact the theme developer, first click on the theme’s thumbnail. You will see the theme developer URL.
If you find that the issue is not from the topic, proceed to the next step.
Step 4: Disable plugins.
Deactivating all your plugins will help you isolate the plugin that is causing the conflict.
Luckily, you don’t have to deactivate plugins one by one. WordPress has a method that allows you to disable plugins all at the same time.
First, go to Plugins >> Installed Plugins. Then click on the plugin checkbox, as shown below:
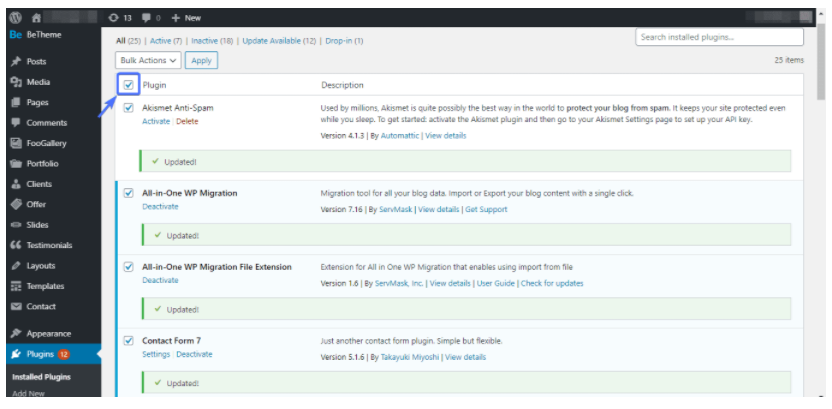
This will cause all plugins to be selected. Now, to deactivate them, select “deactivate” from the drop-down list of the bulk action.
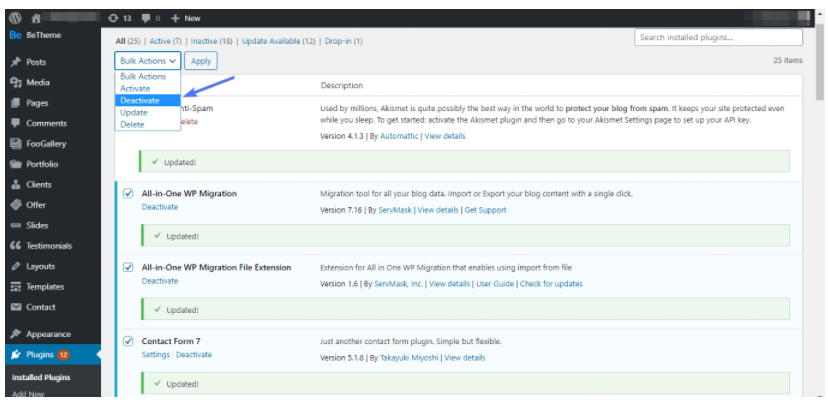
Then click the “apply” button next to it. After pressing the button, all activated plugins will be deactivated.
Note: if you want to exempt a plugin from deactivation, uncheck it by clicking on the checkbox next to it. This is not recommended, however, because the plugin that you are cancelling could be problematic.
After deactivating the plugins, the problem should go away. The next step is to find the exact plugin causing the conflict.
Step 5: Reactivating plugins
To find the faulty plugin (s), we must activate all plugins one at a time.
After each activation, reload the site to see if the problem occurs. The plugin that was activated before is the culprit.
If it is a plugin-plugin conflict, then your problem may be caused by more than one plugin. If a plugin you have already found is too essential for your site, you may find a plugin conflicting with it. To do this, leave this plugin enabled and disable all others.
First, if it’s a plugin-plugin conflict, you shouldn’t see the error anymore. Now start activating plugins. It was activated just before seeing the error conflicts with the previously identified one. Now you can decide what to work on.
Once the plugin is caught, there are three things you could do.
Rollback the plugin to an older version. Don’t worry. You don’t need to be a developer to do this. The WP Roll plugin can help you do this.
Check the plugin support forums. Chances are there if anyone else has encountered a similar problem. And if so, then there must be a solution to this problem.
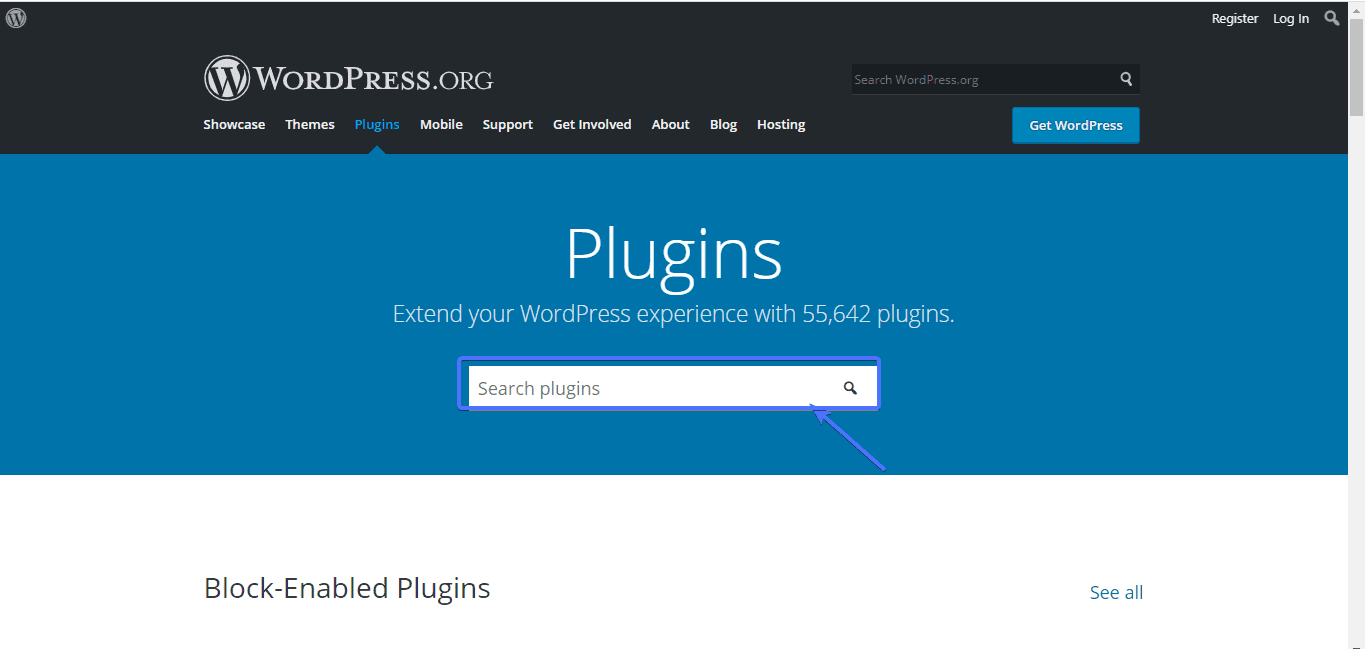
An excellent forum to start with is the official WordPress support forum https://wordpress.org/support/forums/. You can always report a plugin conflict there. If you would like to visit a forum specific to a particular plugin, visit the WordPress Plugin Repository https://wordpress.org/plugins/. Then find the plugin.
Then scroll down a bit and click the View Support Forum button.
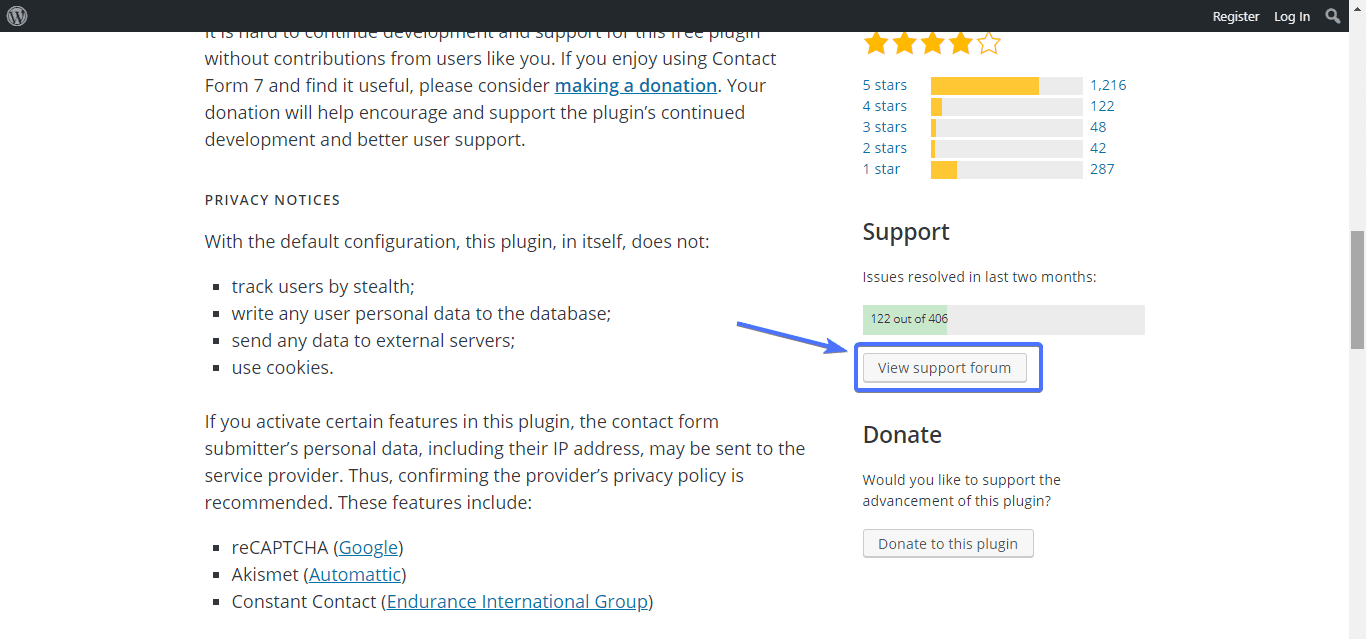
You will be taken to a forum specially created for questions related to this plugin. You can also find a solution by doing a quick Google search. Just enter the plugin name plus “conflict”.
Remove the Plugins causing the conflict. You can always find replacements in the WordPress plugin repository. This is the best alternative. You probably don’t want to compromise the integrity of your site in the future.
Using plugins to diagnose plugin conflict
You might be wondering already if there is a plugin that can do the job? Well, you’re in luck – there are a couple that will come in handy.
Health Check & Troubleshooting
The way this plugin works is basically to deactivate all plugins. He then goes even further by switching to the default WordPress theme.
When all plugins are deactivated, and the default theme is switched, it becomes easy to isolate the conflicting plugin.
Usually, when you uninstall a plugin, it will be removed from your entire site. But what if you want to deactivate an outdated plugin from a page or post, not the whole site? This is where the Plugin Organizer comes in handy.
What if you don’t have access to your site’s admin panel?
So far, the solution we discussed requires you to access the backend of your site. What if a plugin conflict causes you to lose access to your site’s dashboard?
This usually happens when you experience the white screen of death – everything dies, including the login page of your site.
Thus, you won’t be able to disable plugins as usual.
Fortunately, there is a solution to this problem. Using FTP (File Transfer Protocol), you can access your website files.
After the connection between your website and FTP is established, proceed to the next step.
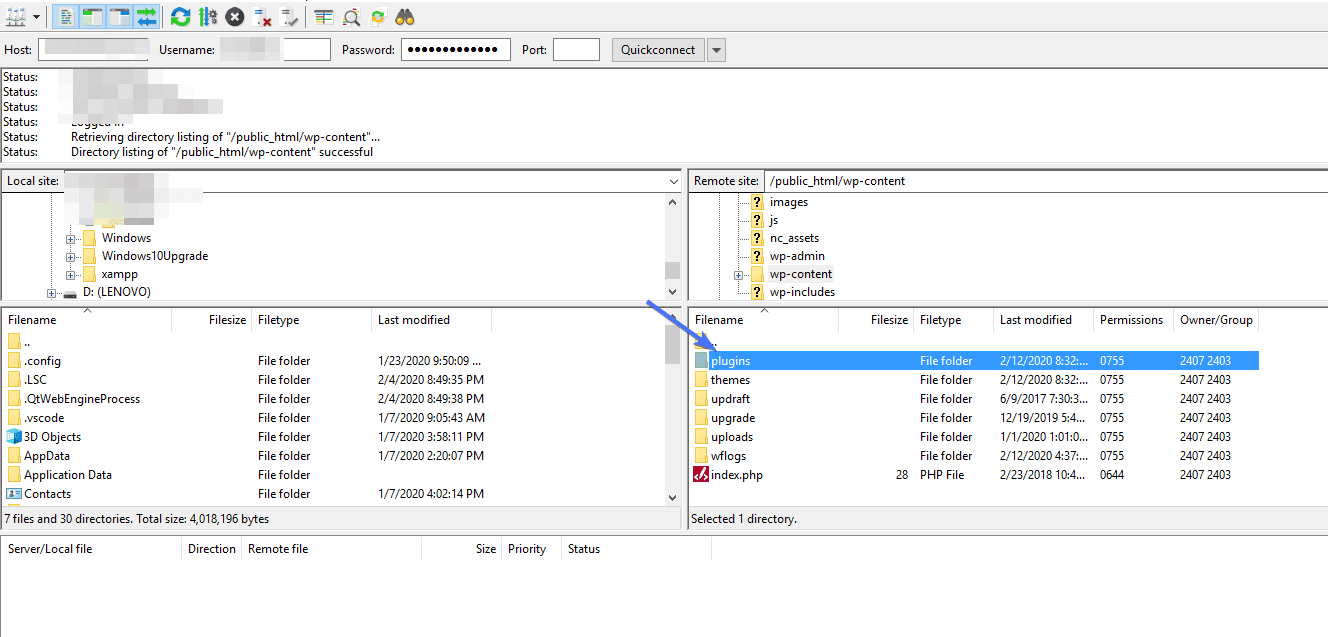
Find the Plugins folder.
Once connected, open the public_html folder (or any other folder that contains your WP website, for example, sometimes called www) and then open the wp-content folder.
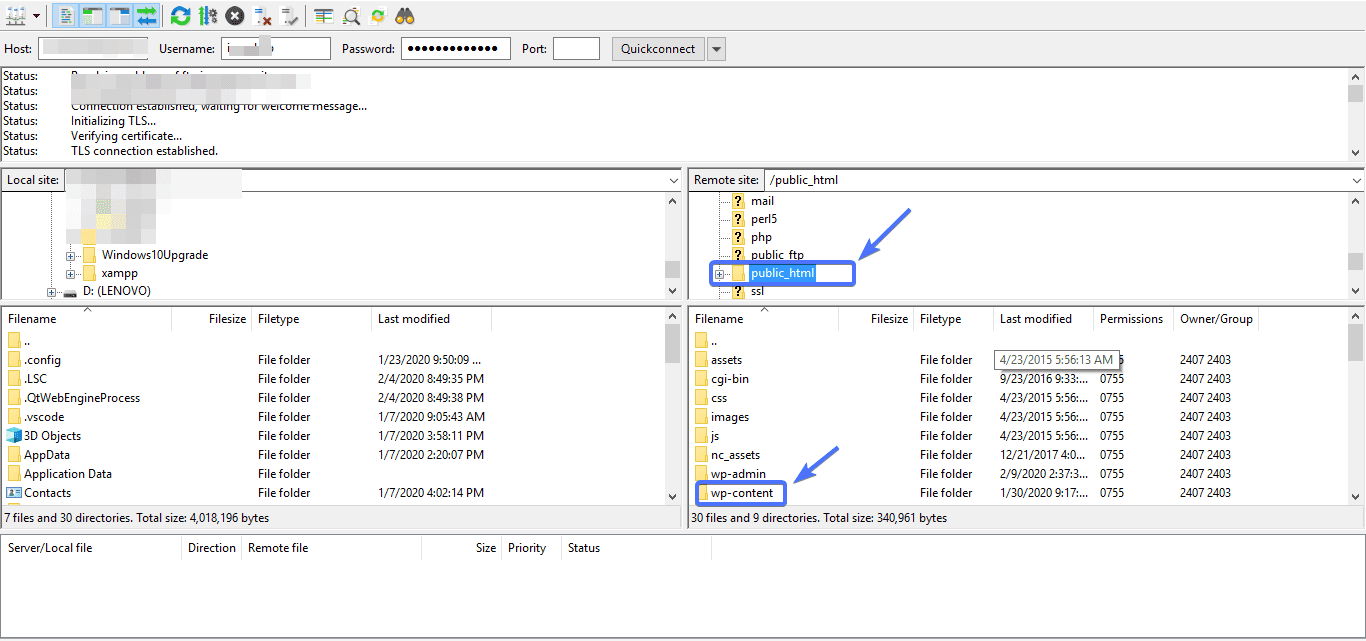
You will see the plugins folder.
To disable all plugins at once, you will have to rename the plugins folder to something like inactive-plugins. You can also try the same with the themes folder after you’re done with plugins.
How to change the name?
Right-click the folder and select Rename.
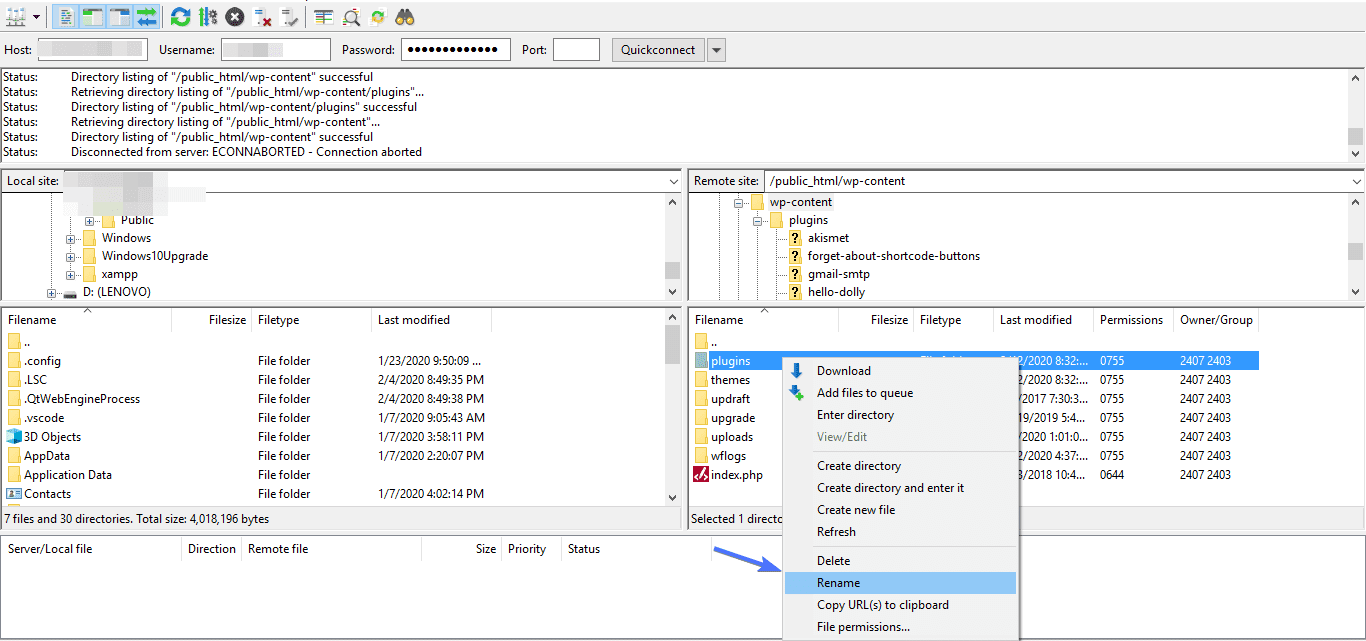
Enter the changed name.
What if you want to disable a specific plugin?
Instead of renaming the plugins folder, double-click it and then select the plugins folder you want to disable. Now rename it. This will cause the plugin to be disabled.
If plugins were the source of the conflict, you should now have access to your dashboard. You can go in there and activate the plugins one by one until you find the culprit.
With all the corrective measures we’ve shown you so far, your site should be up and running. If it is not, then the problem may be from your server. Your best bet is to contact your WordPress hosting provider. They should help you solve the problem.
How to avoid plugin conflicts?
Prevention is always better than cure. Wouldn’t it be great if you could avoid WordPress plugin conflicts? Here are some preventive measures you can take
Avoid running outdated plugins.
Outdated plugins are a significant risk for your site. Avoid them as much as possible.
Also, when looking for a new plugin to install, make sure it’s up to date and still supported.
You should see a warning that the plugin is out of date. For example
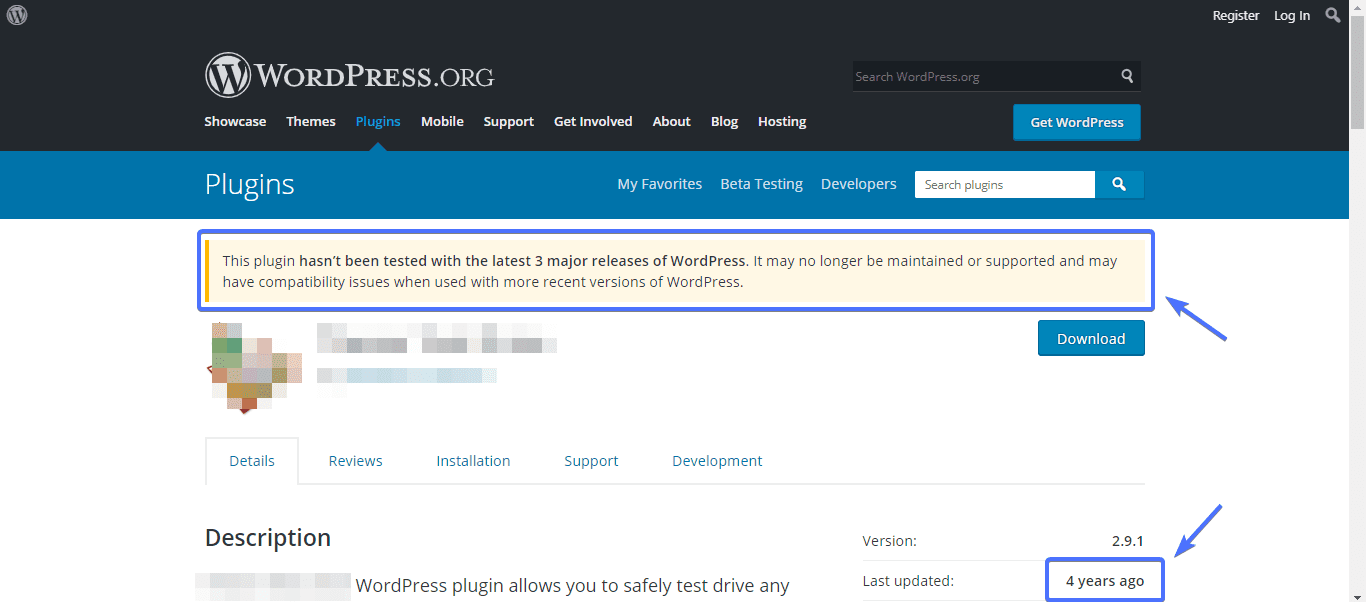
Less is always more.
Typically, in WordPress, you minimize the number of plugins you install on your site. This way, you reduce the chances of problems occurring. Use only those plugins that you need.
Avoid batch plugin updates.
You should avoid updating your plugins at the same time. If something goes wrong, it will be difficult for you to spot the problematic plugin.


