
Depending on the type of Word document you are creating, there may be more to creating a list than, well, creating a list. Maybe you want to use custom bullets to give it a little pizzazz, or maybe you want to define the style of your list from the beginning.
Another change you may want to make when using a list in Microsoft Word is to adjust the indentation of bullets or numbers. For example, you can adjust the indentation distance of the points from the left margin or modify the distance between the text and the bullets.
Next, we will show you how to change indents in Word for a full list and for a single item.
How to indent an entire list
Whether you have your entire list or are still adding items to it, you can change the indentation at any time. You can adjust the indentation for both bulleted and numbered lists.
To adjust list indents in Word:
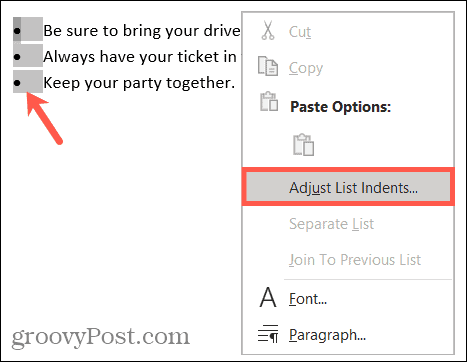
- Select bullets or numbers from the list. You can do that by clicking on any of them, which highlights them all.
- Right-click and select Adjust list indents in the context menu.
- When the small window appears, you can make changes to any or all of the following indent settings in the list:
- Bullet position: Enter a number or use the side arrows to determine how far from the left margin the bullet or list number will be (in inches).
- Indenting the text: Enter a number or use the side arrows to select the distance (in centimeters) from the bullet or the number at which the text should appear.
- Follow the number with: This is what appears between the bullet or the number and the text. By default, it is a tab character, but you can choose Space or None.
- Add tab stop: If you want to add a tab stop, check the box and enter the measurement (in centimeters).
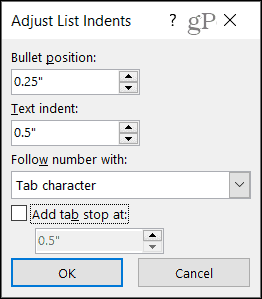
- After making changes, click To accept.
You should see your list immediately updated with your settings.
How to change the indentation of a single list item
If you only want to change the indentation of one item in the list instead of the entire list, you have several ways to do it.
To change the indentation of a list item in Word:
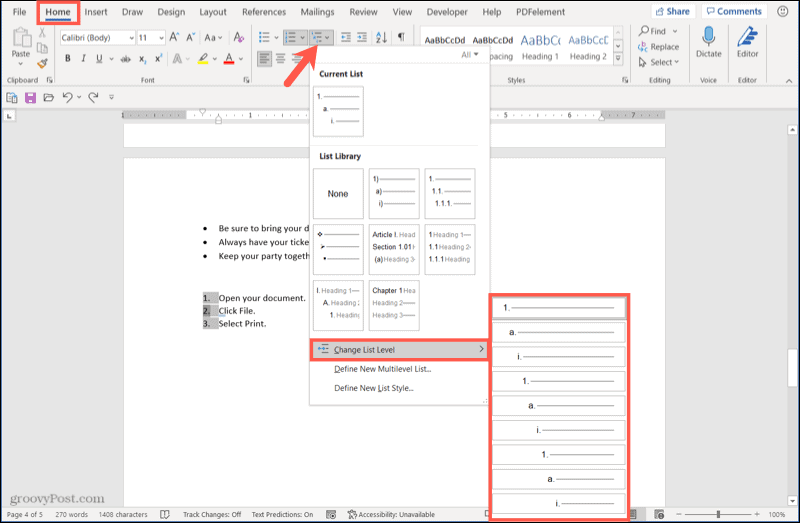
- Place the cursor next to the text of the list item.
- Go to the tab Beginning and click the arrow next to Multi-level list.
- Go to Change list level and choose the level you want to use. Each group provides a different bullet or number.
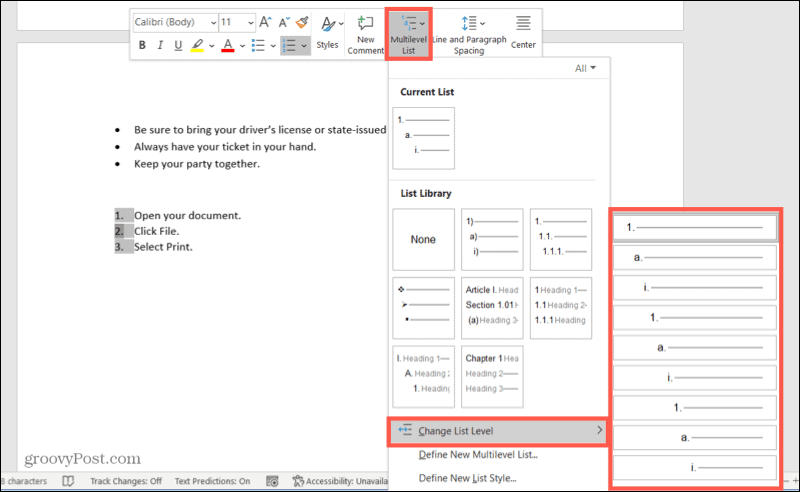
- Alternatively, right-click and select Multi-level list on the floating toolbar.
- Go to Change list level and choose the level you want to use. Again, you will see a different bullet or number for each level.
- Press the key Tab for the number of times you want to indent the list item. With each press of the key, the item moves one level in the list and sees a different bullet or number.

Change list indents in Word
By changing the indents of the lists in your Word document, you are giving yourself additional ways to format your text. You may want to move your list further into the left margin, add more space between bullets and text, or use a different level for a list item. You can quickly make all of these changes to your Word document by following the steps outlined above.


