 in Microsoft Word")
If the use of the tabulation To jump to various areas of a line is practical, you may want to customize the tab stops in Microsoft Word.
You can set the default, add more tab stops, align them to your liking, and even include a heading line. To set the tabs in Word, this is what you have to do.
Work with tabs in Word
To use and configure the tabs, you will have to go to a specific area of Microsoft Word.
First, open Microsoft Word and select the tab Beginning. Then click on the arrow icon located at the bottom right of the Paragraph section of the ribbon to open the Settings Paragraph.
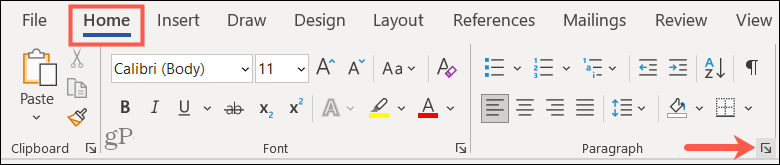
In the Paragraph pop-up window, click Tabs In the bottom left.

If you’re using Word on Mac, click Format> Tabs in the menu bar.

Once you open the tabs settings menu, you will be able to make your adjustments.

Change the default tab
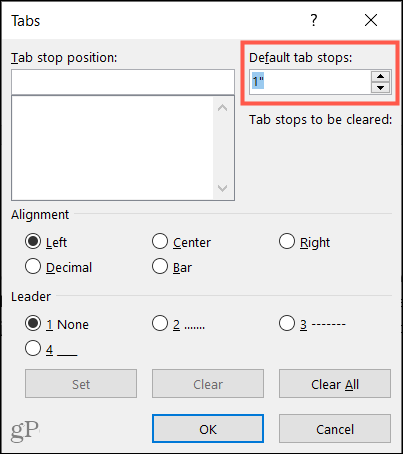
By default, Word sets each tab stop to 1.25 cm. Thus, each time you press the Tab key, you will jump forward that distance. However, if you prefer shorter or larger stops, you can change this.
Enter a measurement in the upper right section of the tab window, or use the arrows to set the value of Default tabs (In centimetres). Click on To accept to save your choice.
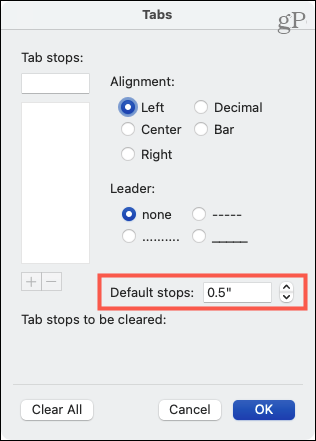
On Mac, you will see the section Default tabs lower right.
Set additional tabs
If you prefer to leave the default tab stops as is, you can configure additional tab stops to suit your needs.
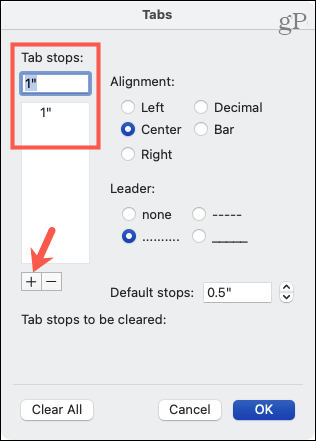
Enter a measure in the box Position on the tab at the top of the window. You can then choose the Alignment and a Filling If you wish. Alignment options include left, center, right, decimal and bar. Guide options include a dotted line, a dashed line or a underlined.
Click on Establish. You can then configure more tab stops at the same time if you want. When you’re done, click To accept.

On Mac, enter the measurement in the box Tabulation from the tab at the top, choose the Alignment and Fill, and click the plus. You can then add more or click To accept to end.
Clear tabs in Word
After creating the tab stops, you may decide that you don’t need one or two of them.
Select the tab in the list on the left and click Remove. You will see that the one you want to delete is below Tabs you want to delete. If correct, click To accept.
![]()
![]()
On Mac, select Tab from the list and click the minus. Confirm your selection and click To accept.
![]()
![]()
To remove all tab caps on both Windows and Mac, click Delete all and then in To accept.
![]()
![]()
Use tabs in Word however you want
You don’t have to feel stuck with Microsoft Word’s default tab. Not only can you change that default, but you can also set tab stops in Word to suit your own needs.


